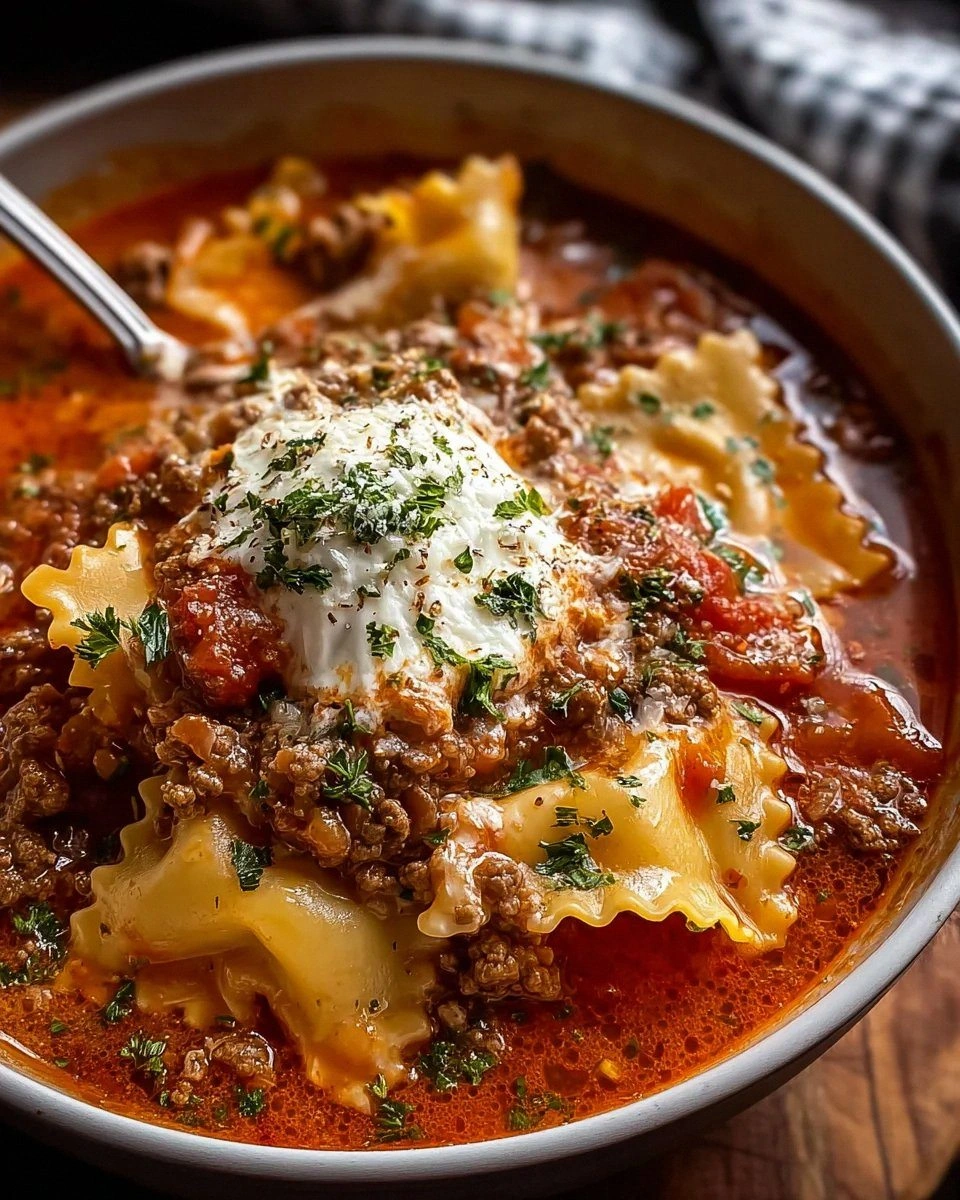
I was standing in my kitchen, the oven timer blinking 5:00, when the entire house erupted into a chorus of “who’s that?” The culprit? My friend’s battered, half‑eaten drumsticks that had somehow found their way into my fridge. I stared at the limp, greasy relics, thinking, “What if I could turn this culinary catastrophe into something that actually tastes like a dessert?” That question became the spark that ignited the Drumstick Ice Cream Cake, a dish that marries the nostalgic crunch of a drumstick with the indulgent creaminess of a frozen treat.
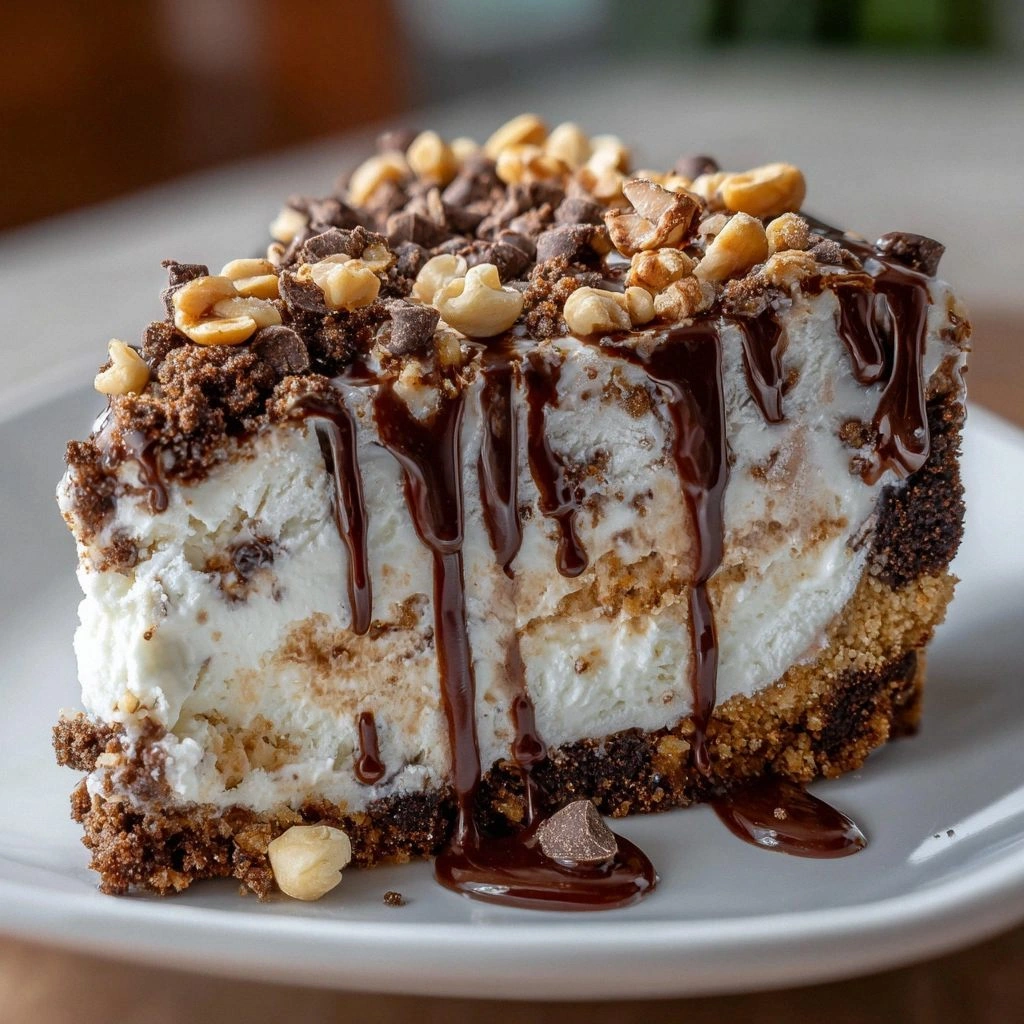
The moment you slice into the cake, the air fills with a sweet, chocolatey perfume, like a bakery that’s been open all night. Your fingers feel the cool, slightly sticky surface of the ice cream, the contrast between the warm, buttery cookie crust and the icy interior. The first bite is a symphony of textures: the crisp cookie shell shatters like thin ice, the creamy vanilla layer melts in your mouth, and the chocolate sauce drips like molten velvet over the edges. It’s a sensory rollercoaster that starts with a crunch and ends in a silky, sweet aftertaste that lingers like a fond memory.
What makes this version stand out from the countless “drumstick cake” recipes you’ll find online is the meticulous balance of flavors and the attention to detail that turns a simple idea into an unforgettable dessert. I’ve perfected the ratio of ice cream to chocolate sauce so that each bite is saturated with richness without feeling heavy. The cookie crust isn’t just a base; it’s a flavor foundation that carries the chocolate notes and offers a satisfying crunch. The icing is light, airy, and dusted with powdered sugar to give it that classic cake finish. Every element is thoughtfully placed to create a cohesive, decadent experience.
And the kicker? I’ve discovered a technique that eliminates the dreaded “melting mess” that usually plagues ice‑cream cakes. Instead of waiting for the cake to freeze solid, I layer the ice cream in a shallow pan, freeze it briefly, then add the next layer. This “freeze‑then‑layer” method keeps each layer distinct and prevents the flavors from blending into a soggy mishmash. Ready to see how this works? Let me walk you through every single step — by the end, you’ll wonder how you ever made it any other way.
What Makes This Version Stand Out
- Flavor: The dual‑ice‑cream base creates a layered taste that alternates between sweet vanilla and rich chocolate, providing a dynamic flavor profile that’s impossible to find in standard cakes.
- Texture: The cookie crust offers a buttery crunch that contrasts with the smooth, velvety ice cream, delivering a multi‑sensory experience in every bite.
- Visual Appeal: The glossy chocolate drizzle and dusting of powdered sugar give the cake a professional, show‑stopper finish that looks as good as it tastes.
- Ease of Assembly: The “freeze‑then‑layer” technique simplifies the process, making it accessible to both beginners and seasoned bakers alike.
- Make‑Ahead Friendly: Once assembled, the cake can be frozen for up to a week, allowing you to prepare ahead for parties or last‑minute dessert needs.
- Ingredient Quality: Using high‑quality chocolate and premium ice cream elevates the overall taste, ensuring each component shines.
- Crowd Reaction: Guests will be amazed by the surprising combination of a “drumstick” and a cake, making it a conversation starter at any gathering.
- Versatility: The base recipe can be adapted with different ice cream flavors, cookie types, or sauces, allowing endless creativity.
Alright, let's break down exactly what goes into this masterpiece…
Inside the Ingredient List
The Flavor Base
The chocolate sandwich cookies are the backbone of this cake. Their buttery, slightly sweet profile sets the stage for the ice cream layers. If you can’t find chocolate sandwich cookies, a good substitute is a mix of chocolate wafer crumbs and crushed chocolate biscuits. The key is to keep the crumb size uniform so the crust layers evenly.
The Texture Crew
Heavy cream and powdered sugar work together to create the silky whipped topping. The cream’s fat content gives the topping a luxurious mouthfeel, while the sugar balances the richness. Skipping the powdered sugar will result in a flatter, less airy topping that won’t hold its shape. For a dairy‑free version, coconut cream can replace heavy cream, but the texture will shift slightly toward a denser consistency.
The Unexpected Star
Crushed nuts, usually almonds or pecans, add an unexpected crunch that echoes the cookie crust’s texture. They also introduce a subtle nutty undertone that complements the chocolate and vanilla layers. If you’re allergic or simply don’t like nuts, you can replace them with mini chocolate chips or omit them entirely; the cake will still shine.
The Final Flourish
Chocolate sauce is the crowning glory that ties everything together. It’s not just a glaze; it’s a flavor enhancer that adds depth and a glossy sheen. A homemade sauce made from dark chocolate, butter, and a splash of milk yields a richer taste than store‑bought. If you prefer a lighter finish, a drizzle of caramel or a dusting of cocoa powder will also work beautifully.
Everything's prepped? Good. Let's get into the real action…
The Method — Step by Step
- Begin by crushing the chocolate sandwich cookies into fine crumbs. Pour them into a shallow bowl and fold in the melted butter until the mixture resembles wet sand. This will be the base that holds the ice cream layers. Spread the crumb mixture evenly across the bottom of a 9‑inch springform pan, pressing firmly to create a solid crust. Chill the crust in the freezer for 10 minutes to set it before adding the ice cream.
- Spoon a layer of softened chocolate ice cream onto the chilled crust, smoothing it with a spatula. The ice cream should be just soft enough to spread but firm enough to hold its shape. Cover the layer with plastic wrap and freeze for 20 minutes. This step locks in the shape and prevents the chocolate flavor from bleeding into the next layer.
- Repeat the process with a layer of softened vanilla ice cream, again freezing for 20 minutes. The alternating layers create a visually striking pattern that looks like a frozen drumstick. Don’t rush this step; patience is the secret to a perfectly layered cake.
- Once both layers are set, remove the cake from the freezer and let it sit at room temperature for 5 minutes. This slight thawing allows the edges to release easily when you remove the springform ring. While the cake is resting, whip the heavy cream with powdered sugar and vanilla extract until soft peaks form. The whipped cream will be folded into the final layer, adding a light, airy finish.
- Add the whipped cream layer on top of the vanilla ice cream, smoothing it into a dome shape. Return the cake to the freezer for 30 minutes to ensure the top layer sets firmly. The result should be a glossy, slightly domed surface that’s ready for the final glaze.
- Heat the chocolate sauce gently in a small saucepan until it’s pourable, swirling occasionally. The sauce should be thick enough to coat the cake without dripping too quickly. Pour the warm sauce over the cake, letting it cascade down the sides in a glossy ribbon. This step adds a decadent finish and a burst of chocolate aroma.
- Dust the top with powdered sugar using a fine sieve for a professional look. This not only adds a touch of sweetness but also balances the chocolate richness. Let the cake chill for an additional 15 minutes before removing the springform ring. This final rest allows the flavors to meld and the texture to set perfectly.
- To serve, slice the cake with a hot knife for clean cuts. The knife should be warmed in hot water and dried before slicing to avoid crushing the layers. Each slice will reveal a vibrant, multi‑layered interior that’s as pleasing to the eye as it is to the palate.
- If you’re planning ahead, wrap the cake in parchment paper and place it in a freezer‑safe container. It can be stored for up to a week. When you’re ready to serve, let it sit at room temperature for 10 minutes to soften slightly, then enjoy the full spectrum of textures.
That’s it — you did it. But hold on, I've got a few more tricks that'll take this to another level…
Insider Tricks for Flawless Results
The Temperature Rule Nobody Follows
Temperature control is the secret sauce. The ice cream layers must be at the exact right softness — too hard, and they won’t spread; too soft, and they’ll melt into a gooey mess. I always use a kitchen thermometer to check that the ice cream is between 20–25°F before adding it to the crust. This small step guarantees a perfect, crisp edge that stays intact during the freezing process.
Why Your Nose Knows Best
Before you set the cake in the freezer, give it a quick sniff. The aroma of chocolate and vanilla should be unmistakable. If the scent feels flat, it’s a sign that the ice cream is too cold or that the chocolate sauce hasn’t been properly heated. Trusting your nose will save you from a bland dessert that fails to impress.
The 5-Minute Rest That Changes Everything
After removing the cake from the freezer, let it rest for exactly five minutes. This short pause allows the surface to firm up just enough so you can remove the springform ring without tearing the crust. Skipping this step often results in a broken crust and uneven layers, which can ruin the presentation and texture.
The Crunch Factor
If you want an extra crunch, sprinkle a thin layer of crushed chocolate chips on top of the cookie crust before adding the ice cream. The chips will melt slightly during the first freeze, creating a subtle, chocolatey crunch that contrasts with the creamy layers. It’s a simple tweak that adds a wow factor.
The Finish Line
When drizzling the chocolate sauce, use a squeeze bottle for a controlled, decorative pattern. This not only looks elegant but also ensures each bite is evenly coated. A messy drizzle can dilute the flavor and ruin the visual appeal, so aim for precision.
Creative Twists and Variations
This recipe is a playground. Here are some of my favorite ways to switch things up:
Minty Madness
Swap the vanilla ice cream for mint chocolate chip. Add a few drops of peppermint extract to the chocolate sauce for a refreshing twist that’s perfect for summer gatherings.
Caramel Crunch
Replace the chocolate sauce with a caramel glaze and sprinkle toasted coconut on top. The caramel’s buttery sweetness pairs wonderfully with the crunchy cookie base, creating a tropical vibe.
Espresso Explosion
Infuse the chocolate sauce with a shot of espresso and use a coffee‑flavored ice cream. The bold espresso notes cut through the richness, giving the cake a sophisticated, adult flavor profile.
Berry Burst
Add a layer of strawberry ice cream between the chocolate and vanilla layers. Drizzle a raspberry coulis over the top for a fruity contrast that brightens the dessert.
Nutty Nibbles
Incorporate chopped walnuts or pecans into the cookie crust and top the finished cake with a drizzle of hazelnut chocolate spread. The nutty flavor adds depth and pairs beautifully with the creamy layers.
Storing and Bringing It Back to Life
Fridge Storage
If you plan to serve the cake within 24 hours, store it in the refrigerator, covered with a lid or plastic wrap. The cold will keep the ice cream firm while preventing condensation from making the crust soggy.
Freezer Friendly
For longer storage, wrap the cake tightly in parchment paper followed by a layer of aluminum foil. Label the date and place it in a freezer‑safe container. The cake can stay in the freezer for up to one week without compromising texture or flavor.
Best Reheating Method
When you’re ready to serve, let the cake sit at room temperature for 10 minutes. If it’s been frozen for a while, add a splash of milk or cream to the top before reheating. The moisture will steam the ice cream back to a silky consistency while preserving the crisp crust.