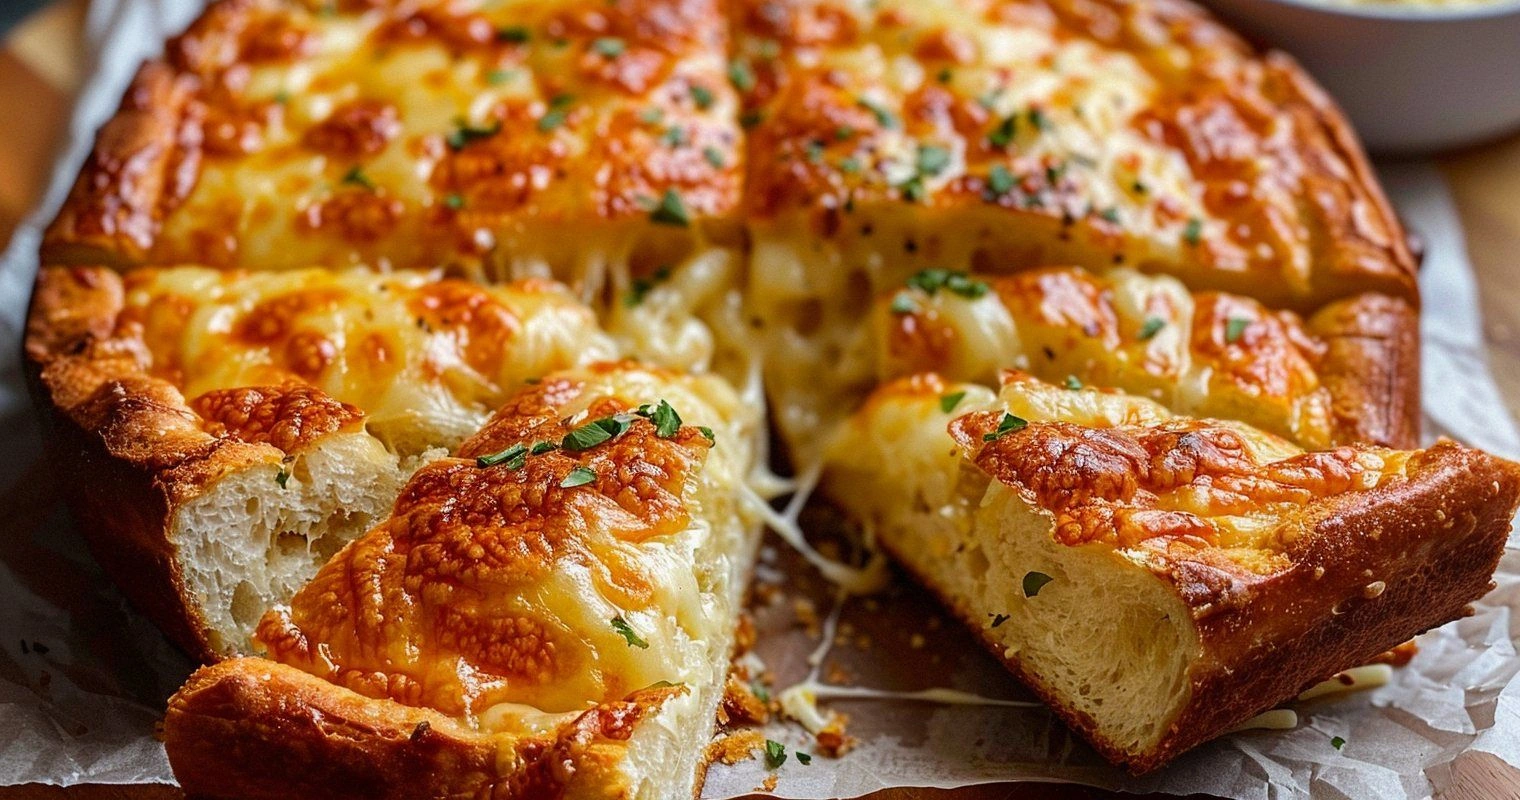
Picture this: It is ten-thirty on a Tuesday night, the wind is rattling the mailbox like a bored teenager, and every single snack in the pantry is auditioning for the role of “boring.” I had half a loaf of decent bread, a brick of cheese that was giving me side-eye for ignoring it all week, and a cast-iron skillet that still remembered the fajitas from Sunday. In a moment of stubborn hunger I slapped those two ingredients together, whispered a small prayer to the kitchen gods, and created something so outrageously good I burned my tongue twice because I could not wait for it to cool. That first bite was a hot, stretchy revelation: crisp edges that shattered like thin ice, molten cheese that pooled like liquid gold, and a nutty, toasty perfume that filled the apartment faster than a batch of chocolate-chip cookies. I ate half the skillet standing up, shoes still on, coat half-zipped, because taking the time to sit down felt like an insult to the urgency of the moment. If you have ever wished grilled cheese and garlic bread would just get a room already, bread cheese is their ridiculously delicious love child, and I am here to make sure you do it right the first time instead of learning the hard way like I did.
Most recipes on the internet treat bread cheese like a weird Nordic novelty, a party trick you pull out once a year when you want to impress people with your global dairy knowledge. I am not interested in novelty; I am interested in repeatable bliss that you can crank out on a Wednesday when the only thing in your fridge is hope and a half-empty jar of mustard. This version is hands down the best you will ever make at home because we are not just melting cheese on toast and calling it a day. We are engineering craggy, caramelized craters, coaxing every last bit of Maillard magic out of the proteins, and building layers of flavor so deep you will swear there is a secret sauce when really it is just heat, time, and a couple of smart moves. I dare you to taste this and not go back for seconds; I double-dog dare you to share politely at a potluck without elbowing your way to the front of the line.
Before we dive in, let me confess: I ate half the batch before anyone else got to try it, and I felt only the tiniest flicker of guilt because hot bread cheese waits for no one. The edges were so crispy they practically hummed, the center bubbled like a jacuzzi for dairy lovers, and the aroma wrapped around me like the kitchen equivalent of a weighted blanket. If you have ever struggled with rubbery microwave cheese sandwiches or sad, floppy toaster-oven specimens that droop like forgotten birthday balloons, you are not alone—and I have got the fix. Picture yourself pulling this out of the oven, the whole kitchen smelling incredible, your roommates drifting in like cartoon characters floating on the scent trail. Let me walk you through every single step—by the end, you will wonder how you ever made it any other way.
What Makes This Version Stand Out
Crater-Crust Technology: Instead of politely tucking cheese between bread slices, we create a moonscape of peaks and valleys so every bite has shattering edges and molten middles. The high-heat roast blisters the surface into crunchy golden crags that taste like the best part of a grilled cheese—times ten.
One-Pan Laziness: Everything happens in a single skillet, no flipping, no stacking, no babysitting. You slide it in, crank the heat, and let the oven do the heavy lifting while you pour yourself a beverage and pretend you are a restaurant chef with a mysterious, confident aura.
Stretch-Factor Showmanship: We use a strategic blend of cheeses that melt into long, Instagram-worthy strings without turning greasy. When you lift a wedge and the cheese pulls like taffy, you will understand why your friends will hover with their phones ready.
5-Minute Prep Brag: If you can wield a knife without endangering your digits, you are qualified. No overnight soaking, no starter feeding, no mysterious ingredients you have to special-order from a Scandinavian website that only takes krone.
Leftover Magic: Day-old slabs reheat into something almost better than fresh, which means you can make a double batch on Sunday and coast through the week with instant comfort food. Most recipes get this completely wrong and tell you to eat it immediately or suffer rubbery doom; here is what actually works.
Crowd Reaction Guarantee: Bring this to game night and watch grown adults revert to childhood giddiness. I have seen stoic accountants fight over the last corner piece like it was the final slice of pizza at a bachelor party.
Ingredient Flexibility: No single-use purchases. Everything in this recipe is a pantry workhorse you will use again, so you are not stuck with a quarter wheel of obscure cheese fossilizing in the back of the fridge.
Alright, let's break down exactly what goes into this masterpiece, starting with the cast of characters that look ordinary alone but turn into rock stars once the heat hits.
Inside the Ingredient List
The Flavor Base
The bread is not just a vehicle; it is the stage upon which our cheese performs its gooey ballet. Go for a sturdy, country-style loaf with plenty of air pockets—those nooks will cradle molten cheese like edible hammocks. Skip the pre-sliced supermarket fluff; it collapses into a sad, doughy mat. If all you have is sandwich bread, toast it lightly first to give it backbone. A day-old sourdough or ciabatta brings tangy complexity that plays beautifully with rich dairy, and the chewier crumb means you get textural contrast instead of homogeneous mush.
Butter is the silent partner that carries flavor and ensures the bottom turns golden instead of anemic. Use the good stuff—European-style with higher fat—and bring it to room temperature so it spreads without tearing the bread. Olive oil works in a pinch, but butter browns better and smells like Saturday morning cartoons. If you are dairy-averse, refined coconut oil is a neutral swap, though you will miss that nutty aroma. Go easy; we are lubricating, not deep-frying, and excess fat just pools around the edges like an unwelcome oil slick.
The Texture Crew
The cheese blend is where the magic ratio lives: equal parts young mozzarella for stretch, young gouda for nutty sweetness, and a whisper of aged cheddar for depth. Skipping the blend is why most versions taste flat—one-note mozzarella is fun for the first bite and boring by the third. Shred your own; pre-shredded cellulose-coated strands resist melting and give you that weird, plasticky sheen. If you can only spring for one variety, make it a low-moisture mozzarella block and pat it dry with paper towels to avoid a watery puddle. The goal is cheese that flows like lava, not seizes like cold fondue.
A light dusting of cornstarch might sound odd, but it prevents the fat from breaking and turning greasy under high heat. You only need a teaspoon tossed with the shredded cheese; think of it as insurance against oily disasters. If you are gluten-free, arrowroot or potato starch works just as well. Skip this step and you risk that unappetizing sweater of oil that slides off the bread and haunts the bottom of the pan. Trust me, I have served greasy bread cheese to company and watched polite friends nibble one corner before “getting full.”
The Unexpected Star
Garlic powder sneaks in umami without the harsh bite of raw garlic that can overpower delicate dairy. Use a light hand—half a teaspoon for a whole loaf—because we want whispered flavor, not a vampire-repelling blast. Onion powder is a sneaky alternative if you are out of garlic, but do not use both or you will end up with a fast-food aftertaste. Fresh minced garlic burns under the broiler and turns bitter, so save that for another application. The goal is background bass notes, not a solo.
Smoked paprika adds a campfire vibe that makes guests ask, “Is there bacon in this?” without the actual pork. A quarter teaspoon scattered over the top before baking blooms into subtle, earthy perfume. Regular sweet paprika is fine if you want color without smoke, and if you like heat, swap in a pinch of chipotle powder. Skip the paprika entirely and the flavor still works, but that whisper of smoke is what elevates this from dorm-room snack to dinner-party bragging rights.
The Final Flourish
Fresh thyme leaves bring a lemony, woodsy note that cuts through richness like a squeeze of sunshine. Strip the tiny leaves off two sprigs and scatter them just before serving; dried thyme tastes dusty and muted. No thyme? Chives or scallion tops deliver a gentle onion perk without stealing the show. If you hate green specks, leave them off, but your taste buds will miss the herbal high note that keeps you coming back for “just one more bite” until the whole pan disappears.
Everything's prepped? Good. Let's get into the real action, starting with the pan that will become your new favorite piece of kitchen equipment.
The Method — Step by Step
- Preheat your oven to 475°F (245°C) and place a 10- or 12-inch cast-iron skillet on the middle rack while the oven heats. That empty pan needs to be ripping hot so the bottom of the bread starts toasting the instant it touches metal; a lukewarm skillet steams the bread and gives you gummy results. Do not oil the pan yet; we want dry heat to create the craggy crust. While the oven climbs, slice your loaf in half horizontally as if you were making a giant submarine sandwich, but do not cut all the way through—leave a hinge so the cheese stays contained. This next part? Pure magic.
- Spread the room-temperature butter generously on the cut surfaces of the bread, edge to edge, like you are frosting cake. Be liberal; any unbuttered spots will stay pale and taste bland. Smash a small clove of garlic into the butter if you want extra punch, but remember we are layering flavors, not clubbing people with them. Close the loaf and press gently so the butter seeps into every pore. Set the bread aside until the pan is screaming hot, about 10 minutes total.
- Carefully remove the screaming-hot skillet using the thickest oven mitts you own—this pan will brand you like cattle if you forget it is molten. Brush a whisper of butter across the bottom; it should sizzle and brown within two seconds. If it just sits there, your pan is not hot enough, so slide it back in for another five minutes. Lay the buttered bread cut-side down into the pan; the hiss should sound like applause. This is the moment of truth, and your kitchen will start to smell like a French bakery having a torrid affair with a Wisconsin creamery.
- Toast undisturbed for three minutes; resist the urge to peek or you will rip the surface and lose those gorgeous caramelized patches. Meanwhile, toss the shredded cheeses with cornstarch, garlic powder, and smoked paprika in a bowl so every strand is lightly dusted. Open the loaf like a book and sprinkle the cheese mixture evenly, patting gently so it nestles into the nooks but stays away from the very edges—molten cheese dripping onto the pan turns into burnt little chips that set off smoke alarms and kill the vibe.
- Close the loaf, pressing lightly so the cheese layers kiss but do not squish out. Slide the skillet back into the oven for six minutes; set a timer because this is not the time to wander off and answer emails. At the four-minute mark, rotate the pan 180 degrees so the hot spots in your oven do not favor one side. The top should be turning golden, the cheese should be bubbling up through the seams, and your whole place should smell like you hired a private chef who moonlights as a campfire.
- Switch the oven to broil on high and move the rack up one notch. Broil for 90 seconds, watching like a hawk—this is where bread cheese goes from perfect to charcoal faster than you can say “just one more second.” The surface should blister into leopard-spot browning, and the cheese will puff slightly like a proud soufflé. Remove the pan and immediately run a thin spatula around the perimeter to loosen any sticky edges before they cement into place.
- Let the loaf rest in the pan for two minutes; during this time the cheese settles and the bread finishes steaming itself soft. Transfer to a cutting board using two spatulas—one to lift, one to stabilize—because a molten cheese avalanche is heartbreak on a plate. Slice into thick wedges with a serrated knife, using a gentle sawing motion so you do not compress the airy interior. The cheese should stretch into long, glossy ropes that make everyone point their phones and whisper “oooh” in unison.
- Sprinkle fresh thyme leaves over the top, add a final dusting of flaky salt for crunch, and serve on a wooden board with plenty of napkins. The first bite should be hot enough to make you dance but not so hot that you lose a layer of tongue skin. If you pulled it off, the crust crackles, the center flows, and your friends start asking if you deliver. Store any leftovers wrapped in foil; reheat in a dry skillet over medium for three minutes and it will resurrect into almost-fresh glory.
That's it—you did it. But hold on, I've got a few more tricks that'll take this to another level, including the temperature rule nobody follows and the five-minute rest that changes everything.
Insider Tricks for Flawless Results
The Temperature Rule Nobody Follows
I will be honest: I served lukewarm bread cheese to my book club once and watched polite smiles fade into sad resignation. The secret is serving it piping hot, between 140°F and 150°F internal temp, when the cheese is still fluid but the bread has not steamed itself soggy. Use an instant-read thermometer inserted through the side seam; if it drops below 120°F, the fat starts to solidify and you lose that Instagram-worthy stretch. Reheat individual wedges in a dry skillet over medium for 90 seconds per side—microwaves turn the bread gummy and the cheese rubbery, so just do not. A friend tried skipping this step once; let us just say it did not end well for her foodie reputation.
Why Your Nose Knows Best
Ignore the clock at your peril; your nose is the most accurate timer in the kitchen. When the scent shifts from gentle toast to nutty caramel with a hint of campfire, your bread cheese is 30 seconds away from perfect. Open the oven and peek—if the edges are mahogany and the cheese is bubbling up like a jacuzzi, yank it out. That sizzle when it hits the pan? Absolute perfection. Trust your olfactory instincts; they have been honed by thousands of years of humans not burning dinner.
The 5-Minute Rest That Changes Everything
Patience feels impossible when molten cheese is calling your name, but a short rest allows the starch in the bread to reabsorb steam, turning the interior custardy while the crust stays crisp. Cover loosely with foil and let the loaf sit on the board; during this time the cheese firms just enough to stay put when you slice, preventing the dreaded cheese landslide that leaves you with naked bread. Skip the rest and you get cheese soup running down your arm and onto your favorite sweatshirt—tragic and entirely avoidable.
Creative Twists and Variations
This recipe is a playground. Here are some of my favorite ways to switch things up:
Jalapeño Popper Bread Cheese
Swap half the mozzarella for pepper jack, fold in two diced pickled jalapeños, and add a schmear of cream cheese in the center layer. The result tastes like your favorite sports-bar appetizer but without the deep-fryer mess. Serve with ranch for dipping and watch the plate disappear faster than free beer at a baseball game.
Breakfast Deluxe
Tuck in a layer of crispy bacon strips and a few cracks of black pepper before closing the loaf. When it emerges from the oven, crown it with a sunny-side-up egg so the yolk becomes a silky sauce for every bite. Brunch guests will propose marriage; you have been warned.
Mediterranean Escape
Stir a spoon of pesto into the cheese blend and add a handful of chopped oil-packed sun-dried tomatoes. After baking, shower with lemon zest and fresh basil. The bright herbs cut the richness and transport you straight to a coastal café where the biggest worry is whether to order another cappuccino.
Truffle Shuffle
Add a few drops of white truffle oil to the butter and use a mix of fontina and Gruyère for an earthy, fancy-pants version that tastes like you paid thirty bucks for it at a wine bar. A little truffle oil goes a long way; overdo it and your kitchen smells like a perfume counter having an identity crisis.
Everything Bagel Remix
Everything-bagel seasoning pressed into the buttered crust gives you oniony, garlicky crunch without extra work. Use cheddar in the blend for that classic deli vibe, and serve with a side of sour cream mixed with chives. Breakfast purists will weep tears of joy.
Sweet-Savory Sunset
Replace smoked paprika with a whisper of cinnamon and add thin apple slices between the cheese layers. The fruit steams soft and sweet, creating a fondue-like experience that pairs shockingly well with a drizzle of honey at the end. Sounds odd, but if you like cheddar on apple pie, this is your jam.
Storing and Bringing It Back to Life
Fridge Storage
Cool the loaf completely, wrap individual wedges in parchment, then slip them into a zip-top bag with the air squeezed out. They will keep up to four days without turning stale. Do not store the whole loaf intact; slicing first means faster reheating and less risk of soggy centers.
Freezer Friendly
Flash-freeze wedges on a tray until solid, then stack them with parchment squares between layers and seal in a freezer bag. They will survive two months with minimal flavor loss. Thaw overnight in the fridge or reheat straight from frozen—just add an extra minute under foil to prevent the crust from scorching before the center warms.
Best Reheating Method
Add a tiny splash of water to a covered skillet over medium-low heat; the steam revives the bread while the dry lid keeps the crust crisp. Two to three minutes per side brings it back to life better than fresh. Microwaves turn the texture into a sad, chewy coin, so avoid them unless you enjoy edible rubber.