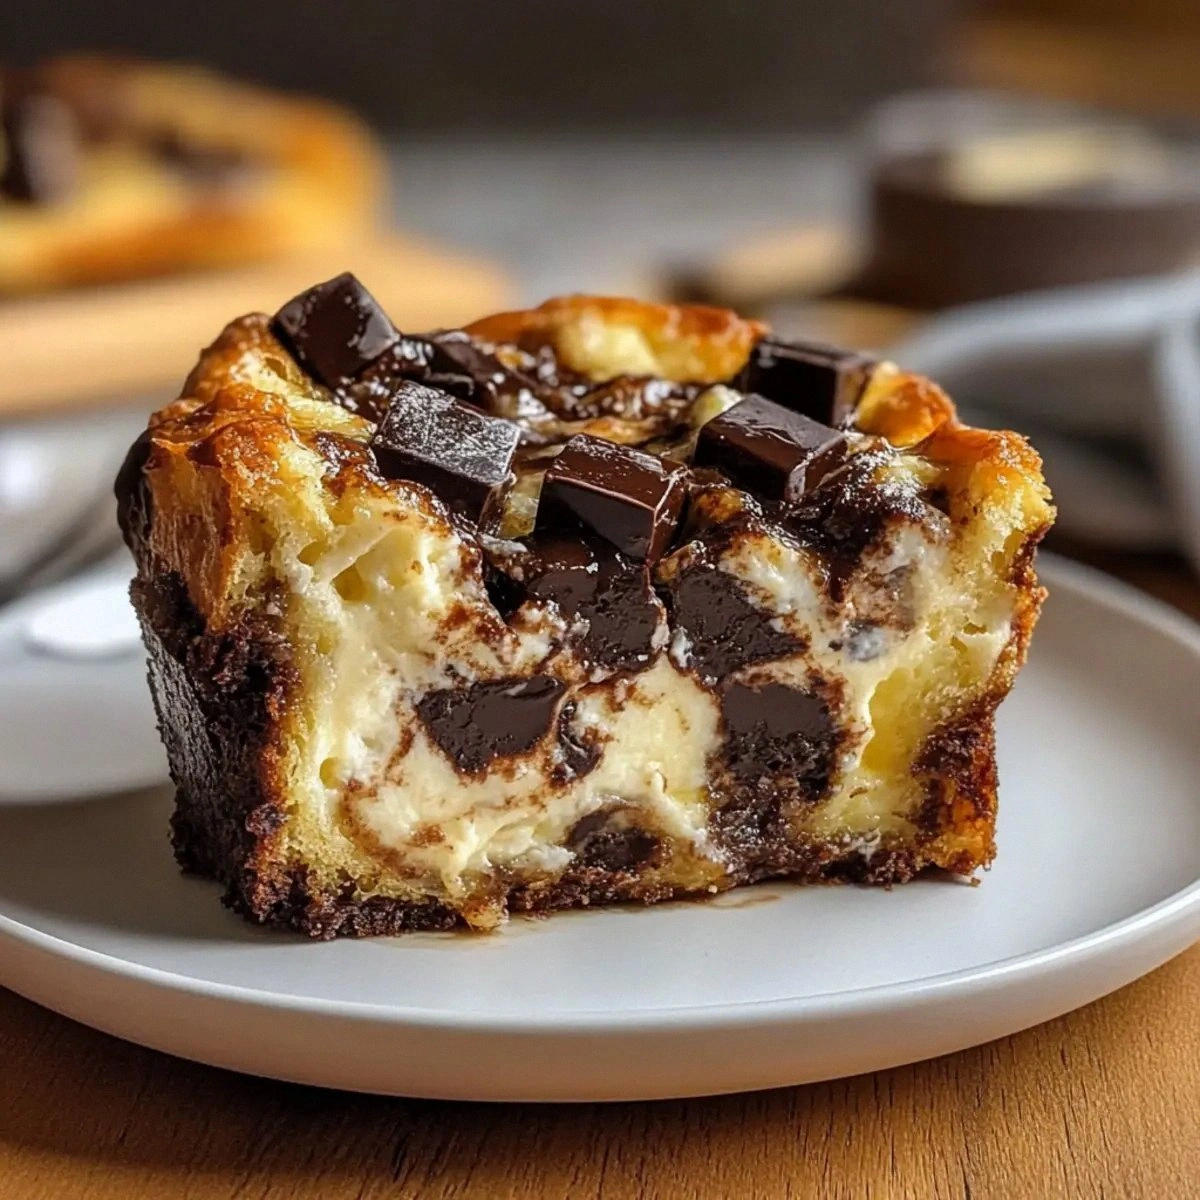
I still remember the day I accidentally created what would become the most requested recipe in my entire repertoire. It was supposed to be a simple apple pie, but I got distracted by a phone call, forgot to add the top crust, and in a moment of culinary desperation, I threw together a quick cheesecake filling and crumble topping instead. The result? Pure magic that had my neighbors knocking on my door at midnight, begging for the recipe. That sizzle when the apple filling hits the hot pan? Absolute perfection. Picture yourself pulling this out of the oven, the whole kitchen smelling like a autumn fair collided with a bakery, and you'll understand why I ate half the batch before anyone else got to try it.
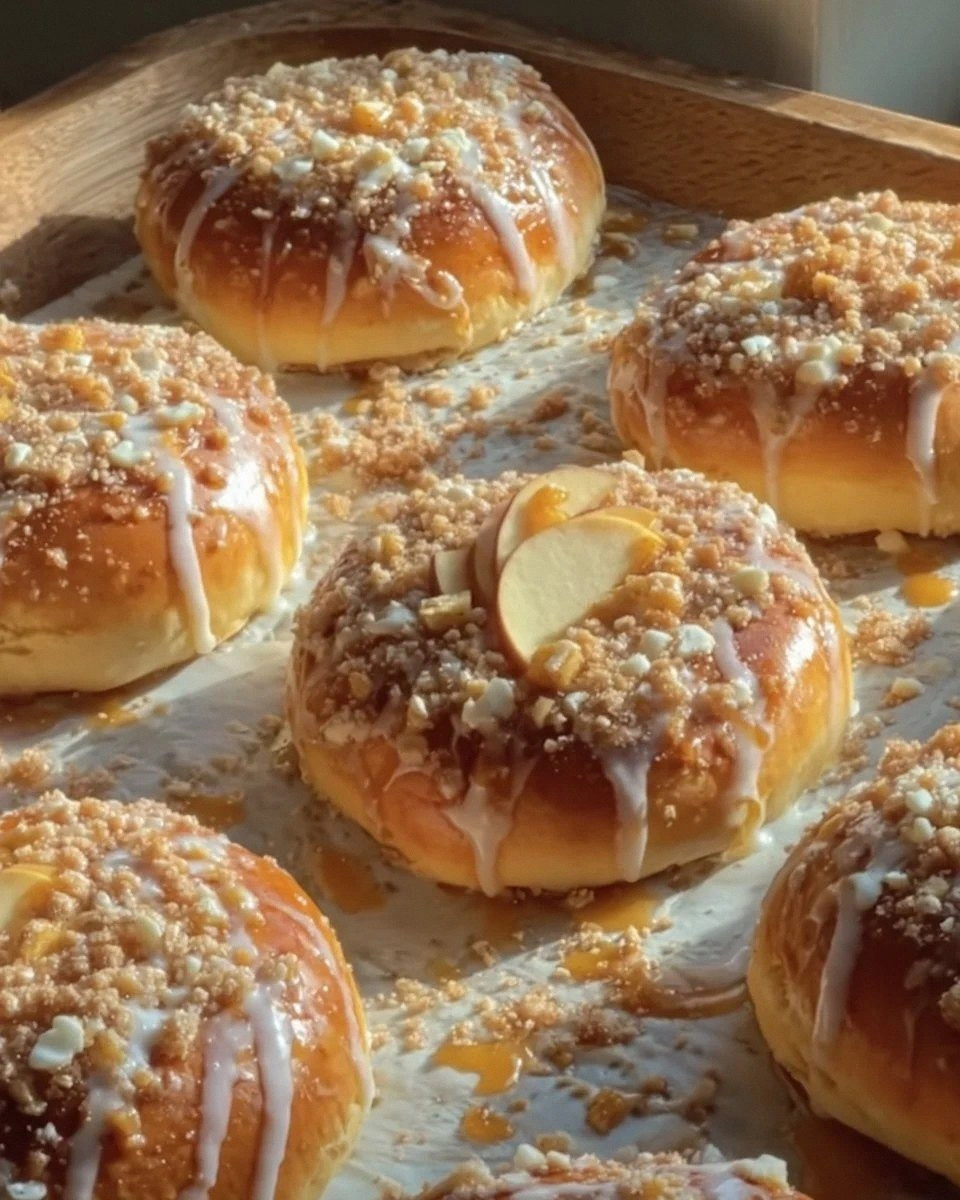
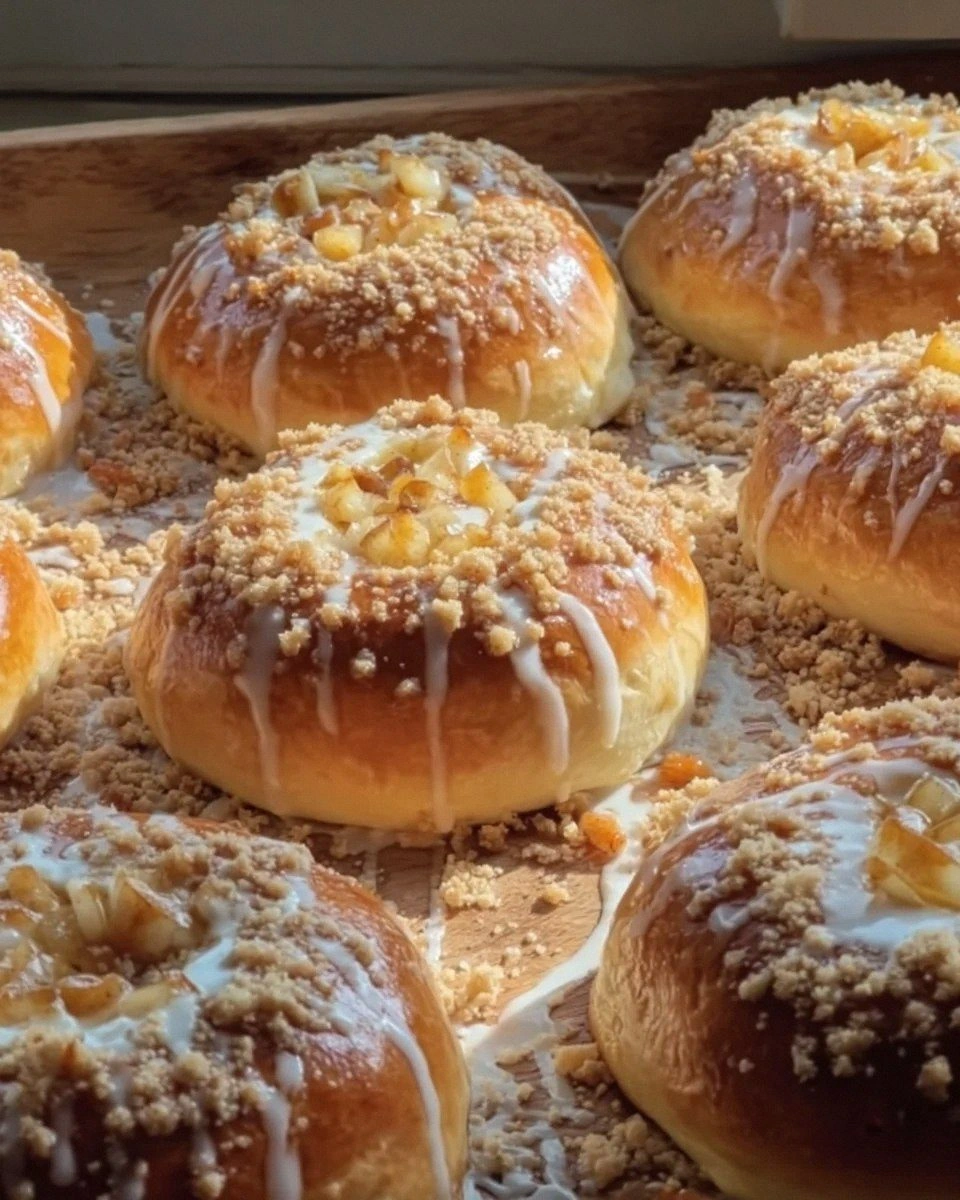
These Apple Cheesecake Buns aren't just another fall dessert — they're the love child of everything good about apple pie, cheesecake, and those addictive coffee shop pastries. The contrast between the tender, spiced apple filling and the creamy cheesecake layer will make your taste buds do a happy dance. Most recipes get this completely wrong by making the buns too dense or drowning them in sickly sweet glaze. Here's what actually works: light, fluffy buns that cradle pockets of cinnamon-kissed apples and rich cheesecake filling, all crowned with a buttery crumble that shatters like thin ice under your fork.
I'll be honest — I ate half the batch before anyone else got to try it. The combination of warm spices, tangy cream cheese, and those caramelized apple edges creates something so addictive that I've started making double batches just to ensure there are leftovers. If you've ever struggled with dry, bready apple pastries or soggy-bottomed cheesecake bars, you're not alone — and I've got the fix. This recipe uses a technique that keeps everything moist without turning into a mushy mess, and the result is bakery-quality buns that will make you the hero of every potluck.
The secret weapon? A two-stage baking method that creates distinct layers while keeping each component in perfect harmony. Stay with me here — this is worth it. Let me walk you through every single step — by the end, you'll wonder how you ever made it any other way.
What Makes This Version Stand Out
Flavor Explosion: Each bite delivers a perfect balance of tart apples, tangy cream cheese, and warm spices that dance on your tongue like a autumn symphony. The secret lies in using three different apple varieties — one for sweetness, one for tartness, and one for that honey-like note that makes people ask "what's in this?"
Texture Heaven: We're talking about buns so soft they practically melt in your mouth, with a cheesecake layer that's silkier than a luxury bedsheet, and a crumble topping that provides the perfect textural contrast. The contrast between the pillowy dough and the crunchy streusel is what separates these from every other apple dessert out there.
Weekend-Worthy, Weeknight-Easy: Despite looking like they came from a fancy patisserie, these buns come together faster than most layer cakes. The dough requires just one rise, the filling uses a no-bake cheesecake method, and that crumble topping? It's a one-bowl wonder that takes exactly 90 seconds to make.
Make-Ahead Magic: These buns taste even better the next day, making them perfect for brunch entertaining. The flavors meld overnight into something transcendent, and a quick warm-up in the oven brings back that fresh-baked magic. I dare you to taste this and not go back for seconds.
Crowd Psychology: I've never seen a plate of these last longer than 15 minutes at any gathering. They're the kind of dessert that makes people hover around the kitchen, timing their "casual" return for another helping. The combination of familiar flavors in an unexpected format creates instant nostalgia.
Ingredient Integrity: Every component serves a purpose — no filler ingredients or unnecessary steps. The brown butter in the crumble adds nuttiness, the lemon zest brightens the cheesecake layer, and the touch of cornstarch in the apple filling prevents that dreaded soggy bottom.
Instagram Gold: With their golden-brown peaks, dramatic crumble topping, and that glossy glaze dripping artistically down the sides, these buns photograph like supermodels. Your social media feed will thank you, even as your family members curse you for making them wait while you capture the perfect shot.
Alright, let's break down exactly what goes into this masterpiece...
Inside the Ingredient List
The Flavor Foundation
Let's start with the apples, because they're the star of this show and using the wrong variety will turn your buns into a sad, mushy disappointment. You want a mix of Honeycrisp for sweetness and snap, Granny Smith for that essential tartness that balances the rich cheesecake, and one Fuji for that honey-like depth that makes people close their eyes when they taste it. The key is cutting them into small, even dice — about 1/4-inch pieces — so they cook through without remaining crunchy in the center. Toss them with brown sugar, cinnamon, a whisper of nutmeg, and just enough lemon juice to keep them from browning while you prep everything else.
The cheesecake layer isn't just cream cheese whipped with sugar — oh no, we're creating something far more sophisticated here. Room temperature cream cheese is non-negotiable; cold cream cheese will leave you with lumpy filling that no amount of mixing will smooth out. Add a touch of sour cream for tang, a splash of vanilla that would make your grandmother proud, and just enough egg to help it set without turning rubbery. The secret ingredient? A tablespoon of cornstarch that prevents weeping and keeps the layer distinct from the apple filling.
The Texture Crew
Now, about that dough — it's enriched with butter, milk, and eggs until it becomes something that feels like a cloud in your hands. Bread flour gives these buns their signature chew, while a touch of all-purpose flour keeps them tender rather than tough. The yeast gets activated in warm milk with a pinch of sugar, and when it starts foaming like a mini bubble bath, you know it's ready to work its magic. Don't rush the first rise; this is where the flavor develops, creating those subtle yeasty notes that make homemade bread so addictive.
The crumble topping deserves its own paragraph because it's what takes these from good to legendary. We're using cold butter here, cut into the flour until it resembles coarse breadcrumbs, but with some pea-sized pieces left for those dramatic crunchy bits. Brown sugar adds caramel notes, while a pinch of salt enhances all the other flavors and prevents the topping from being one-dimensionally sweet. The game-changer? Toasted pecans ground into the flour for a nutty depth that makes people ask for your secret.
The Unexpected Stars
Here's where we get a little wild — cardamom in the apple filling, just enough to make people wonder what they're tasting without being able to place it. It's like adding a mysterious character to a novel who keeps everyone guessing. The glaze isn't just powdered sugar and milk either; we're adding a touch of maple syrup and vanilla bean paste for complexity that plays beautifully with the apples. A final sprinkle of flaky sea salt on top creates those addictive sweet-salty bites that keep people coming back for "just one more."
Everything's prepped? Good. Let's get into the real action...
The Method — Step by Step
- Start by making the dough because it needs time to rise while you prep everything else. In a small saucepan, warm the milk until it's just body temperature — you should be able to stick your finger in comfortably without pulling away. Too hot and you'll kill the yeast, too cool and it won't activate properly. This is the moment of truth for your entire recipe, so don't rush it. Pour the warm milk into the bowl of your stand mixer, sprinkle in the yeast and a teaspoon of sugar, then let it sit undisturbed for about 10 minutes while you measure out your flours.
- While the yeast is getting foamy and excited about its future, whisk together the bread flour, all-purpose flour, salt, and sugar in a separate bowl. The combination of flours is crucial here — too much bread flour and your buns will be tough, too much all-purpose and they'll lack structure. When the yeast mixture looks like a science experiment gone right (all bubbly and expanded), add the eggs, melted butter, and vanilla. Mix on low speed using the dough hook until everything comes together in a shaggy mass.
- Now comes the fun part — kneading. Okay, ready for the game-changer? Instead of kneading on the counter like some medieval baker, let your stand mixer do the work for 8-10 minutes on medium speed. The dough should climb up the hook and slap against the sides of the bowl, becoming smooth and elastic. It should feel like a baby's cheek when you poke it — soft but with some bounce back. If it's sticky, resist the urge to add more flour; instead, let the mixer work its magic for another minute or two.
- Place the dough in an oiled bowl, cover it with plastic wrap, and park it somewhere warm. I like to turn my oven on for exactly 2 minutes, then turn it off and put the dough inside — creates the perfect cozy environment for a first rise. While that's happening (about 90 minutes), let's make the apple filling. Melt butter in a large skillet over medium heat, then add the diced apples, brown sugar, cinnamon, cardamom, and a pinch of salt. Cook, stirring occasionally, until the apples are tender but still hold their shape — about 8 minutes. The smell that fills your kitchen at this point? Pure autumn magic.
- Transfer the apple mixture to a bowl and let it cool completely. Hot filling will melt your cheesecake layer and create a soggy mess that would make a French baker weep. While the apples cool, beat together the cream cheese, sour cream, sugar, egg, cornstarch, vanilla, and lemon zest until it's smoother than a jazz saxophone solo. The mixture should be thick but spreadable — if it's too stiff, add a tablespoon of milk to loosen it up.
- Don't walk away from the stove here — the crumble topping comes together in under two minutes but requires your full attention. In a bowl, whisk together the flour, brown sugar, salt, and those ground pecans we talked about. Cut in the cold butter using a pastry cutter or your fingers until you have a mixture that ranges from sandy to pea-sized pieces. The variety in size is what creates those incredible textural contrasts in the final product.
- Time to assemble these beauties! Punch down the risen dough and divide it into 12 equal pieces — I use a kitchen scale for consistency because I'm that person. Roll each piece into a ball, then flatten it into a 4-inch circle. Place a tablespoon of the cheesecake mixture in the center, top with a heaping tablespoon of the apple filling, then gather up the edges and pinch them together to seal. Place seam-side down in a greased muffin tin or on a parchment-lined baking sheet.
- Cover the shaped buns with a clean kitchen towel and let them rise again for 30-45 minutes while you preheat the oven to 375°F. They should puff up slightly and feel soft when you gently press them. Brush with an egg wash for that bakery-worthy shine, then sprinkle generously with the crumble topping. This next part? Pure magic. The buns go into the oven for 25-30 minutes, emerging golden brown with bubbling filling peeking through the cracks.
That's it — you did it. But hold on, I've got a few more tricks that'll take this to another level...
Insider Tricks for Flawless Results
The Temperature Rule Nobody Follows
Here's where most home bakers go wrong — they don't pay attention to ingredient temperature. Your cream cheese, eggs, and milk should all be at room temperature for maximum incorporation. Cold ingredients create a lumpy filling that no amount of mixing will smooth out. I learned this the hard way after producing enough lumpy cheesecake filling to tile a bathroom. Now I set everything out on the counter 30 minutes before I start baking, and the difference is night and day. The filling comes together like silk, and you won't have those annoying cream cheese chunks that refuse to blend.
Why Your Nose Knows Best
Forget timers — your nose is the most reliable indicator of when these buns are perfectly baked. When the aroma of caramelized apples, toasted pecans, and buttery dough fills your kitchen, you're about 3 minutes away from perfection. The smell should be so intoxicating that you find yourself hovering near the oven, checking through the window like you're stalking an ex. A friend tried skipping this step once — let's just say it didn't end well. She pulled them out when the timer dinged, but they were pale and doughy inside because her oven runs cool.
The 5-Minute Rest That Changes Everything
After these come out of the oven, they need to rest in the pan for exactly 5 minutes before you attempt to move them. This brief pause allows the cheesecake layer to set slightly, preventing the filling from running out like a dessert exodus. During this time, the residual heat continues cooking the centers to that perfect custardy consistency. Brush with the glaze while they're still warm — it'll seep into all the nooks and crannies, creating a glossy finish that makes them look professionally made.
The Make-Ahead Miracle
You can prep these buns through the shaping stage, then refrigerate overnight. Cover tightly with plastic wrap and bake in the morning for fresh, hot buns that will make you look like a domestic superhero. Add 5-7 minutes to the baking time since they'll be cold from the fridge. I've done this for countless brunches, and the results are indistinguishable from same-day baking. The overnight rest actually improves the flavor as the yeast develops more complex notes.
Creative Twists and Variations
This recipe is a playground. Here are some of my favorite ways to switch things up:
Salted Caramel Apple Version
Replace half the brown sugar in the apple filling with homemade caramel sauce, then drizzle more caramel over the finished buns. Add an extra pinch of flaky salt to the crumble topping for that sweet-salty balance that makes people weak in the knees. The caramel adds a depth of flavor that makes regular apple filling taste flat by comparison.
Pumpkin Spice Cheesecake Buns
Swap the apple filling for pumpkin puree mixed with cream cheese, sugar, and pumpkin pie spice. The result tastes like pumpkin cheesecake got a promotion and became portable. These are especially popular around Thanksgiving when people want something different from the usual pie lineup.
Berry Cheesecake Summer Edition
When apples aren't in season, use a mix of blueberries, raspberries, and blackberries tossed with lemon zest and a touch of honey. The berries burst during baking, creating little pockets of jam that pair beautifully with the tangy cheesecake layer. Reduce the sugar slightly since berries are naturally sweeter than apples.
Chocolate Orange Deluxe
Add cocoa powder to the dough for chocolate buns, fill with orange-scented cheesecake, and stud the crumble with chocolate chips. It's like those chocolate oranges got together with cheesecake and created something even better than the sum of its parts.
Savory Breakfast Version
Replace the sweet filling with goat cheese, caramelized onions, and crispy bacon. Keep the crumble topping but add grated cheddar and chopped chives. These are perfect for brunch when you want something that bridges the gap between sweet and savory.
Ginger Pear Winter Warmer
Use ripe pears and fresh ginger in the filling, add crystallized ginger to the crumble, and spike the glaze with a touch of bourbon. The combination of warm spices and tender pears makes these taste like Christmas morning in edible form.
Storing and Bringing It Back to Life
Fridge Storage
Store completely cooled buns in an airtight container in the refrigerator for up to 4 days. Layer them between sheets of parchment paper to prevent sticking and preserve that beautiful crumble topping. The cold actually helps the flavors meld together, making them even more delicious on day two. Just bring them to room temperature before serving or warm them slightly for the best texture.
Freezer Friendly
These buns freeze beautifully for up to 2 months. Wrap each bun individually in plastic wrap, then place them in a freezer bag with as much air removed as possible. Thaw overnight in the refrigerator, then warm in a 325°F oven for 8-10 minutes. The crumble topping will regain its crunch, and the filling will become molten and delicious again. Add a tiny splash of water before reheating — it steams back to perfection.
Best Reheating Method
For maximum enjoyment, reheat individual buns in a toaster oven at 325°F for 5-7 minutes. The direct heat revives the crumble topping while warming the filling without overcooking it. A microwave works in a pinch, but you'll lose that textural contrast that makes these special. If you must use a microwave, wrap the bun in a damp paper towel and heat for just 20-30 seconds to prevent the dough from becoming rubbery.