I was standing in my kitchen on a rainy Tuesday, staring at a half‑finished batch of chicken nuggets that tasted like cardboard and regret. My roommate dared me to make something that would actually make us forget the soggy pizza we ordered the night before, and I thought, “Why not a pickle‑infused chicken that sounds insane enough to work?” The moment I sliced a fresh dill pickle and tossed it into a bowl of flour, the whole room filled with a tangy perfume that reminded me of a summer picnic mixed with a cheesy carnival. I could almost hear the crunch of a fresh‑cut apple as I imagined the first bite, and my heart started doing a little happy dance.
Fast forward a few frantic minutes, a pan sizzling like a tiny fireworks show, and a plate of golden‑brown chicken that seemed to glow with a buttery sheen. The smell? A buttery, cheesy, dill‑laden perfume that made my nose tingle like it had just been kissed by a lemon‑scented breeze. When I finally bit in, the crunch was so satisfying it sounded like thin ice shattering under a weightless footstep, and the inside was juicy, tender, and packed with that unmistakable dill pickle zing that made my taste buds scream “YES!” I dare you to taste this and not go back for seconds; the combination is pure, unapologetic comfort food with a twist.
Most recipes for pickle chicken either drown the flavor in a bland breadcrumb coat or forget the crucial Parmesan kick that turns a simple fry into a gourmet experience. I’ve tried the “quick fix” versions that use powdered pickle chips – they end up tasting like a sad, salty dust. This version, however, uses a double‑dip technique, a secret blend of grated Parmesan, and a quick brine that locks in moisture. The result? A chicken piece that is crispier than a freshly fried potato chip, yet tender enough to melt in your mouth, with a cheesy, dill‑forward flavor that makes every bite feel like a celebration.
And just when you think you’ve seen it all, I’m about to drop a technique that will change the way you think about coating anything – a quick flash‑freeze of the pickle slices before they hit the batter, creating a micro‑crust that traps the pickle juice inside while the outer shell turns to pure gold. Okay, ready for the game‑changer? Let me walk you through every single step — by the end, you’ll wonder how you ever made it any other way.
What Makes This Version Stand Out
- Flavor Explosion: The dill pickle juice infused into the batter gives a tangy pop that balances the rich Parmesan, creating a taste symphony that dances on your palate.
- Crunch Factor: A double‑dip method plus a brief freezer blast creates a crust that shatters like thin ice, delivering that satisfying crunch you crave.
- Simplicity: Only eight core ingredients, all pantry‑friendly, so you won’t need a trip to the specialty store.
- Unique Twist: Incorporating actual dill pickle slices, not just powder, adds texture and bursts of briny goodness.
- Crowd‑Pleaser: Even the pickiest eaters admit this is hands down the best version you’ll ever make at home.
- Ingredient Quality: Freshly grated Parmesan and high‑quality chicken breasts make a world of difference in flavor and moisture.
- Cooking Method: Oven‑finish after pan‑searing locks in juiciness while giving the perfect golden finish.
- Make‑Ahead Potential: You can prep the coating and even pre‑bake the chicken, then finish it crisp just before serving.
Inside the Ingredient List
The Flavor Base
The star of the show is the dill pickle itself. Using whole pickle slices, not just powdered dill, gives you that satisfying crunch and a burst of brine with every bite. If you skip the fresh slices and rely on powder, you’ll lose the textural contrast that makes this dish unforgettable. For a milder tang, you can opt for bread‑and‑butter pickles, but the classic dill offers the perfect sharpness.
The Texture Crew
All‑purpose flour creates the first thin veil that adheres the egg wash, while the breadcrumb‑Parmesan blend forms the golden armor. The key is using panko breadcrumbs for extra airiness; they expand during cooking, giving that airy crunch. If you’re gluten‑free, swap the flour for a rice flour blend and use gluten‑free panko – the texture will stay impressive.
The Unexpected Star
Parmesan cheese isn’t just a flavor enhancer; its umami depth and slightly nutty note elevate the entire coating. Freshly grated Parmesan melts into the breadcrumb matrix, creating a caramelized crust that’s impossible to resist. If you’re out of Parmesan, a blend of Pecorino Romano and Grana Padano works in a pinch, though the flavor profile will shift slightly toward sharper notes.
The Final Flourish
A splash of buttermilk in the egg wash adds acidity that tenderizes the chicken while adding a subtle richness. The acid also helps the coating adhere better, preventing those dreaded “flaky” spots. If you don’t have buttermilk, a mix of milk and a teaspoon of lemon juice works just as well.
Everything's prepped? Good. Let's get into the real action...
The Method — Step by Step
Start by patting four boneless, skinless chicken breasts dry with paper towels. Slice each breast horizontally to create two thin cutlets, then season both sides with salt, pepper, and a pinch of garlic powder. This base seasoning is the foundation; you’ll taste it even after the coating is on. Let the chicken rest for five minutes while you prep the coating – this short pause lets the seasoning penetrate the meat.
While the chicken rests, prepare the pickle slices. Cut three large dill pickles into ¼‑inch thick rounds. Place them on a parchment‑lined tray and pop them into the freezer for exactly ten minutes. That quick chill is the secret that creates a micro‑crust, preventing the pickle from leaking juice into the batter later on.
Kitchen Hack: Freeze the pickle slices on a single layer; overlapping will cause uneven freezing and affect the crunch.Set up a three‑station breading line: (1) a shallow bowl with 2 cups of all‑purpose flour, seasoned with a teaspoon of salt and half a teaspoon of smoked paprika; (2) a second bowl with two large eggs whisked together with ¼ cup of buttermilk; (3) a third bowl with 2 cups of panko breadcrumbs mixed with 1 cup freshly grated Parmesan, a pinch of dried oregano, and a dash of cayenne for a subtle heat. The order matters – the flour creates a dry surface for the egg to cling, and the egg acts as the glue for the breadcrumb‑Parmesan mixture.
Take each chicken cutlet, dip it first into the flour, shaking off any excess. Then plunge it into the egg‑buttermilk wash, ensuring every nook is coated. Finally, press it into the breadcrumb‑Parmesan blend, patting gently so the coating adheres fully. For the pickle slices, give them a quick dusting in flour before the egg wash, then coat them exactly like the chicken. This double‑dip technique builds layers that will turn into that coveted crunch.
Heat a large cast‑iron skillet over medium‑high heat and add enough vegetable oil to coat the bottom (about ¼ inch). When the oil shimmers and a drop of water sizzles, it’s ready. Carefully lay the coated chicken and pickle slices into the pan, making sure not to crowd them – overcrowding drops the oil temperature and leads to soggy results.
Watch Out: If the oil starts smoking, reduce the heat immediately; burnt oil will give the coating a bitter flavor.Cook each side for 3‑4 minutes, or until the coating turns a deep, buttery gold and you hear that satisfying sizzle. The edges of the chicken should start pulling away from the pan, a visual cue that the crust is forming properly. Flip carefully with tongs – the coating is sturdy but can break if handled too roughly.
Once both sides are golden, transfer the skillet to a preheated oven set at 400°F (200°C) for an additional 10‑12 minutes. This finish ensures the interior reaches a safe 165°F while the exterior stays crisp. The oven’s dry heat is what turns the crust from golden to caramelized, giving it that “cheese‑crack” texture that makes the bite unforgettable.
While the chicken rests for three minutes (this is the crucial 5‑minute rest that lets juices redistribute), drizzle a quick lemon‑butter glaze over the top: melt two tablespoons of butter, stir in a teaspoon of fresh lemon zest, and a splash of pickle juice for an extra punch. This glaze adds a glossy finish and a bright note that balances the richness.
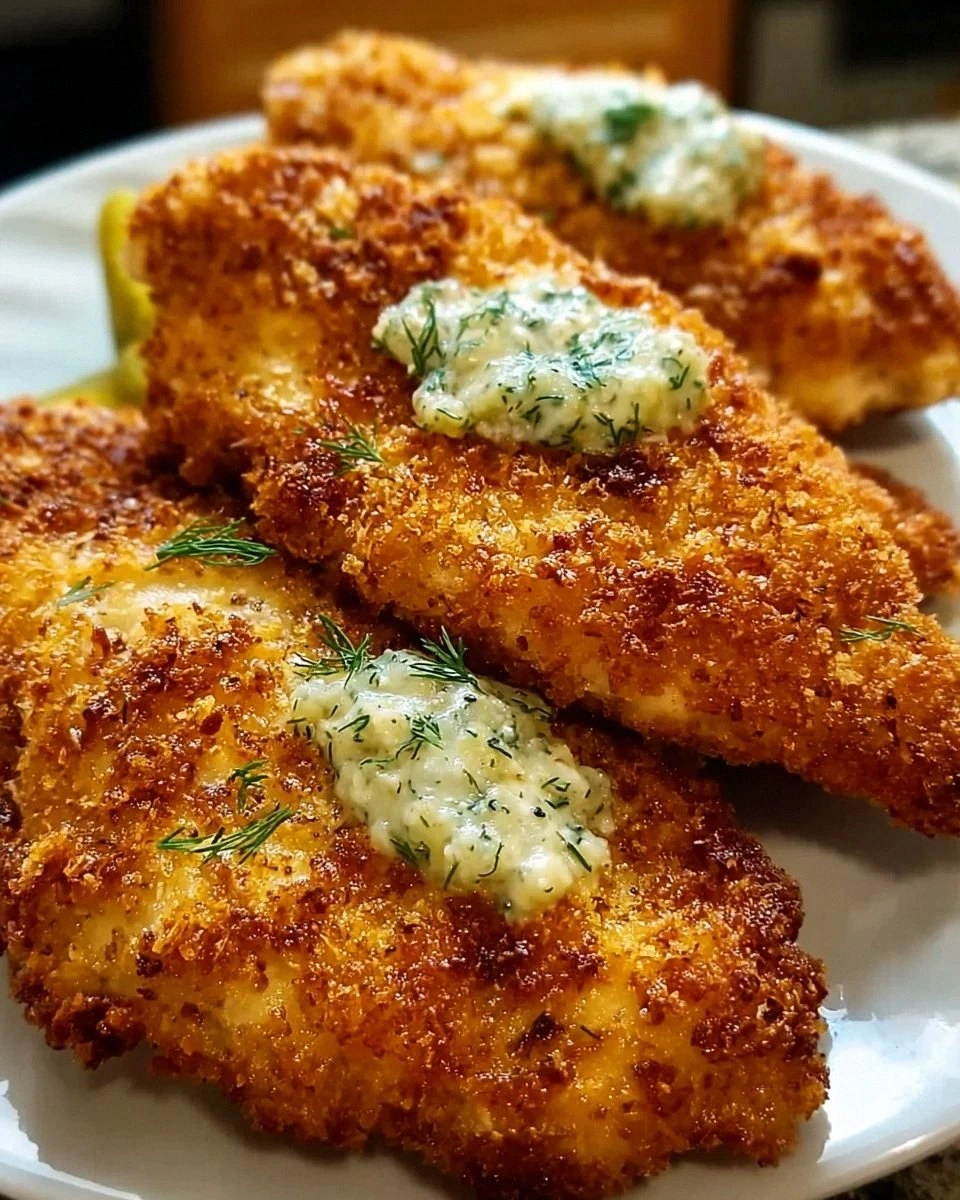
Plate the chicken alongside the crispy pickle rounds, garnish with a handful of chopped fresh dill and a sprinkle of extra Parmesan. Serve immediately with a side of creamy ranch or a cool cucumber salad. Picture yourself pulling this out of the oven, the whole kitchen smelling incredible, and your guests leaning in for that first bite – pure, unadulterated joy.
That's it — you did it. But hold on, I've got a few more tricks that'll take this to another level, like a secret sauce you can drizzle over leftovers or a quick way to repurpose the crust for a crunchy topping on soups.
Insider Tricks for Flawless Results
The Temperature Rule Nobody Follows
Never start with a cold pan. Preheat your skillet for at least two minutes before adding oil; a hot surface guarantees that first sizzle is loud and decisive, sealing the coating instantly. I once tried to save time by adding the chicken to a lukewarm pan, and the result was a soggy, pale crust that fell apart when I tried to flip it. The rule of thumb: medium‑high heat, oil shimmering, and you’ll hear that “snap” sound that signals perfection.
Why Your Nose Knows Best
Your sense of smell is a far better indicator than a timer when it comes to the perfect golden color. When the coating begins to emit a nutty, toasted aroma, you’re within seconds of the ideal finish. Trust that nose cue – if it smells like toasted almonds, you’re golden. If it starts to smell acrid, you’ve overshot the mark and need to pull the pan off the heat immediately.
The 5‑Minute Rest That Changes Everything
After the oven finish, let the chicken rest for at least five minutes. This short pause allows the juices to settle back into the fibers, preventing a dry bite. I once served the chicken straight from the oven, and the first bite was a little too “wet” – the coating softened, and the flavor was muted. Those five minutes are a game‑changer for texture and flavor retention.
Egg‑Buttermilk Ratio Magic
A common mistake is using straight eggs; the lack of acidity can make the coating less adherent. The buttermilk adds a gentle tang that not only tenderizes the chicken but also creates a slight chemical reaction with the flour, forming a stronger bond. If you’re out of buttermilk, mix one tablespoon of white vinegar or lemon juice into a cup of milk and let it sit for five minutes – you’ll get the same effect.
The Crunch‑Preserving Freezer Trick
If you need to prep ahead, coat the chicken and pickle slices, then place them on a baking sheet and freeze for 30 minutes before transferring to a zip‑top bag. When you’re ready to cook, you can go straight to the pan – the frozen coating will crisp up faster, preserving that coveted crunch. I tried this once for a party, and the results were indistinguishable from fresh‑made, which saved me a ton of last‑minute stress.
Creative Twists and Variations
This recipe is a playground. Here are some of my favorite ways to switch things up:
Spicy Sriracha Kick
Add a tablespoon of sriracha to the egg wash and sprinkle a pinch of chili flakes into the breadcrumb mix. The heat will cut through the richness of the Parmesan, giving you a bold, tongue‑tingling bite that’s perfect for those who love a little fire.
Herb‑Infused Delight
Swap the dried oregano for a blend of fresh thyme, rosemary, and parsley. Finely chop the herbs and fold them into the breadcrumb‑Parmesan mixture. The fresh herb aroma adds a garden‑fresh dimension that pairs beautifully with the dill pickle.
Southern Fried Twist
Replace the panko with seasoned cornmeal and add a splash of hot sauce to the buttermilk. This creates a Southern‑style crust that’s gritty, flavorful, and perfect for serving with collard greens.
Cheesy Overload
Mix in shredded mozzarella or cheddar into the breadcrumb blend for a gooey, melty interior. The extra cheese stretches with each bite, turning the dish into a comfort‑food extravaganza.
Low‑Carb Almond Flour Version
Swap the all‑purpose flour for almond flour and use crushed pork rinds instead of panko. The result is a low‑carb, high‑protein crust that still delivers that satisfying crunch without the carbs.
Storing and Bringing It Back to Life
Fridge Storage
Place cooled chicken pieces in an airtight container lined with a paper towel to absorb excess moisture. They’ll stay fresh for up to three days. Reheat in a preheated 375°F oven for 10 minutes; the crust will revive nicely.
Freezer Friendly
After the final bake, let the chicken cool completely, then freeze on a parchment sheet before transferring to a zip‑top bag. They’ll keep for up to two months. To reheat, bake directly from frozen at 400°F for 15‑20 minutes, adding a splash of water before the final five minutes to steam the interior back to juiciness.
Best Reheating Method
For ultimate crispness, use a hot skillet: add a thin layer of oil, heat over medium‑high, and sear each side for 2‑3 minutes. The quick pan‑sear restores the crunch while keeping the interior moist. If you’re in a hurry, a microwave works but you’ll lose the signature crunch.