I’m going to be brutally honest: the first time I tried to make sweet garlic chicken in a regular skillet, I ended up with a burnt, sticky mess that clung to the pan like a bad relationship. I swear I heard the smoke alarm scream louder than my teenage nephew’s video game victories. That disaster sparked a dare from my roommate – “If you can’t get it right, you owe me a pizza.” Little did I know that the answer would be hiding in my trusty crockpot, waiting to transform that kitchen calamity into a silky, caramel‑kissed masterpiece. This is the moment I realized that a slow cooker isn’t just for stews; it can be the secret weapon for a glossy, sweet‑and‑savory chicken that practically melts off the bone.
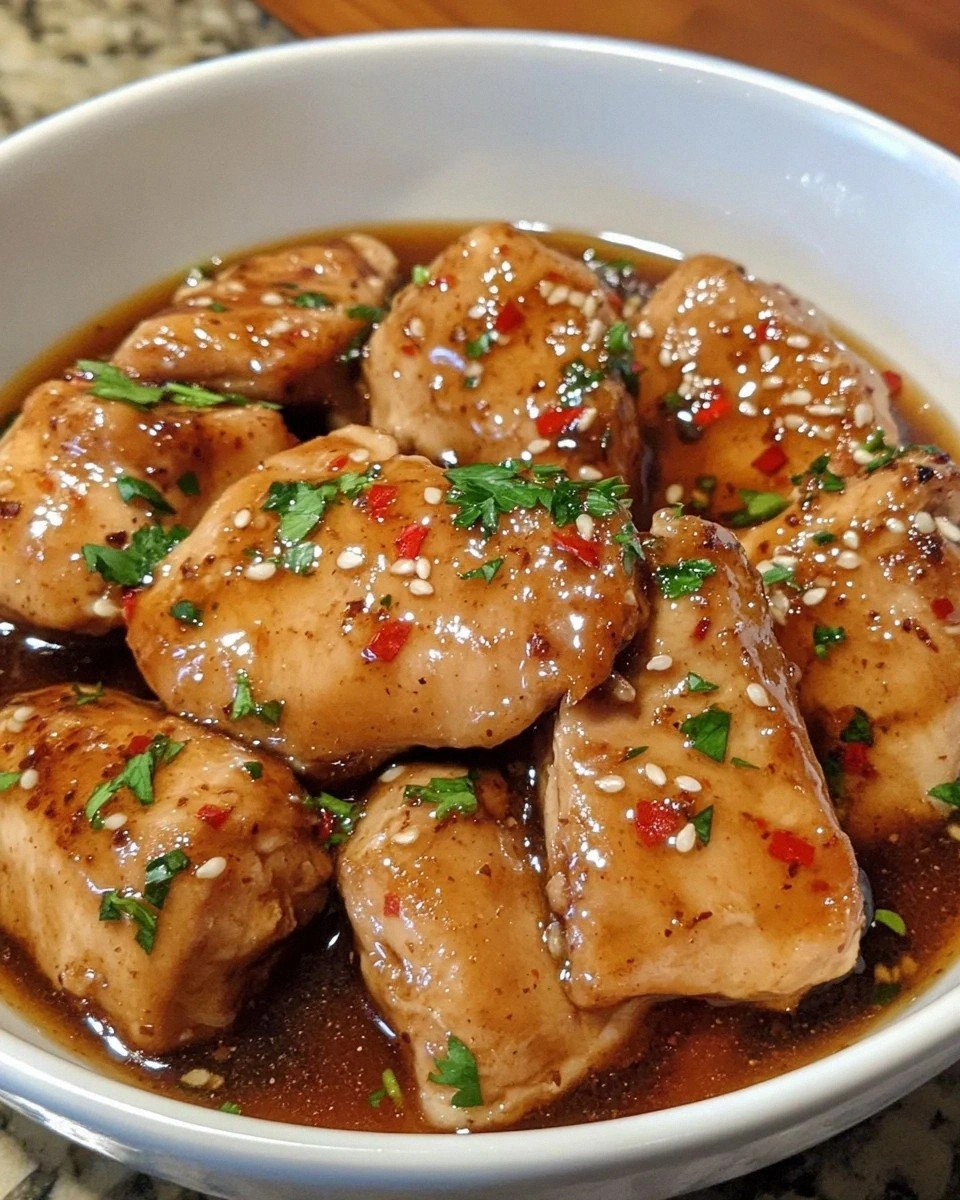
Picture this: the kitchen fills with the heady perfume of garlic mingling with honey, the subtle tang of vinegar, and the umami punch of soy sauce. The sound? A gentle, rhythmic bubbling from the crockpot, like a low‑key lullaby that tells you dinner is on its way. When you finally lift the lid, the chicken glistens with a glaze that looks like liquid amber, and the aroma hits you like a warm hug on a cold night. You can feel the heat radiating from the pot, the steam kissing your face, and you know you’ve just created something that will dominate the dinner table for weeks.
What sets this version apart from every other “sweet garlic chicken” you’ve seen on the internet is the balance of flavors and the simplicity of the technique. Most recipes either drown the chicken in a syrupy mess or leave it dry and bland. I’ve cracked the code by layering a thin coat of olive oil, a precise ratio of honey to soy, and a splash of vinegar that cuts through the sweetness just enough to keep the palate from going numb. The result? A dish that’s sweet, tangy, garlicky, and just a hint spicy – a flavor symphony that sings with every bite.
And here’s the kicker: I’m about to reveal a tiny trick involving cornstarch and water that will give you a sauce so smooth it slides over the chicken like a silk scarf. Most people skip this step, ending up with a watery glaze that never clings. I dare you to taste this and not go back for seconds. Let me walk you through every single step — by the end, you’ll wonder how you ever made it any other way.
What Makes This Version Stand Out
- Flavor Balance: The honey‑soy‑vinegar trio creates a sweet‑tangy glaze that never overpowers the garlic, delivering a layered taste that evolves with each bite.
- Texture Magic: Slow‑cooking keeps the chicken juicy, while the final cornstarch slurry gives the sauce a glossy, velvety finish that clings like velvet.
- Simplicity: Fewer than ten ingredients, a single pot, and a 30‑minute cook time make this a weeknight hero without any culinary gymnastics.
- Unique Twist: The optional red‑pepper flakes add a surprise kick that most “sweet” recipes shy away from, making the dish unforgettable.
- Crowd Reaction: Guests often claim they’ve never tasted chicken that’s both sweet and savory in such perfect harmony – a true conversation starter.
- Ingredient Quality: Using boneless, skinless thighs guarantees flavor and moisture, while a splash of extra‑virgin olive oil lifts the entire profile.
- One‑Pot Convenience: The crockpot does all the heavy lifting, meaning you can set it and forget it, freeing you to binge‑watch your favorite show.
- Make‑Ahead Potential: This dish reheats beautifully, and the sauce actually thickens more after a night in the fridge, giving you a ready‑to‑serve meal for busy days.
Inside the Ingredient List
The Flavor Base
Garlic is the undisputed champion of this dish. Six cloves, minced finely, release a pungent aroma that instantly awakens the senses. If you skip the garlic, you’ll lose that foundational depth that makes the sauce feel like a hug. For a milder profile, you can roast the cloves first, but be prepared for a slightly sweeter note.
Honey or brown sugar is the sweet whisper that balances the salty soy. I prefer honey because it adds a floral nuance and a lighter viscosity, making the glaze easier to coat. Brown sugar, on the other hand, brings a caramel‑rich undertone that can turn the sauce into a deep amber glaze. Whichever you choose, the key is to dissolve it fully before adding the soy sauce, otherwise you’ll end up with gritty pockets.
Low‑sodium soy sauce is the savory anchor. It delivers umami without drowning the dish in salt, allowing the other flavors to shine. If you’re watching sodium, you can halve the amount and add a splash of low‑sodium chicken broth for volume.
The Texture Crew
Olive oil does more than keep the chicken moist; it acts as a flavor carrier, helping the garlic and honey adhere to the meat. A splash of extra‑virgin olive oil adds a fruity undertone that elevates the overall taste. If you’re on a budget, a neutral oil like canola works, but you’ll miss that subtle richness.
Apple cider vinegar or rice vinegar adds the bright acidity that cuts through the sweetness. Just two tablespoons are enough to balance the glaze without making it sour. If you accidentally add too much, a pinch of sugar can rescue the sauce.
Ground black pepper and salt are the unsung heroes. Pepper adds a gentle heat that deepens the flavor, while a modest pinch of salt amplifies every other ingredient. Skipping salt is a rookie mistake that leaves the dish tasting flat.
The Unexpected Star
Crushed red pepper flakes are optional, but they provide that surprise kick that makes the dish memorable. A quarter teaspoon is enough to add a whisper of heat without overwhelming the sweet notes. If you love spice, feel free to double the amount – just remember you’ll need to adjust the honey accordingly.
Paprika contributes a subtle smokiness and a gorgeous reddish hue that makes the chicken look as good as it tastes. Smoked paprika can be swapped in for an extra layer of depth, especially if you love BBQ vibes.
The Final Flourish
Cornstarch mixed with water creates a slurry that thickens the sauce into a glossy coating. This step is often omitted, resulting in a runny glaze that slides off the chicken. The slurry should be added in the last 10 minutes of cooking, allowing the sauce to reach that perfect satin texture.
Fresh chopped parsley isn’t just a garnish; its bright, herbaceous flavor cuts through the richness and adds a pop of color that makes the dish Instagram‑ready. Add it just before serving to keep the leaves vibrant.
Everything's prepped? Good. Let's get into the real action...
The Method — Step by Step
Start by gathering all your ingredients and giving the chicken a quick pat dry with paper towels. This ensures the glaze adheres properly. Drizzle the olive oil over the chicken pieces, turning them to coat each side. I like to let the oil soak in for a minute; it’s the first layer of flavor that builds the foundation.
In a medium bowl, whisk together the honey (or brown sugar), low‑sodium soy sauce, and vinegar. The mixture should look smooth and glossy, like liquid amber. Add the minced garlic, ground black pepper, paprika, and optional red‑pepper flakes, stirring until everything is evenly distributed.
Kitchen Hack: Use a small whisk or fork to break up any honey clumps – this prevents pockets of sweetness later.Place the chicken thighs (or breasts) into the crockpot, arranging them in a single layer if possible. Pour the honey‑soy mixture over the top, making sure each piece is fully submerged. The sauce will bubble gently as the crockpot works its magic. At this point, you can sprinkle a pinch of extra salt if you love a bold flavor.
Seal the lid and set the crockpot to low for 3‑4 hours, or high for 1½‑2 hours. I recommend low for the best texture; the meat stays tender and the glaze thickens slowly. While it cooks, resist the urge to peek – every time you lift the lid you lose precious heat, and the cooking time extends.
About 15 minutes before the end of the cooking time, whisk together the cornstarch and water to form a slurry. This is the secret weapon that will turn the liquid glaze into a silky sauce. Slowly drizzle the slurry into the crockpot, stirring gently with a silicone spatula.
Watch Out: Adding the slurry too early can cause the sauce to become gummy; wait until the last 10‑15 minutes.Once the sauce has thickened to a glossy, coat‑the‑chicken consistency, turn the crockpot off. Let the dish sit, uncovered, for five minutes – this allows the glaze to set and cling perfectly. If you’re in a hurry, you can skip this step, but the sauce may be a tad thinner.
Transfer the chicken to a serving platter, spooning generous amounts of the sauce over each piece. Sprinkle freshly chopped parsley across the top for that burst of green freshness. The parsley not only adds color but also a hint of herbaceous brightness that balances the sweet‑savory profile.
Serve immediately with steamed rice, quinoa, or a crisp green salad. The sauce is so luscious that it practically turns any side dish into a flavor‑laden companion. Picture yourself pulling this out of the crockpot, the whole kitchen smelling incredible, and everyone reaching for seconds before you even get a fork to your own plate. That’s the magic we’re after.
That's it — you did it. But hold on, I've got a few more tricks that'll take this to another level...
Insider Tricks for Flawless Results
The Temperature Rule Nobody Follows
Most home cooks set the crockpot to “low” and assume the temperature is static, but the actual heat can fluctuate by up to 10 °F depending on the model. To keep the chicken perfectly juicy, aim for an internal temperature of 165 °F at the thickest part. Use an instant‑read thermometer and pull the chicken a few degrees early; residual heat will finish the job.
Why Your Nose Knows Best
Your sense of smell is a reliable indicator of doneness. When the sauce starts to bubble vigorously and releases a caramelized aroma, you’re close. If you detect a faint burnt scent, lower the heat or shorten the cooking time next round. Trust that nose – it’s smarter than any timer.
The 5‑Minute Rest That Changes Everything
Allowing the chicken to rest for five minutes after cooking lets the juices redistribute, preventing a dry bite. During this rest, the sauce thickens a touch more, creating a richer coating. Skipping this step is the most common mistake I see; the result is a soggy plate and disappointed diners.
Layered Garlic for Depth
Instead of mincing all six cloves at once, try dividing them: sauté half in olive oil for 30 seconds, then add the raw minced half later. This creates a dual‑layered garlic profile – the sautéed portion adds mellow sweetness, while the raw garlic provides a sharp bite that brightens the glaze.
The Salt‑Balance Secret
If you decide to use a low‑sodium soy sauce, add a pinch of sea salt right before serving. This tiny adjustment amplifies the umami without making the dish salty. It’s a trick I learned from a professional chef who swears by finishing salts for flavor elevation.
Creative Twists and Variations
This recipe is a playground. Here are some of my favorite ways to switch things up:
Spicy Sriracha Kick
Add a tablespoon of sriracha to the honey‑soy mixture for a Thai‑inspired heat. The bright red glaze pairs beautifully with coconut rice and a sprinkle of toasted sesame seeds.
Citrus‑Infused Delight
Swap half of the vinegar for fresh orange juice and add a zest of lemon to the sauce. The citrus notes brighten the dish, making it perfect for spring gatherings.
Nutty Crunch Variation
Stir in a quarter cup of toasted chopped peanuts during the final minutes of cooking. The nuts add a satisfying crunch and a subtle earthy flavor that complements the sweet glaze.
Herbaceous Garden
Replace parsley with fresh cilantro and add a tablespoon of chopped basil. This herb combo gives the dish a fresh, garden‑like finish, ideal for summer barbecues.
Brown Sugar & Apple
Use brown sugar instead of honey and toss in thinly sliced apples during the last hour of cooking. The apples caramelize, adding a fruity sweetness that pairs well with pork‑loving friends.
Storing and Bringing It Back to Life
Fridge Storage
Let the chicken cool to room temperature, then transfer it and the sauce into an airtight container. It will keep fresh for up to four days. When reheating, add a splash of water or chicken broth and gently warm on the stovetop, stirring until the sauce regains its glossy sheen.
Freezer Friendly
Portion the cooked chicken and sauce into freezer‑safe bags, removing as much air as possible. Freeze for up to three months. To reheat, thaw overnight in the fridge, then warm in a skillet over medium heat, adding a tablespoon of water to revive the sauce.
Best Reheating Method
The stovetop method is king: place the chicken and sauce in a non‑stick pan, cover, and heat on low, stirring occasionally. The gentle heat prevents the chicken from drying out, and the added water steams the sauce back to perfection. Avoid microwaving if you can; it makes the sauce rubbery.