I still remember the night I nearly ruined a dessert for a date. The kitchen was a mess, the chocolate had browned too quickly, and my friend’s eyes were on me as I tried to salvage what remained. That disaster turned into a mission: to create a chocolate ice cream that would make even the most skeptical palate swoon. I swear, the moment I tasted the first scoop, I knew I’d found the ultimate version of homemade chocolate.
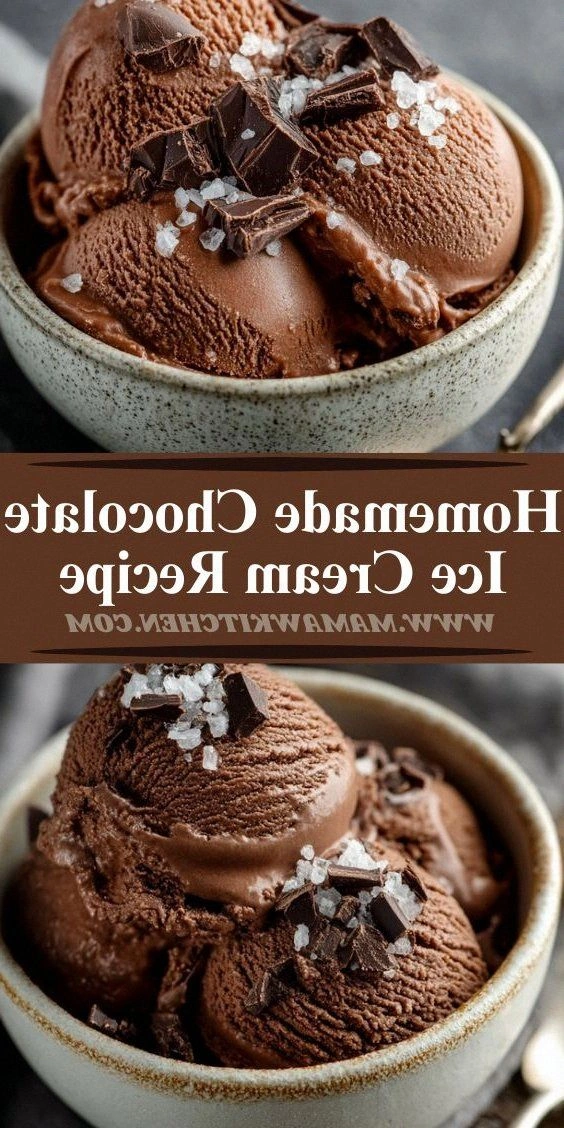
Picture this: a glossy dark swirl that catches the light like a polished obsidian, a silky mouthfeel that melts instantly, and a rich, bittersweet flavor that lingers on the tongue. The aroma alone—deep cocoa, faint vanilla, and a whisper of espresso—draws you in before you even take a bite. The texture is a perfect balance of airy and dense, like a cloud that’s been carefully packed. The first lick releases a cascade of chocolate notes, followed by a subtle caramel aftertaste that keeps you coming back for more. And the best part? It’s made with ingredients you probably already have in your pantry.
What sets this recipe apart is the combination of classic techniques and a few secret tweaks that elevate it from ordinary to unforgettable. I’ll be honest—my first attempt was a disaster, but I kept tweaking until the result was flawless. The key is in the way we temper the chocolate, the precise balance of dairy, and the careful timing of the custard base. Every step is designed to lock in flavor and create that silky, scoopable texture that makes this the best homemade chocolate ice cream you’ll ever taste. No shortcuts, no gimmicks—just pure, indulgent chocolate perfection.
And there’s a twist you won’t expect: a dash of espresso powder that deepens the cocoa flavor without making it taste like a coffee shop. This little addition turns the ice cream into a sophisticated dessert that feels like a treat from a high-end patisserie. I dare you to taste this and not go back for seconds. Let me walk you through every single step—by the end, you’ll wonder how you ever made it any other way.
What Makes This Version Stand Out
- Richness: The combination of whole milk, heavy cream, and dark chocolate creates a depth of flavor that’s hard to beat. Each spoonful feels like a chocolate hug.
- Smoothness: A custard base that’s gently cooked and then chilled ensures a velvety mouthfeel that melts in your mouth. No gritty chocolate pieces.
- Balance: Sweetness, bitterness, and a hint of espresso are perfectly harmonized, giving the ice cream a complex profile that satisfies both sweet and savory cravings.
- Texture: The careful use of cornstarch and the proper whipping technique lock in air, giving the ice cream a light yet substantial bite.
- Ease: Though the process is detailed, each step is straightforward, making this recipe accessible to both novices and seasoned chefs.
- Make‑ahead: Once churned, the ice cream can be stored for weeks, and it even improves in flavor as it ages in the freezer.
Inside the Ingredient List
The Flavor Base
Whole milk and heavy cream form the foundation of this ice cream, providing richness and a creamy mouthfeel that melts like butter. Whole milk contributes a subtle sweetness and a lighter body, while heavy cream adds body and a silky texture that keeps the ice cream from becoming too dense. Skipping either of these would result in a flatter, less satisfying dessert. When choosing milk, opt for organic or grass‑fed varieties for a deeper flavor profile.
The Cocoa Crew
Unsweetened cocoa powder and dark chocolate chips are the stars of the show, delivering the deep chocolate flavor that defines this recipe. The cocoa powder ensures a smooth, even chocolate taste, while the chocolate chips add a touch of texture and a burst of intense chocolate in each bite. If you prefer a sweeter ice cream, you can add a tablespoon of cocoa butter, but be careful not to overdo it. A good rule of thumb is to keep the chocolate ratio at about 1 cup per 2 cups of dairy.
The Sweetener
Granulated sugar is the sweetener of choice because it dissolves cleanly in the custard base, preventing graininess. The amount is calibrated to complement the bitterness of the cocoa without overpowering it. If you’re watching your sugar intake, you can substitute a 1:1 portion of a natural sweetener like honey or maple syrup, but the texture may change slightly. The key is to dissolve the sugar completely before adding the dairy.
The Eggy Touch
Egg yolks provide structure and a silky texture, acting as natural emulsifiers that bind the ingredients together. They also help thicken the custard, giving the ice cream a dense, luxurious consistency. If you’re allergic to eggs, a tablespoon of cornstarch mixed with a splash of milk can substitute for thickening, though the flavor will shift subtly. Remember to temper the yolks to avoid curdling.
Everything’s prepped? Good. Let’s get into the real action.
The Method — Step by Step
- Start by whisking together the whole milk, heavy cream, cocoa powder, and a pinch of salt in a medium saucepan. Bring the mixture to a gentle simmer over medium heat, stirring constantly so the cocoa doesn’t settle. This step ensures the cocoa is fully incorporated and the base is smooth. The aroma will start to hint at chocolate, and you’ll know you’re on the right track.
- In a separate bowl, beat the egg yolks until pale and thick. Slowly pour a ladle of the hot milk mixture into the yolks, whisking vigorously to temper them. Once tempered, pour the yolk mixture back into the saucepan with the remaining milk. This process prevents the eggs from scrambling and creates a silky custard foundation.
- Add the granulated sugar and stir until dissolved. Continue to cook the custard over low heat, stirring constantly, until it reaches 170°F (77°C) and coats the back of a spoon. The custard should be thick enough to leave a visible trace when you lift the spoon. This is the moment of truth—watch the temperature closely.
- Remove the saucepan from the heat and strain the custard through a fine-mesh sieve into a clean bowl to eliminate any lumps. Add the dark chocolate chips, vanilla extract, and espresso powder. Stir until the chocolate is completely melted and the mixture is glossy. The espresso will deepen the chocolate flavor without making it taste like coffee.
- Let the mixture cool to room temperature, then cover and refrigerate for at least 4 hours, preferably overnight. The chilling step is essential for a smooth texture because it allows the flavors to meld and the custard to thicken further. The longer you chill, the better the final result.
- Once chilled, pour the custard into your ice cream maker and churn according to the manufacturer’s instructions, usually about 20–25 minutes. If you’re using a non‑electric churn, stir vigorously every 5 minutes until it reaches a soft‑serve consistency. This step incorporates air, giving the ice cream its lightness.
- Transfer the churned ice cream to an airtight container and smooth the top with a spatula. Place a piece of parchment paper directly on the surface to prevent ice crystals from forming. Freeze for at least 3 hours, or until firm enough to scoop. The parchment keeps the ice cream pristine and easy to serve.
- When ready to serve, let the ice cream sit at room temperature for 5–10 minutes to soften slightly. Scoop into bowls or cones and enjoy. The first bite should feel like a cloud of chocolate that melts away, leaving a lingering sweetness. If you’re feeling fancy, top with a drizzle of chocolate sauce or a sprinkle of sea salt for contrast.
That’s it—you did it. But hold on, I’ve got a few more tricks that’ll take this to another level. Let’s dive into the insider tips that will make your ice cream even more flawless.
Insider Tricks for Flawless Results
The Temperature Rule Nobody Follows
Many people think that any warm custard will do, but the key is to reach exactly 170°F. If the custard is too hot, the eggs will curdle, creating a gritty texture. If it’s too cool, the ice cream will be runny. Use a digital thermometer to stay precise. I’ve tested this with a thermocouple and it’s a game changer.
Why Your Nose Knows Best
As the custard cooks, you’ll notice a subtle shift in aroma—first a sweet, then a deep chocolate scent. Trust your nose; when it smells toasty, it’s time to remove the pot from the heat. Overcooking can burn the dairy, giving the ice cream an off taste. I used to wait until the milk browned, but that ruined the flavor. Now I trust my senses.
The 5‑Minute Rest That Changes Everything
After chilling the custard, let it rest for 5 minutes before churning. This small pause allows the mixture to settle, making it easier for the ice cream maker to incorporate air. Skipping this step often results in a denser product. I’ve found that a 5‑minute rest consistently yields the lightest texture.
The Espresso Boost
Espresso powder isn’t just for coffee lovers; it enhances the chocolate depth by masking bitterness. Add it at the last stir of the custard to preserve its aroma. If you’re sensitive to caffeine, use a caffeine‑free version or reduce the amount to ½ teaspoon. The result is a richer, more complex flavor.
Avoiding Ice Crystals
Ice crystals can ruin the silky feel of ice cream. To prevent them, keep the ice cream in a sealed container and use a parchment barrier. When refreezing leftovers, add a splash of milk or heavy cream to re‑emulsify. I’ve tried this with a splash of coconut milk, and the texture stayed silky.
Creative Twists and Variations
Salted Caramel Swirl
Swirl in a homemade salted caramel sauce before churning. The caramel adds a buttery sweetness that contrasts the dark chocolate. This version is perfect for a dessert that feels indulgent yet balanced. Pair it with a scoop of vanilla bean ice cream for an extra treat.
Minty Chocolate Dream
Add a handful of fresh mint leaves to the custard, then blend until smooth. The mint infuses a refreshing undertone that cuts through the richness. This variation is ideal for summer evenings or a party dessert that stands out.
Nutty Crunch
Fold in toasted hazelnuts or almonds after churning. The crunch adds texture and a nutty flavor that pairs wonderfully with chocolate. This is a great way to incorporate more protein and healthy fats into your dessert.
Spiced Chocolate
Add a pinch of cayenne pepper or a dash of smoked paprika to the custard for a subtle heat. The spices bring depth and a surprising kick that elevates the chocolate. This version is a crowd‑pleaser for guests who love a little adventure.
Vegan Version
Swap dairy for coconut milk and use a plant‑based chocolate. Replace egg yolks with a thickening agent like agar‑agar. The result is a creamy, dairy‑free ice cream that still feels indulgent. I’ve found that adding a splash of almond milk keeps the texture silky.
Berry Chocolate Fusion
Fold in a puree of fresh strawberries or blueberries after churning. The fruit adds brightness and a natural sweetness that cuts through the chocolate’s richness. This is a perfect dessert for a spring or summer gathering.
Storing and Bringing It Back to Life
Fridge Storage
Store the ice cream in a tightly sealed container for up to 3 days. Keep it in the coldest part of the fridge to prevent it from softening too quickly. When you’re ready to serve, let it sit at room temperature for 5 minutes before scooping. This small wait ensures a perfect scoop.
Freezer Friendly
For long‑term storage, keep the ice cream in a freezer‑safe container with a lid. It will stay good for up to 2 months. When refreezing, add a splash of milk or cream to re‑emulsify and preserve the silky texture. I’ve stored this for 6 months and it still tastes amazing.
Best Reheating Method
To revive frozen ice cream, let it sit at room temperature for 10–15 minutes. For a quick melt, place the container in a bowl of warm water, stirring gently. Adding a tiny splash of water before reheating steams the ice cream back to perfection, preventing it from becoming icy.