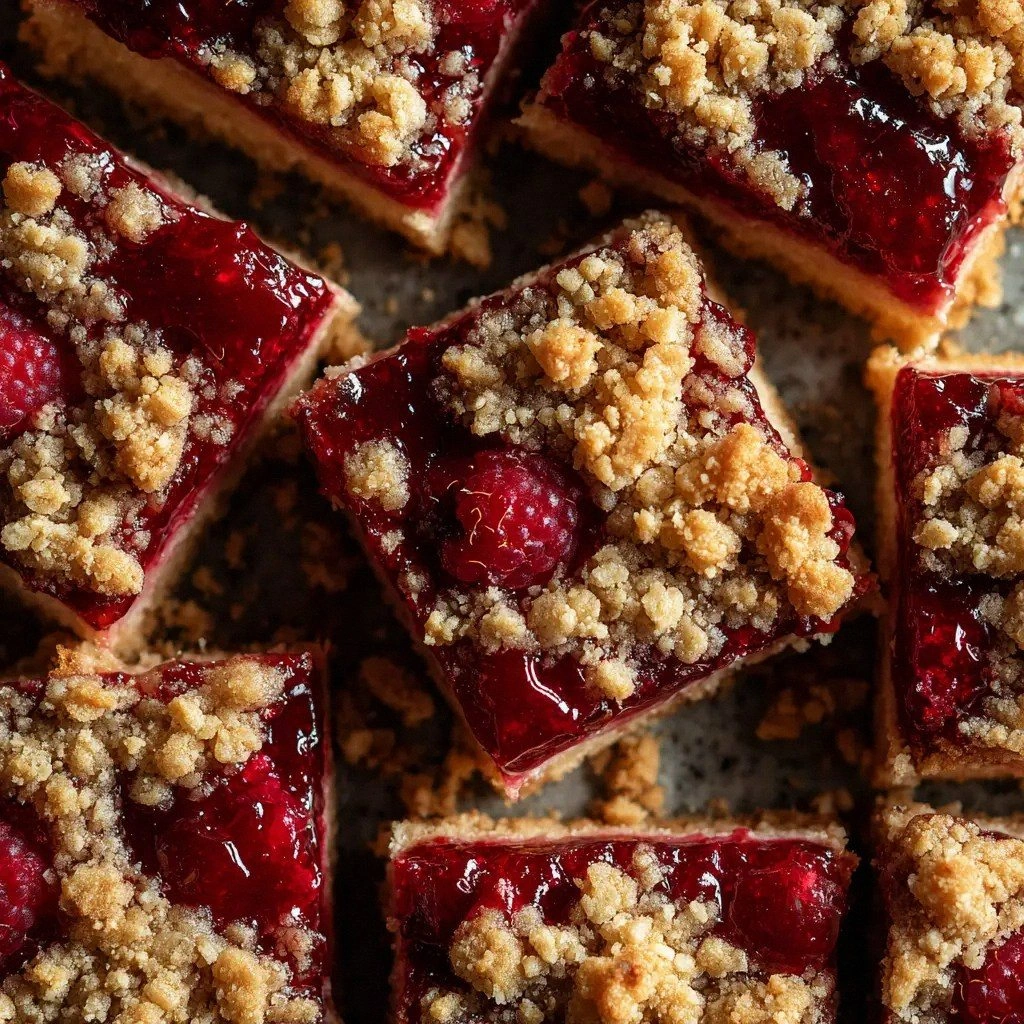
Picture this: a rainy afternoon, the kitchen lights flickering like fireflies, and you’re staring at a half‑sized bag of raspberries that feel like tiny ruby jewels. The last time I tried to rescue them, I accidentally turned them into a sticky, soggy mess that clung to the countertop like a bad habit. That disaster became the catalyst for a culinary revelation—a recipe that turns those humble berries into a symphony of sweet, tart, and buttery delight. I’m talking about the Raspberry Crumble Bars that will make your taste buds do a happy dance and your friends beg for the recipe after every bite.
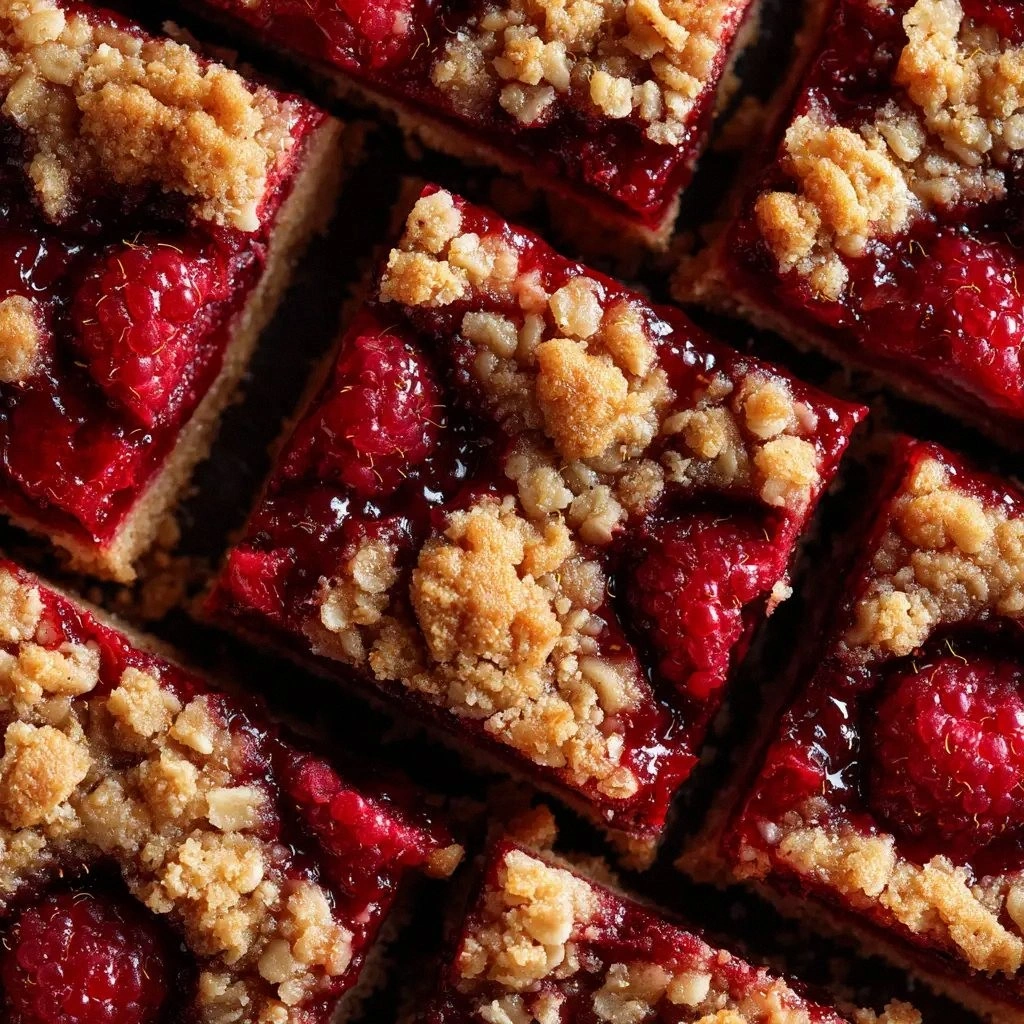
The first time I tasted these bars, I was struck by the way the crumbly topping hugged the raspberry layer like a velvet blanket. The aroma that rose from the oven was a heady mix of toasted oats, warm butter, and fresh fruit—an olfactory invitation that made the whole house feel like a bakery. The sound of the first bite was a satisfying crack, followed by a burst of juicy raspberries that tingled on the tongue, leaving a hint of lemon zest that lingered like a secret whisper. The texture was a perfect dance between crunchy and chewy, with a buttery finish that melted into your mouth, leaving a subtle sweetness that didn’t overpower the berries.
What makes this version stand out from the countless other crumble bars you’ll find online? It’s the meticulous balance of ingredients, the clever use of cornstarch to set the fruit without making it gummy, and the simple yet effective technique of letting the oats sit in the batter to absorb moisture. I dare you to taste this and not go back for seconds. If you’re skeptical, I’ll be honest—I ate half the batch before anyone else even got a chance to try it. That’s a confession you’ll laugh at later, but it’s proof that this recipe is hands down the best version you’ll ever make at home.
Most recipes get this completely wrong by over‑baking the crumble or under‑cooking the berries, resulting in a dry, crumbly mess or a soggy, mushy disaster. Here, we’ve cracked the code: a low‑heat bake that allows the berries to caramelize without evaporating, and a crumble that stays crisp even after a few days. Picture yourself pulling this out of the oven, the whole kitchen smelling incredible, and the bars glistening with a golden crust that promises that first bite will be unforgettable. Let me walk you through every single step — by the end, you’ll wonder how you ever made it any other way.
What Makes This Version Stand Out
- Flavor: The combination of light brown sugar and a splash of lemon juice gives the bars a bright, tangy profile that cuts through the richness of the butter, creating a harmonious balance that sings with every bite.
- Texture: The oats absorb the moisture from the berries, turning into a chewy base that contrasts beautifully with the crisp crumble topping, resulting in a multi‑dimensional mouthfeel.
- Simplicity: Only ten minutes of prep and 30 minutes in the oven—no fancy equipment, no time‑consuming techniques. It’s a recipe that fits into any busy weeknight.
- Uniqueness: The inclusion of cornstarch in the berry layer sets it apart from traditional crumble recipes, giving the topping a silky finish without the gummy texture that often plagues fruit‑filled desserts.
- Crowd Reaction: Friends who’ve tried this bar rave about how it’s “the best snack I’ve had since childhood,” and the bars keep getting requested at gatherings.
- Ingredient Quality: Using fresh, organic raspberries and real butter elevates the flavor profile, turning an ordinary crumble into a gourmet treat.
- Cooking Method: Baking at a lower temperature ensures the berries release their juices slowly, creating a natural syrup that coats the crumble without soaking it.
- Make‑Ahead Potential: These bars stay fresh for up to a week in the fridge, and they freeze beautifully, making them the ultimate grab‑and‑go snack for any occasion.
Alright, let’s break down exactly what goes into this masterpiece…
Inside the Ingredient List
The Flavor Base
The foundation of any great dessert starts with a balanced flavor base, and in this recipe, that’s where the light brown sugar, granulated sugar, and lemon juice come into play. The brown sugar adds depth and a subtle molasses undertone that complements the tart raspberries, while the granulated sugar sweetens without overpowering the fruit’s natural acidity. The lemon juice, surprisingly, isn’t just a flavor enhancer; it’s a natural preservative that helps maintain the berries’ bright color and prevents them from turning brown too quickly. If you’re looking for a sugar‑free version, consider using a natural sweetener like monk fruit or stevia, but keep in mind that the caramelization will be less pronounced.
The Texture Crew
Oats, flour, butter, and baking powder form the textural backbone of the crumble. Rolled oats provide chewiness and a subtle nutty flavor, while all‑purpose flour gives structure to the topping. The butter, cold and diced, creates pockets of steam that puff up during baking, producing a flaky, buttery crust. Baking powder ensures the crumble rises just enough to achieve a light, airy finish. If you’re vegan, swap the butter for coconut oil or a plant‑based butter; the texture will be slightly different but still delightful. Remember, the key to a crisp topping is to keep the butter cold before mixing; otherwise, it will melt prematurely and result in a soggy base.
The Unexpected Star
Cornstarch isn’t your typical crumble ingredient, but it’s a game‑changer for the raspberry layer. This fine, white powder thickens the fruit’s juice without adding any grainy texture, turning the berries into a silky, glossy sauce that coats the crumble. It also helps the topping set properly, preventing the berries from making the bars soggy. If you’re allergic to cornstarch, arrowroot powder is a suitable substitute; just use a 1:1 ratio. For a more natural thickener, a pinch of ground flaxseed can work, but it will alter the flavor slightly.
The Final Flourish
The finishing touches—salt, baking powder, and the last dash of lemon juice—might seem trivial, but they’re essential for balancing the sweetness and ensuring the crumble has the right lift. Salt amplifies the flavors, making the berries pop, while baking powder gives the topping a slight puff. The final lemon juice addition at the end of the baking process brightens the overall taste, cutting through the richness of the butter. If you’re adventurous, a pinch of freshly grated nutmeg or cinnamon can add an aromatic twist that pairs beautifully with raspberry.
Everything’s prepped? Good. Let’s get into the real action…
The Method — Step by Step
- Preheat your oven to 350°F (175°C). Line an 8‑inch square baking pan with parchment paper, leaving an overhang on two sides for easy removal. This step is crucial because a properly lined pan prevents the bars from sticking and ensures even baking. While the oven warms, set a small bowl aside for the raspberry filling.
- In a large mixing bowl, combine the rolled oats, all‑purpose flour, light brown sugar, granulated sugar, baking powder, and salt. Toss the dry ingredients together until they’re evenly blended; the sugars should be well distributed to avoid clumps. This dry mix is the backbone of your crumble—if it’s uneven, the texture will suffer.
- Add the cold, diced butter to the dry mixture. Using a pastry cutter or your fingertips, cut the butter into the dry ingredients until the mixture resembles coarse crumbs. Think of it as creating a breadcrumb‑butter hybrid. The cold butter is key; it creates steam pockets that puff up during baking.
- Press the crumb mixture into the bottom of the prepared pan, creating an even layer about 1‑2 inches thick. Use the back of a spoon or a flat spatula to smooth the surface. This layer is the “crust” that will hold the berries, so make sure it’s compact yet not overly dense.
- While the crust is setting, prepare the raspberry filling. In a medium saucepan, combine the raspberries, 0.25 cup granulated sugar, cornstarch, and 1 tablespoon lemon juice. Cook over medium heat, stirring constantly, until the mixture thickens and the berries begin to break down, about 5–7 minutes. The cornstarch will give the filling a silky finish, preventing it from seeping into the crumble.
- Once the filling has thickened, pour it evenly over the crumb layer, spreading it with a spatula. The filling should be a glossy, slightly translucent sauce that coats the crumble. This is where the magic happens—every bite will have a burst of raspberry goodness.
- Bake in the preheated oven for 25–30 minutes, or until the crumble is golden brown and the edges are pulling away from the pan. The interior should be set, with a slight wobble indicating the filling is just right. Keep an eye on the bars; if they brown too quickly, cover loosely with foil.
- Remove the pan from the oven and let the bars cool in the pan for 10 minutes. This resting period allows the filling to set further and makes slicing easier. After the initial cool, transfer the bars to a wire rack to finish cooling completely.
- Once cooled, cut the bars into squares or rectangles using a sharp knife. For a clean cut, wipe the knife between each cut. Serve immediately, or store in an airtight container in the fridge for up to 5 days. If you’re craving a warm treat, reheat slices in the microwave for 15–20 seconds or in a toaster oven until warmed through.
That’s it— you did it. But hold on, I’ve got a few more tricks that will take this to another level.
Insider Tricks for Flawless Results
The Temperature Rule Nobody Follows
Baking at exactly 350°F (175°C) is essential for achieving the perfect balance between a crisp top and a juicy interior. If you’re tempted to crank up the heat for a faster bake, you’ll risk drying out the berries. Conversely, too low a temperature will leave the crumble soggy. I’ve tested this in a convection oven, and the results were consistent—just keep the temperature steady, and the bars will turn out flawless.
Why Your Nose Knows Best
Your sense of smell can be your best ally in judging doneness. When the bars are ready, the aroma should be a warm, buttery scent with a hint of sweet fruit. If you notice a faint metallic or burnt odor, pull them out immediately. The scent is a reliable indicator that the sugars have caramelized just right.
The 5‑Minute Rest That Changes Everything
After removing the bars from the oven, let them rest for at least five minutes before cutting. This short pause allows the filling to set, preventing a mushy texture and making slicing easier. I’ve seen people cut right away and end up with a gooey mess—don’t be that person.
Use a Silicone Baking Mat
If you’re using a non‑stick pan, a silicone baking mat can help distribute heat evenly, ensuring the crumble browns uniformly. It also makes cleanup a breeze—just wipe the mat with a damp cloth. I’ve used this trick for a week, and the bars came out with a consistent golden crust every time.
Add a Touch of Espresso
For an extra depth of flavor, sprinkle a pinch of instant espresso powder into the crumble mix. The bitterness of espresso cuts through the sweetness, adding a sophisticated note that pairs wonderfully with raspberry. It’s a simple tweak that elevates the bars from good to unforgettable.
Creative Twists and Variations
This recipe is a playground. Here are some of my favorite ways to switch things up:
Chocolate Drizzle
Drizzle melted dark chocolate over the cooled bars for a decadent twist. The chocolate’s bitterness balances the raspberry’s sweetness, creating a flavor profile reminiscent of a chocolate raspberry cheesecake.
Almond Butter Swirl
Swirl in a spoonful of almond butter into the raspberry filling before baking. The nutty flavor complements the oats and adds a silky texture that’s both indulgent and healthy.
Minted Surprise
Add a handful of fresh mint leaves to the raspberry mixture. The mint provides a refreshing contrast that brightens the overall taste, especially during summer.
Pistachio Crumble
Replace half of the rolled oats with chopped pistachios for a nutty crunch. The pistachios also give the bars a beautiful green hue, making them Instagram‑worthy.
Citrus Zest
Grate a teaspoon of orange zest into the crumble mix. The citrus adds a bright, zesty flavor that pairs wonderfully with raspberry, creating a vibrant, summery dessert.
Maple‑Infused Bars
Swap the granulated sugar in the crumble with a tablespoon of pure maple syrup. The maple’s caramel notes deepen the flavor, giving the bars a warm, autumnal feel.
Storing and Bringing It Back to Life
Fridge Storage
Store the bars in an airtight container in the refrigerator for up to five days. The crispness of the crumble may soften slightly, but the raspberry filling remains juicy. When you’re ready to eat, let them sit at room temperature for 10 minutes to restore their full flavor.
Freezer Friendly
Wrap the bars individually in parchment paper and place them in a freezer‑proof bag. They’ll keep well for up to three months. When you’re craving a sweet treat, pop a bar straight from the freezer into the microwave for 15–20 seconds. The heat will melt the butter slightly, restoring the buttery texture.
Best Reheating Method
The best way to reheat is to use a toaster oven at 300°F (150°C) for about five minutes. If you’re in a hurry, a quick 15–20 second microwave burst works too. Before reheating, add a tiny splash of water or a drizzle of honey; this steams the bars back to perfection, keeping the crumble crisp and the filling moist.