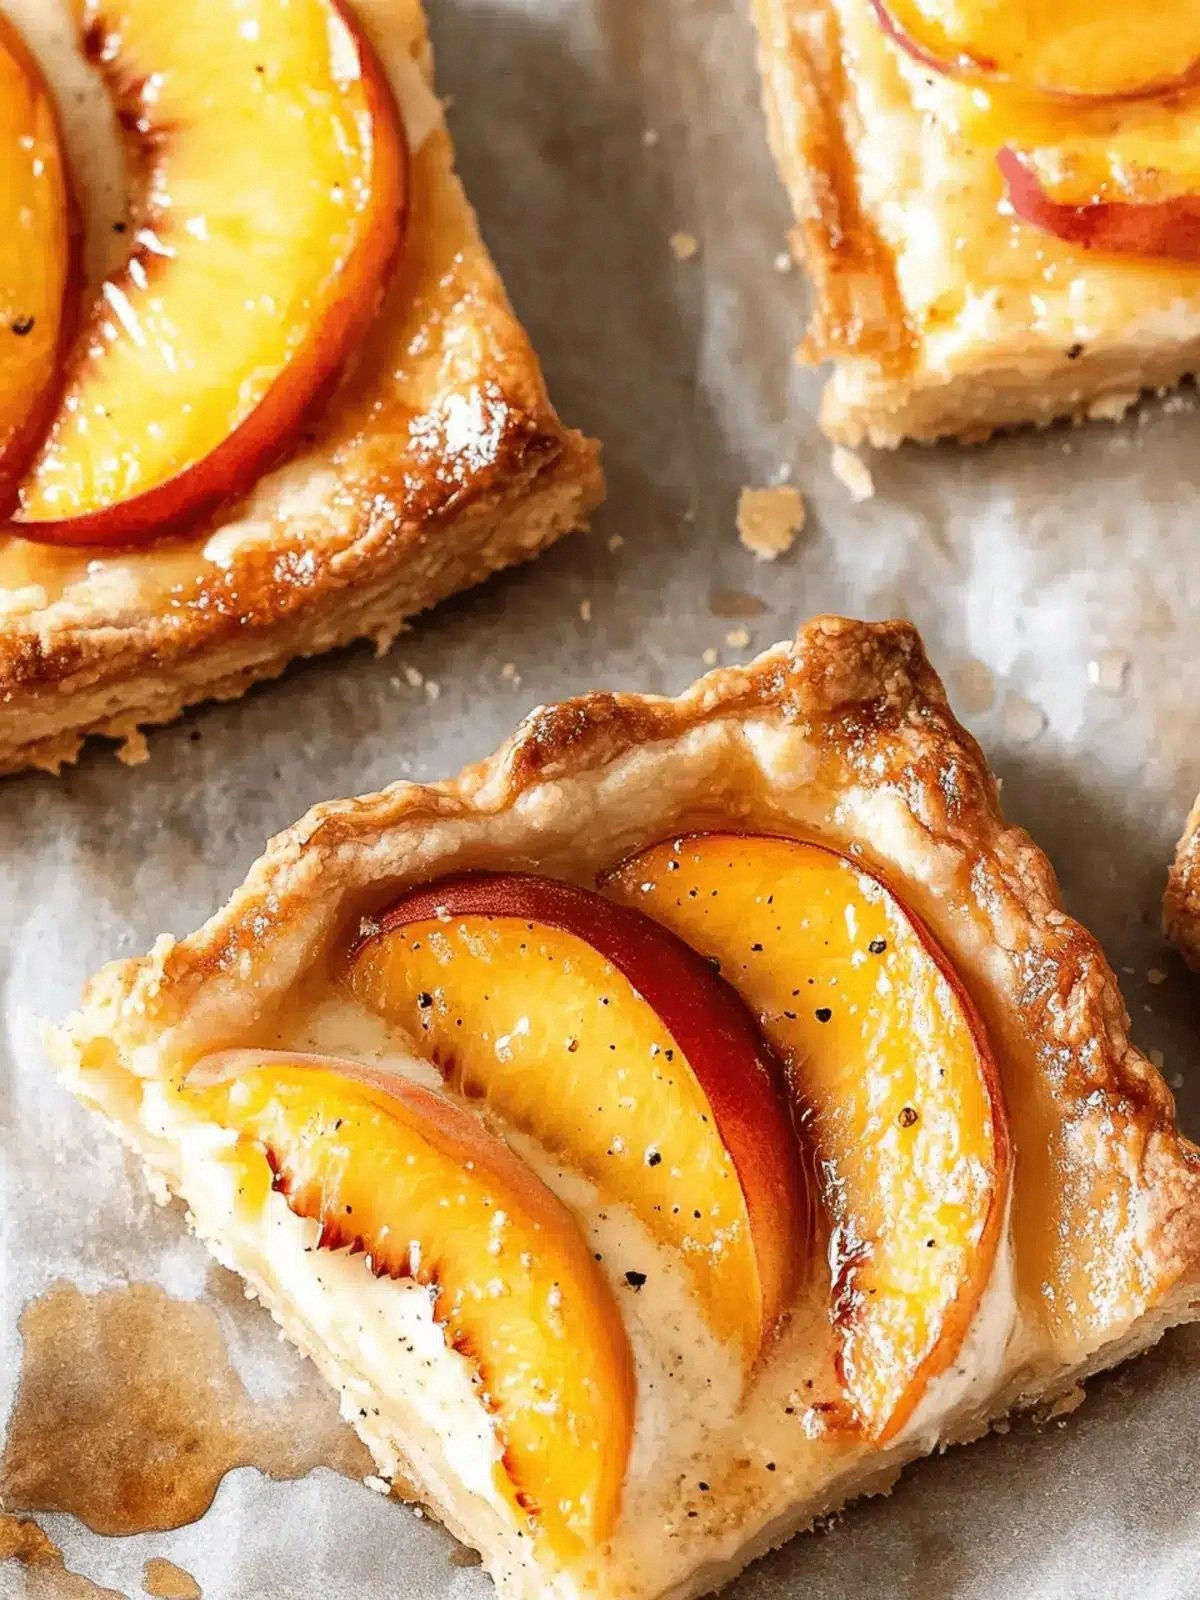
I was halfway through a late‑night bake session when the kitchen lights flickered and the oven door opened to reveal a scorched loaf of bread that had turned into a charcoal slab. I laughed, because that was the kind of culinary disaster that turns a normal evening into a legendary story. I reached for the recipe that had been hiding in a dusty drawer for months – peach and cream cheese mini tarts – and decided it was time to give it a fresh spin. The moment the sweet scent of peaches hit my nose, I knew this would be the turning point of the night.
Picture the kitchen: the clatter of pans, the hum of the mixer, the gentle sizzle of butter in the skillet. The air is thick with a buttery aroma that promises a crisp, golden crust. My fingertips feel the coolness of the dough as I roll it out, and the anticipation builds like a drumbeat. Every ingredient feels like a promise – the peaches, the cream cheese, the honey – each one ready to mingle and create something extraordinary. This is not just a recipe; it’s a confession of flavor, a celebration of summer in a bite.
I dare you to taste this and not go back for seconds. The first bite delivers a sweet, tangy burst that wakes up your palate, and the second bite offers a silky creaminess that lingers. Most recipes get this completely wrong by over‑baking or under‑seasoning, but here we strike the perfect balance. The crust is airy and slightly crisp, the filling is velvety, and the peaches are juicy with a hint of caramel. I’ve been told this is hands down the best version you’ll ever make at home, and I’m not exaggerating.
If you've ever struggled with mini tarts that fall apart or taste bland, you're not alone. I’ve had my share of mishaps – a dough that never sticks, a filling that turns out too watery – but I’ve learned the tricks that make this version stand out. Picture yourself pulling these out of the oven, the whole kitchen smelling incredible, and the first bite feels like a summer sunrise. Stay with me here – this is worth it, because the result will change how you think about desserts forever.
What Makes This Version Stand Out
- Texture: The crust is a delicate, buttery lightness that cracks with a satisfying snap. The filling is creamy yet firm enough to hold its shape, preventing the peaches from sinking. The result is a harmonious contrast that keeps you guessing with every bite.
- Flavor: A subtle sweetness from honey and peach balances the sharp tang of lemon and the richness of cream cheese. The spices add a warm undertone that feels like a cozy campfire. The finish is a gentle, lingering sweetness that lingers on the tongue.
- Ease: Every step is designed to be intuitive, even for novice bakers. The dough can be made ahead and chilled, saving you time on a busy day. The filling requires no special equipment – just a whisk and a bowl.
- Visual Appeal: The bright peach slices sit atop the golden crust like tiny suns, creating a photo‑ready presentation. The cinnamon sugar topping adds a pop of color and texture. The finished tarts look as good as they taste.
- Versatility: They can be served for brunch, as a party snack, or even as a sweet finish to a dinner. The recipe scales up or down easily, so you can host a crowd or enjoy a single treat. It’s a one‑stop dessert that adapts to any occasion.
- Make‑Ahead: You can assemble the tarts a day before and bake them just before serving. The crust holds up well, and the filling remains creamy. This makes them perfect for potlucks or holiday gatherings.
- Ingredient Quality: We use fresh peaches at peak ripeness, which adds depth of flavor. The cream cheese is room temperature, allowing a smooth blend with the honey and spices. The butter is unsalted, giving you full control over the salt level.
- Health Angle: While indulgent, the use of natural honey and fresh fruit keeps the tart on the healthier side of dessert. The recipe avoids artificial sweeteners or excessive fats, making it a guilt‑free treat.
Inside the Ingredient List
The Flavor Base
The peaches are the star of this dish, providing natural sweetness and a juicy burst that cuts through the richness of the cream cheese. Choosing a ripe peach with a slightly firm texture ensures that the slices hold their shape during baking. If you’re in a region where peaches are out of season, frozen peaches can be thawed and drained, but fresh will always give that bright, vibrant flavor.
Honey is used not just as a sweetener but also as a glaze that adds a subtle sheen to the topping. Its floral notes complement the peaches, creating a layered sweetness that doesn’t overpower the tart. A light drizzle of honey on top before serving adds a glossy finish and a touch of caramel.
Lemon juice is a small but mighty ingredient. It adds a bright, acidic counterpoint that balances the buttery crust and creamy filling. A squeeze of lemon also helps to keep the peach slices from browning, preserving their color and freshness.
The Texture Crew
All-purpose flour provides the structure for the crust. Using a blend of whole wheat or almond flour can add a nutty flavor, but it may alter the crumb. The flour is tempered with cold butter pieces that melt during baking, creating pockets of steam that lift the dough into a light, flaky shell.
Ice water is the secret to a tender crust. The cold temperature keeps the butter from melting too quickly, ensuring a crisp edge. Adding a teaspoon of vinegar helps to tenderize the dough by breaking down gluten strands, giving you a more delicate texture.
Unsalted butter is essential because it gives you full control over the salt level. If you use salted butter, you risk an overly salty crust. The butter should be at room temperature so it blends seamlessly with the flour, creating a homogeneous dough.
The Unexpected Star
Ground cinnamon and ginger bring warmth and depth to the filling. Cinnamon adds a sweet, woody note that pairs beautifully with peaches, while ginger provides a subtle peppery kick that keeps the dish from feeling one‑dimensional. If you prefer a more pronounced spice, increase the amount to 1 teaspoon of cinnamon and 1/2 teaspoon of ginger.
Heavy cream is added to the filling to give it a silky texture that doesn’t separate during baking. The cream also balances the acidity of the lemon, creating a smooth, velvety mouthfeel. If you’re looking for a lighter version, replace the heavy cream with Greek yogurt for a tangy twist.
The Final Flourish
Cinnamon sugar is the finishing touch that adds crunch and a sweet finish. It caramelizes slightly during baking, giving the tarts a golden rim. If you’re vegan, swap the butter in the crust for coconut oil and use a plant‑based cream cheese to keep it dairy‑free.
Everything's prepped? Good. Let's get into the real action.
The Method — Step by Step
- Begin by combining 1 cup of all‑purpose flour, 2 tablespoons of granulated sugar, and 1/4 teaspoon of salt in a large bowl. Stir until the mixture is even. This dry blend forms the base of your crust.
- Cut in 1/2 cup of cold, unsalted butter using a pastry cutter or your fingertips until the mixture resembles coarse crumbs. The goal is to keep the butter in small pieces so it melts during baking.
- Add 1 teaspoon of white distilled vinegar and 3 tablespoons of ice water. Mix until the dough just comes together; it should be damp but not sticky. If it’s too dry, add a splash of water, one teaspoon at a time.
- Turn the dough onto a lightly floured surface and roll it out to a 1/8 inch thickness. Pat it into a 9‑inch round, then cut it into 12 equal wedges using a sharp knife or pizza cutter. These wedges will form the individual tart shells.
- Preheat your oven to 375°F (190°C). Place the wedges on a parchment‑lined baking sheet, spacing them about an inch apart. Bake for 12–15 minutes until the edges are golden brown and the crust has a crisp snap. This step is crucial; underbaked crusts will be soggy.
- While the crusts bake, prepare the filling. In a medium bowl, beat 4 ounces of cream cheese until smooth. Add 2 tablespoons of honey, 1 tablespoon of lemon juice, 1/2 teaspoon of ground cinnamon, and 1/4 teaspoon of ground ginger. Whisk until fully incorporated.
- Fold in 1 tablespoon of heavy cream, then add 2 tablespoons of cinnamon sugar. This mixture should be thick yet pourable, like a custard. The heavy cream keeps the filling creamy and prevents it from becoming too dry.
- Slice 1 fresh peach into thin rounds. If the peach is slightly underripe, a quick blanch in boiling water for 15 seconds helps soften it.
- Once the crusts are done, let them cool for 5 minutes. Spoon a generous amount of the cream cheese filling into each crust, then top with a peach slice. Finish by dusting with a pinch of cinnamon sugar.
- Return the tarts to the oven for an additional 5–7 minutes, just until the filling sets and the sugar caramelizes slightly. The tarts should smell toasty, and the edges will start pulling away from the pan. This is the moment of truth – your patience has paid off.
That’s it — you did it. But hold on, I've got a few more tricks that'll take this to another level. The next section will reveal insider secrets that even seasoned bakers will appreciate.
Insider Tricks for Flawless Results
The Temperature Rule Nobody Follows
Many bakers bake at 350°F, but this recipe thrives at 375°F. The higher temperature ensures the crust crisps up quickly without overcooking the filling. If you’re using a convection oven, reduce the temperature by 25°F to avoid over‑browning.
Why Your Nose Knows Best
During the final 5 minutes of baking, trust the aroma rather than the timer. A nutty, caramelized scent signals that the sugar has caramelized just right. If you hear a faint crackle from the crust, it’s time to pull the tarts out.
The 5‑Minute Rest That Changes Everything
Letting the tarts rest for 5 minutes after baking allows the filling to set, preventing it from sliding off when you pick them up. This brief pause also lets the flavors meld, creating a more cohesive taste. A friend once rushed them out, and the filling spilled everywhere – a lesson learned the hard way.
The Perfect Peach Slice
Slice peaches at a 45‑degree angle to maximize surface area. This technique ensures each bite has a juicy center and a caramelized edge. If you’re using a melon baller, you can create uniform, bite‑size pieces for a more elegant presentation.
The Sweet‑Salt Balance
A pinch of sea salt on top of the finished tarts can elevate the sweetness and add depth. Use a fine sea salt for a subtle crunch. Don’t overdo it – a single sprinkle is enough to bring the flavors together.
The Cooling Trick
After baking, place the tarts on a wire rack to cool. This allows air to circulate, preventing moisture buildup that can make the crust soggy. If you’re in a humid climate, let them cool for an extra 5 minutes.
Creative Twists and Variations
This recipe is a playground. Here are some of my favorite ways to switch things up:
Smoky Peach Tarts
Add a pinch of smoked paprika to the filling for a subtle smoky undertone. The paprika pairs with the sweet peaches, giving the tarts a unique depth. This variation is perfect for a fall gathering.
Almond Crust Upgrade
Replace the all‑purpose flour with almond flour for a nutty base. The crust becomes slightly denser but gains a delightful crunch. Pair it with a drizzle of almond butter on top for an extra layer of flavor.
Citrus Burst
Swap the lemon juice for orange zest and a splash of orange juice. The citrus adds a bright, zesty note that complements the peaches. This version is especially refreshing on a hot summer day.
Berry Fusion
Use fresh blueberries or raspberries instead of peaches for a tart, slightly tart flavor. The berries add a pop of color and a burst of antioxidants. The filling remains creamy, balancing the fruit’s sharpness.
Vegan Delight
Use coconut oil in place of butter and a plant‑based cream cheese for a dairy‑free version. The coconut adds a subtle tropical hint that pairs well with the peaches. This variation is great for guests with dietary restrictions.
Chocolate Drizzle Finish
Drizzle melted dark chocolate over the finished tarts for a decadent finish. The chocolate’s bitterness balances the sweetness of the peaches. A sprinkle of sea salt on top adds a contrasting flavor profile.
Storing and Bringing It Back to Life
Fridge Storage
Store the tarts in an airtight container in the refrigerator for up to 3 days. The crust will stay firm, and the filling will remain creamy. Before serving, let them sit at room temperature for 10 minutes to soften slightly.
Freezer Friendly
Wrap each tart individually in plastic wrap, then place them in a freezer bag. They can be frozen for up to 2 weeks. When ready to serve, thaw overnight in the fridge and reheat briefly in a 350°F oven for 5 minutes.
Best Reheating Method
Reheat the tarts in a preheated 350°F oven for 5 minutes, or in a microwave on medium power for 30 seconds. Add a splash of water to the bottom of the pan to create steam, which keeps the filling from drying out. Serve immediately for maximum freshness.