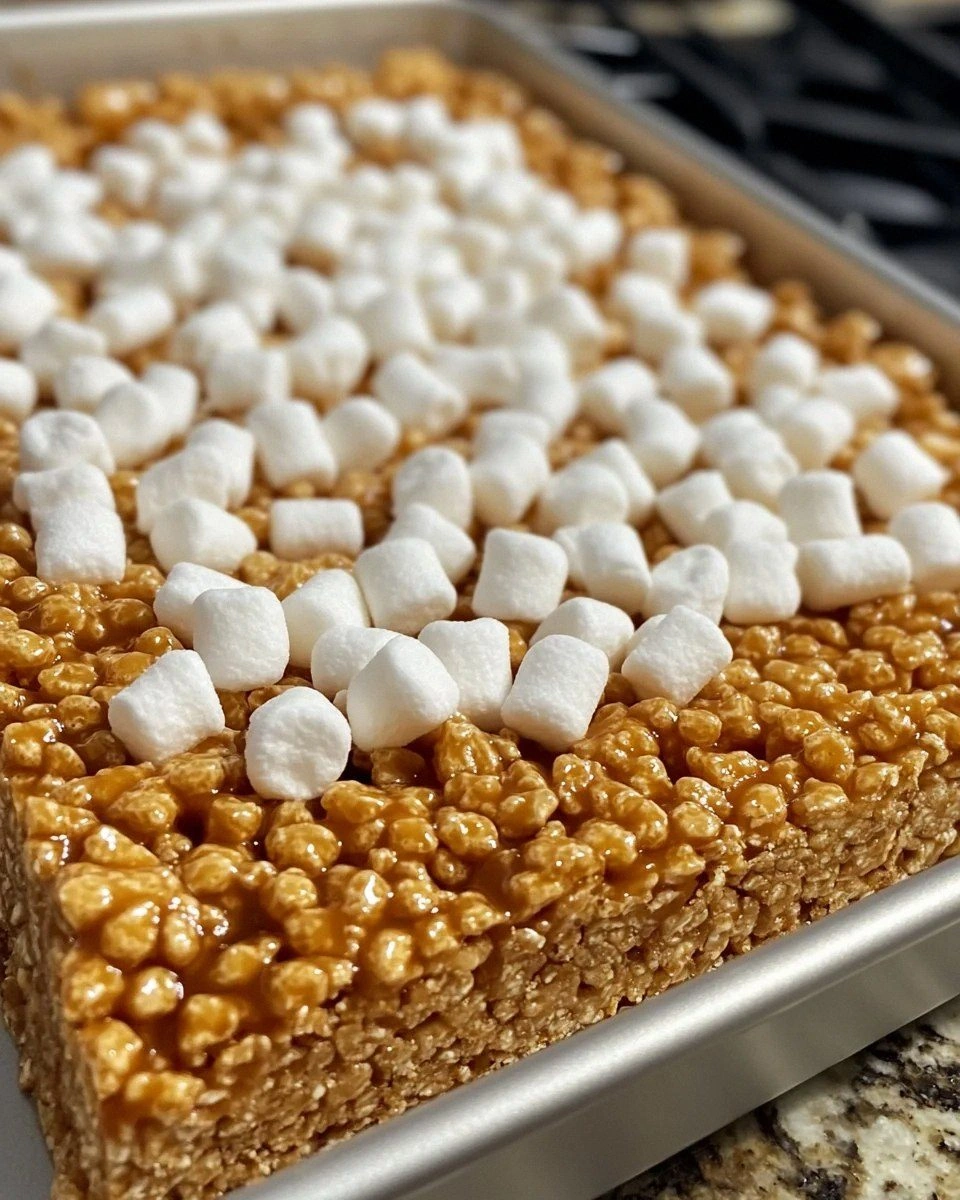
I'm standing in my kitchen at 11:47 PM, still wearing my work clothes, because I couldn't stop thinking about these treats all day. My neighbor dropped off some homemade dulce de leche last week, and it's been sitting in my fridge like a golden secret, whispering to me every time I reach for the milk. Tonight, I finally gave in — and holy cow, I'm glad I did. The moment that butter hit the pan and started browning, my apartment filled with this nutty, caramel aroma that made my roommate appear from her bedroom like a sleepwalking zombie drawn to the smell. Ten minutes later, we were both standing over the counter, burning our tongues on molten marshmallow because we couldn't wait for them to cool. This isn't just another rice krispie treat recipe — this is the one that made me cancel my dinner plans and call in sick to work tomorrow just so I could make another batch. The brown butter adds this deep, toasted flavor that makes regular butter taste like water, while the dulce de leche swirls create these pockets of caramel bliss that will make you close your eyes and sigh. I dare you to taste this and not go back for seconds. Actually, I dare you to stop at seconds. Picture yourself pulling this out of the pan, the whole kitchen smelling like a Argentinean bakery crossed with a French patisserie, and tell me you won't eat at least four squares before they even set. Stay with me here — this is worth every single sticky, buttery, caramel-drizzled second.
What started as a desperate late-night craving has become my signature party trick. I bring these to work potlucks and watch grown adults turn into competitive vultures, hovering around the plate and making "just one more" excuses. My brother tried to hide the last piece from his girlfriend — she still hasn't forgiven him. The magic isn't just in the ingredients, though they're spectacular. It's in the technique: browning the butter until it smells like toasted hazelnuts and looks like liquid gold, then folding in that ribbon of dulce de leche so it creates these gorgeous caramel veins throughout. Most recipes get this completely wrong by rushing the butter or skipping the salt at the end. Here's what actually works: patience, good ingredients, and the willingness to stand at your stove for an extra three minutes while your butter transforms from ordinary to extraordinary. I'll be honest — I ate half the batch before anyone else got to try it. And I'm not even sorry, because once you taste that first bite, with its crispy-crunchy base and gooey caramel swirls, you'll understand why selfishness is sometimes justified.
The first time I made these, I was trying to impress someone who loved traditional rice krispie treats but had never experienced them elevated beyond the blue-box basics. I wanted that nostalgic comfort but with a sophistication that said, "Yes, I know my way around a kitchen, and yes, I care enough to make this special." The brown butter was a game-changer — it's like the difference between instant coffee and a perfectly pulled espresso shot. That nutty, almost butterscotch flavor infuses every single marshmallow, while the dulce de leche adds this luxurious richness that makes regular treats taste flat and one-dimensional. The sea salt finish isn't just for show — it's the contrast that makes the sweet notes sing, like adding a bass line to your favorite song. You get this incredible balance of flavors: toasty, sweet, salty, caramelized, with that perfect chewy-crispy texture that defines a perfect rice krispie treat. Okay, ready for the game-changer? Let me walk you through every single step — by the end, you'll wonder how you ever made it any other way.
What Makes This Version Stand Out
Buttery Depth: Browning the butter transforms it from a background player to the star of the show, creating nutty, caramel notes that regular melted butter simply can't achieve. This isn't just heating butter — it's conducting a flavor symphony that will make your kitchen smell like a French bakery.
Caramel Ribbons: The dulce de leche doesn't just sweeten the deal — it creates gorgeous golden streaks throughout each treat, offering pockets of intense caramel flavor that burst on your tongue like little surprises in every bite.
Textural Perfection: By controlling the marshmallow melt time and temperature, you get that ideal balance of chewiness and crispiness. No rock-hard bricks or fall-apart mush here — just that perfect snap when you break one apart.
Salty-Sweet Balance: A final flourish of flaky sea salt doesn't just add sodium — it amplifies every other flavor, making the caramel taste more caramel-y and the butter taste more buttery. It's like turning up the volume on your taste buds.
One-Pot Wonder: Despite tasting like it came from a fancy bakery, this entire recipe comes together in one pot and one pan. Less dishes means more time for eating, and trust me, you're going to want that extra time.
Crowd Psychology: I don't know what it is about these treats, but they disappear faster than free concert tickets. Maybe it's the nostalgic comfort crossed with sophisticated flavors, or maybe it's just that people lose all self-control when faced with caramel and brown butter. Either way, prepare to be popular.
Make-Ahead Magic: These actually taste better the next day, once the flavors have had time to meld and the caramel has set into perfect chewy ribbons. Make them tonight, become a hero tomorrow morning when you show up with the best coffee-shop treat anyone's ever had.
Alright, let's break down exactly what goes into this masterpiece...
Inside the Ingredient List
The Flavor Foundation
Butter is where everything begins, and I'm not talking about that pale, flavorless stuff you bought on sale. You want the good European-style butter with higher fat content — it browns better and tastes like actual dairy instead of yellow shortening. When you brown it properly (and we'll get to that), it develops these complex nutty flavors that make people ask, "What's in these? They taste... different. Better." The transformation is magical: it goes from yellow and milky to amber and fragrant, like liquid hazelnuts. Don't rush this step — good things come to those who wait, and by good things, I mean butter that tastes like it was kissed by angels and aged in oak barrels.
The Sweet Science
Mini marshmallows aren't just cute — they're scientifically superior for melting evenly and creating that perfect stretchy texture. The large ones leave you with weird rubbery pockets and take forever to melt. Fresh marshmallows make a difference too — if yours have been sitting in the pantry since last Thanksgiving, they're going to be dry and stubborn. You want them soft and pillowy, ready to melt into that glossy river of sweetness that coats every cereal piece like edible velvet. And here's the thing about quantity: ten ounces sounds like a lot, but it's exactly what you need for that perfect chewy-gooey balance. Too little and your treats are dry and crumbly. Too much and you've got a sugar bomb that could double as door stops.
The Crispy Crew
Rice Krispies cereal is obviously the classic choice, but here's what nobody tells you: the freshness of your cereal matters enormously. Stale cereal makes stale-tasting treats, no matter how good your butter is. Buy a fresh box, or if you're like me and don't make these often enough to justify it, store your cereal in an airtight container with a silica gel packet. Six cups gives you that ideal ratio where every piece gets coated but you still get individual crispy bits. Some recipes call for more, but then you're just eating sweetened cereal held together with wishful thinking. We want treats that hold together but still have that satisfying snap when you bite into them.
The Flavor Amplifiers
Vanilla extract might seem optional, but it's the difference between good and great. A half-teaspoon adds this warm, aromatic depth that makes people wonder if you have some secret ingredient. Use real vanilla, not the imitation stuff that tastes like sadness and chemicals. And that pinch of sea salt at the end? Non-negotiable. It doesn't make things salty — it makes everything else taste more like itself. The caramel becomes more caramel-y, the butter more buttery, the vanilla more vanilla-y. It's like Instagram filters for your taste buds, but without making everything look orange.
Everything's prepped? Good. Let's get into the real action...
The Method — Step by Step
- Start with a heavy-bottomed pot — I mean it, don't use that thin cheap pan unless you want burnt butter and tears. Medium heat is your friend here; too hot and your butter goes from brown to black faster than you can say "darn it." Add your half-cup of butter and watch it like you're watching Netflix — don't look away. First, it'll foam and sputter like it's angry about being woken up. Then the milk solids will start turning golden, and you'll smell something amazing: nutty, toasty, almost like hazelnines. This whole process takes about 5-7 minutes, and trust me, it's worth every second of standing there like a butter bodyguard.
- Once your butter is the color of toasted almonds and smells like heaven, immediately remove it from heat. This next part? Pure magic. Add your mini marshmallows and stir like your life depends on it. The residual heat will melt them into this glossy, stretchy blanket of sweetness. If you've never seen marshmallows melt in brown butter, prepare to be mesmerized. They'll deflate and turn into this river of white gold that smells like caramel and childhood memories had a baby.
- Here's where most people mess up — they get impatient and crank the heat back up. Don't. You want gentle melting, not scorching. If your marshmallows aren't melting fast enough, place the pot back on the warm burner but keep it off the heat. Stir constantly, watching for that perfect consistency where it looks like glossy clouds. Add your vanilla extract now, when everything is warm and welcoming, so it incorporates smoothly instead of seizing up in cold marshmallow.
- Time for the cereal dump — but wait, there's a technique. Don't just dump all six cups in at once unless you want marshmallow cement. Add about four cups first, folding gently but thoroughly. You're looking for complete coverage here, every piece wearing its marshmallow coat like it dressed up for a party. Once that's incorporated, add the remaining two cups. This two-stage approach ensures even coating without crushing the cereal into sad little crumbs.
- Now for the dulce de leche — the moment of truth. You want it warm but not hot, spoonable but not liquid. Drop spoonfuls across the surface of your cereal mixture, then use a knife to marble it through. Don't overmix or you'll just have caramel-colored treats instead of beautiful ribbons. Think of it like folding egg whites into batter: gentle, decisive movements that preserve those gorgeous golden streaks. Your goal is pockets of intense caramel flavor, not homogenous brown goo.
- Pressing into the pan is where many good treats go bad. Don't smash them down like you're trying to win a compaction contest. Lightly butter your hands (or use wax paper) and press gently but firmly. You want them packed enough to hold together when cut, but not so dense they could double as building materials. Think of it like tucking in a baby — firm enough to feel secure, gentle enough to stay soft.
- The waiting is the hardest part, but it's crucial. Let them set for at least 30 minutes at room temperature. This isn't just about firming up — it's about the flavors melding, the caramel setting into perfect chewy ribbons, the salt dissolving just enough to enhance everything. Use this time to clean your pot (hot water is your friend) and maybe hide a few pieces for yourself before the vultures arrive.
- Final flourish time: that sprinkle of flaky sea salt isn't optional, it's transformational. Hold your hand high and let it fall like snow — you want light, even coverage that hits different parts of each treat. Some bites will be saltier, some sweeter, creating this amazing variety that keeps you coming back for "just one more" to see what the next bite brings. Cut with a sharp knife, wiping between cuts for clean edges that look like they came from a fancy bakery instead of your late-night kitchen experiment.
That's it — you did it. But hold on, I've got a few more tricks that'll take this to another level...
Insider Tricks for Flawless Results
The Temperature Rule Nobody Follows
Here's the thing about marshmallow temperature: too hot and your treats will be tough and chewy like old taffy. Too cool and they won't bind properly, leaving you with cereal that falls apart like bad relationships. You want your marshmallow mixture warm enough to be pliable but not so hot it steams when you add the cereal. The sweet spot is around 140°F — warm to the touch but not burning. A friend tried skipping this step once — let's just say it didn't end well. She ended up with treats that could double as hockey pucks, and her kids used them as building blocks instead of eating them.
Why Your Nose Knows Best
Browning butter is all about aroma, not just color. When it starts smelling like toasted hazelnines and warm nuts, you're there. Don't wait for it to look like dark caramel — by then it's already burnt and will taste bitter. Your nose will tell you when those milk solids have transformed from boring butter particles into flavor gold mines. That sizzle when it hits the pan? Absolute perfection. It means the water is evaporating and the milk solids are starting their magical transformation. Trust your senses over the clock — every butter is different, every pan conducts heat differently, and your kitchen's humidity affects timing.
The 5-Minute Rest That Changes Everything
After you mix in the cereal, let the mixture rest for exactly five minutes before pressing into the pan. This isn't lazy cooking — it's chemistry. The marshmallow needs time to cool slightly and start setting around the cereal. Press too soon and you'll crush the cereal into sad little crumbs. Wait too long and it becomes unmanageable, sticking to everything like edible superglue. Five minutes is the Goldilocks zone where everything is still pliable but starting to set. Set a timer, walk away, and resist the urge to poke at it like a curious child. Your patience will be rewarded with treats that hold together perfectly while maintaining their crispy integrity.
Pan Size Psychology
Use an 8x8 pan for thick, bakery-style treats that feel substantial and indulgent. A 9x13 pan makes thinner, more modest portions that are perfect for kid lunches or when you want to feel slightly less guilty about eating four pieces. Don't have either? A 9x9 works too — just adjust your pressing pressure accordingly. The key is knowing your audience: thick treats for indulgent moments, thinner ones for everyday snacking. I once brought thick-cut treats to a fitness class potluck — the cognitive dissonance was beautiful to behold.
Storage Secrets
Here's what nobody tells you: these actually get better with age, up to a point. Day two treats have this amazing texture where the caramel has set into perfect chewy ribbons and the flavors have melded into something greater than the sum of their parts. Store them in an airtight container with a piece of bread — the bread prevents them from drying out and going stale. Replace the bread every day or two. They'll keep for up to a week this way, though honestly, they've never lasted more than three days in my house. If they start getting slightly stale, pop them in the microwave for 8-10 seconds — just enough to warm and soften without melting the caramel into a mess.
Creative Twists and Variations
This recipe is a playground. Here are some of my favorite ways to switch things up:
Midnight Mocha Madness
Add two tablespoons of espresso powder to the butter while it's browning — the heat will bloom the coffee flavor and create this amazing mocha note that pairs perfectly with the caramel. Finish with chocolate-covered espresso beans pressed into the top. Coffee lovers will propose marriage. The bitter coffee notes balance the sweetness beautifully, creating a sophisticated treat that works as an afternoon pick-me-up or an impressive dinner party dessert. I've seen grown men fight over the last piece of this version.
Salted Peanut Caramel Crush
Fold in a cup of roughly chopped salted peanuts with the cereal — the salt and crunch add this amazing contrast to the sweet, gooey base. Use chunky peanut butter instead of regular butter for an extra layer of nuttiness. The peanuts get slightly toasted from the warm marshmallow, releasing their oils and creating this incredible aroma. It's like a Snickers bar and a rice krispie treat had a beautiful baby. Pro tip: use roasted peanuts, not raw, or they'll taste grassy and weird.
White Chocolate Raspberry Swirl
Replace the dulce de leche with warmed raspberry jam and add white chocolate chips to the cereal mixture. The tart raspberries cut through the sweetness while the white chocolate adds creamy richness. Drop spoonfuls of jam across the surface and marble just like you would with caramel. The color contrast is gorgeous — pink ribbons against white marshmallow clouds. This version is particularly popular at baby showers and with people who claim they "don't like things too sweet."
Spicy Mexican Chocolate
Add a teaspoon of cinnamon and a quarter-teaspoon of cayenne to the butter while browning. The heat builds slowly and pairs incredibly with the caramel notes. Use Mexican vanilla if you can find it — it has a spicier, more complex flavor than regular vanilla. Finish with a dusting of cinnamon sugar on top. This version is addictive in a way that makes you keep eating just to figure out what's happening in your mouth. The heat hits at the end, after you've tasted the sweet and caramel, creating this amazing flavor journey.
Coconut Macaroon Dream
Replace one cup of cereal with unsweetened coconut flakes and add a teaspoon of coconut extract to the marshmallow mixture. Use coconut oil instead of butter for an extra coconut punch. The coconut toasts slightly from the warm marshmallow, creating these amazing chewy-crispy bits throughout. Drizzle with melted dark chocolate after they set for a tropical candy bar vibe. This version is particularly good in summer when you want something that tastes like vacation.
Bourbon Bacon Breakfast (For Adults Only)
Add a tablespoon of good bourbon to the melted marshmallow and fold in half a cup of crispy bacon bits with the cereal. The bourbon cooks off but leaves this amazing depth, while the bacon adds smoky, salty notes that make these completely irresistible. Use thick-cut bacon cooked until very crispy — chewy bacon in treats is just sad. These are dangerous at brunch parties because they taste like breakfast but pack a boozy punch. I've seen people eat these for actual breakfast and regret nothing.
Storing and Bringing It Back to Life
Fridge Storage
Despite what your grandma told you, these do NOT go in the fridge. Cold temperatures turn the caramel into teeth-breaking shards and the cereal into sad, stale bits. Room temperature in an airtight container is your friend. If your kitchen runs warm and you're worried about the butter going rancid, store them in the coolest room of your house instead. They'll keep for up to a week at room temperature, though honestly, if they last more than three days, you're doing something wrong or you have superhuman self-control. The enemy here is moisture and air — both will steal your crispy texture faster than you can say "who ate all the treats?"
Freezer Friendly
Surprisingly, these freeze beautifully if you do it right. Cut them into individual portions, wrap each one tightly in plastic wrap, then store in a freezer bag. They'll keep for up to three months — perfect for emergency dessert situations or when you need to bribe someone but don't have time to bake. Thaw them at room temperature for about an hour, or microwave for 15-20 seconds if you're impatient. Don't thaw in the fridge — same problem with the caramel getting too hard. The texture isn't quite as perfect as fresh, but it's about 90% there, which is way better than no treats at all.
Best Reheating Method
If they've gone slightly stale (though they shouldn't if you stored them right), revive them with a quick microwave blast: 8-10 seconds on high. Not 15, not 20 — 8 to 10. You want to warm and soften, not melt and destroy. If they've been frozen, let them thaw most of the way first, then give them that quick microwave hit. For an extra special touch, warm them slightly and serve with a scoop of vanilla ice cream — the contrast of warm, gooey treat with cold ice cream is restaurant-quality dessert territory. Add a drizzle of warm caramel sauce and you've got a dessert that will make people think you went to culinary school.