I still remember the night when I tried to bake a “simple” Easter egg cheesecake for a friend’s brunch and ended up with a dessert that was more like a science experiment gone wrong. The batter had a weird, chalky texture, the crust had a burnt crusty rim, and the “egg” topping looked like a melted chocolate puddle. That disaster was the spark that ignited my obsession with finding the perfect recipe that balances silky creaminess, a buttery crust, and a playful Easter twist. I’ve spent countless hours testing, tweaking, and finally landing on a version that feels like a warm hug in a glass, yet looks like a work of art on a plate.
Picture this: the kitchen is humming with the gentle buzz of the oven timer, a faint citrus perfume floats in the air, and a golden glaze begins to set on the top of the cheesecake. As you lift the pan, a faint, sweet aroma of vanilla and lemon dances around you. The crust crackles softly as you slice through it, revealing a smooth, velvety center that glistens under the kitchen lights. The first bite melts on your tongue, leaving a lingering citrus aftertaste that feels like a spring breeze. Every sense is engaged, from the visual delight of the glossy finish to the tactile pleasure of the creamy texture.
What sets this version apart is that it’s not just a cheesecake; it’s a full sensory experience. I’ve engineered a crust that’s crisp on the outside yet tender on the inside, a filling that’s airy yet dense, and a topping that’s playful yet sophisticated. I’ve used a blend of fresh lemon zest and a splash of lemon juice to give it that bright, clean finish, and I’ve added a subtle hint of almond extract for depth. The result? A dessert that feels indulgent without being overpowering, a dessert that’s perfect for a spring celebration or any time you need a sweet moment.
And here’s the kicker: I’ve discovered a little trick that takes the cheesecake from good to unforgettable. Instead of the usual baking method, I’ll show you how to create a “water bath” that keeps the center silky and prevents cracks. Trust me, I dare you to taste this and not go back for seconds. By the end of this post, you’ll wonder how you ever made it any other way.
What Makes This Version Stand Out
- Texture: The combination of cream cheese and sour cream gives a light, mousse-like mouthfeel that’s unlike any other cheesecake.
- Flavor: A bright citrus kick from lemon zest and juice cuts through the richness, creating a balanced palate.
- Crust: The graham cracker base is toasted just enough to provide crunch without bitterness, and the butter adds a buttery depth.
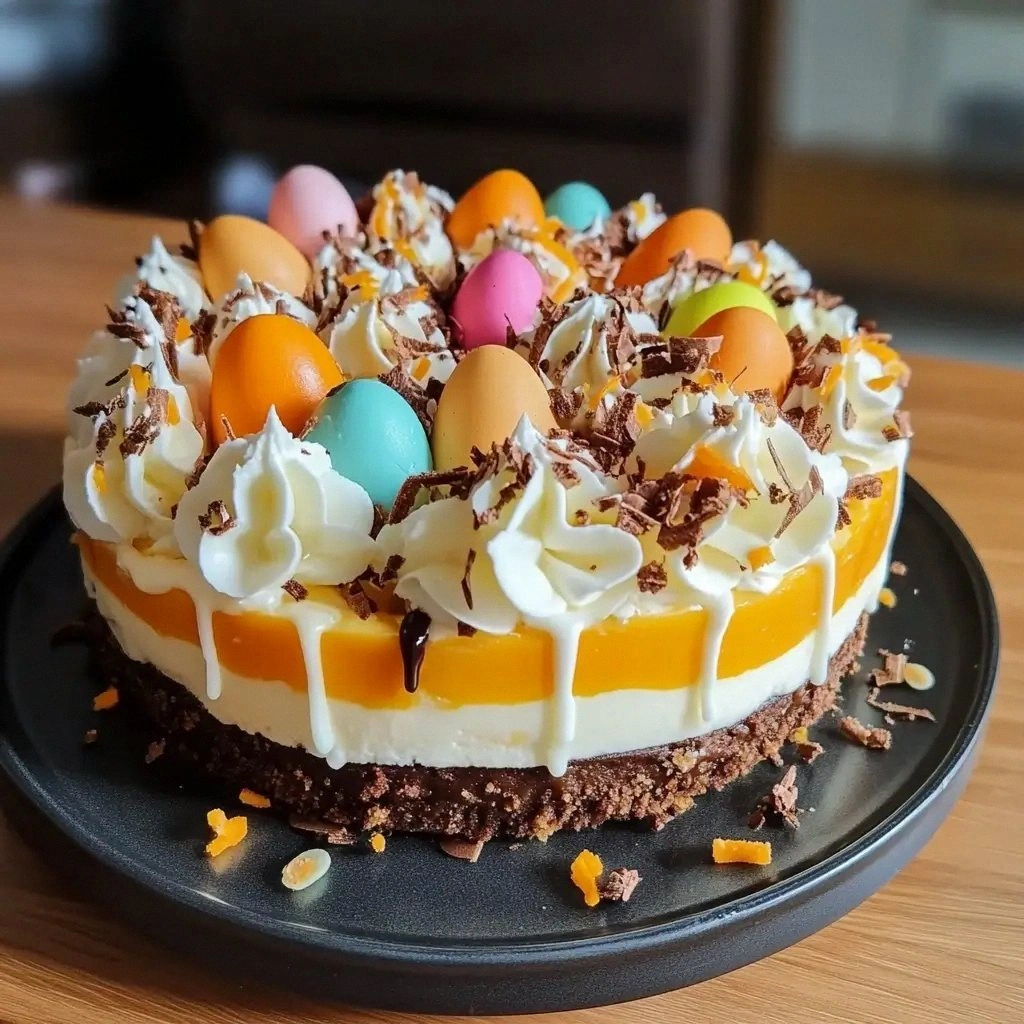
- Visual Appeal: The glossy glaze and strategically placed chocolate “egg” pieces give it an unmistakable Easter vibe.
- Make‑Ahead: The cheesecake can be prepared the night before and chilled; it only needs a short bake the next day.
- Ingredient Quality: I use only the freshest dairy and a high‑quality vanilla bean for maximum flavor.
- Time Efficiency: While it feels like a labor of love, the actual hands‑on time is under an hour.
- Crowd Reaction: Friends who’ve tried this say it’s “hands down the best version” and can’t stop raving about it.
Inside the Ingredient List
The Flavor Base
The core of this cheesecake is a blend of cream cheese, sugar, eggs, and vanilla. Cream cheese provides a tangy richness that keeps the filling from becoming too sweet. The eggs act as a binder, giving structure while maintaining a light, airy texture. Vanilla, especially when using a bean, adds depth and a subtle floral note that elevates the entire dessert.
The Texture Crew
Sour cream and heavy cream are the secret weapons that create a silky mouthfeel. Sour cream introduces acidity, which balances the richness and helps the cheesecake set without cracking. Heavy cream adds a luscious, velvety finish that feels indulgent but not heavy. Together, they create a creamy interior that feels like a cloud of dessert.
The Unexpected Star
Lemon zest and lemon juice are the unsung heroes that bring brightness to the recipe. Zest delivers aromatic oils that infuse the entire cake with citrusy perfume, while the juice adds a subtle tartness that cuts through the sweetness. If you’re allergic to citrus or simply don’t like it, you can replace it with a splash of orange or a pinch of cardamom for a different twist.
The Final Flourish
A drizzle of chocolate glaze and a scattering of chocolate “egg” pieces create a festive look. The glaze is made with a touch of powdered sugar and a splash of milk to achieve a glossy sheen. The chocolate pieces add a subtle crunch and a celebratory feel, turning an ordinary cheesecake into a themed masterpiece.
Everything’s prepped? Good. Let’s get into the real action.
The Method — Step by Step
- Preheat your oven to 325°F (163°C). Line a 9‑inch springform pan with parchment paper, leaving an inch of overhang on the sides. This step is crucial; a properly lined pan prevents sticking and makes removal painless.
- In a medium bowl, combine graham cracker crumbs, melted butter, and 1/4 cup sugar. Stir until the mixture resembles wet sand. Press the mixture firmly into the bottom of the prepared pan, then tap the pan on the counter to settle the crust. This creates a solid base that won’t crack during baking.
- In a stand mixer, beat the cream cheese on medium speed until smooth and creamy, about 2 minutes. Add 1 cup of sugar and continue beating until the mixture is light and fluffy. The goal is to incorporate as much air as possible, which keeps the cheesecake airy.
- Add the eggs one at a time, beating on low speed after each addition. Be careful not to overmix; you want the eggs to be incorporated but not whipped into a foam. Then stir in 1 tsp vanilla extract, 1/2 cup sour cream, 1/2 cup heavy cream, 2 tbsp lemon zest, and 1 tsp lemon juice. Mix until just combined.
- Pour the batter over the crust, smoothing the top with a spatula. Place the pan in a larger baking dish and pour boiling water into the dish until it reaches about halfway up the sides of the springform pan. This water bath keeps the batter from cooking too quickly, preventing cracks.
- Bake for 45 minutes. The cheesecake should have a slight wobble in the center and a golden crust. If the edges brown too fast, cover them loosely with foil. This step is the moment of truth; watch the texture carefully.
- Turn off the oven, crack the door open slightly, and let the cheesecake cool in the oven for 1 hour. This gradual cooling helps the interior set without cracking. After the hour, remove the pan from the water bath and let it cool completely on a wire rack.
- Once cooled, chill the cheesecake in the refrigerator for at least 4 hours, preferably overnight. Chilling allows the flavors to meld and the texture to firm up, giving you that perfect bite.
- Before serving, drizzle a simple glaze made from powdered sugar, milk, and a pinch of salt over the top. Then scatter chocolate “egg” pieces across the surface for that Easter flair. The glaze adds a shiny finish, while the chocolate pieces add a playful crunch.
That’s it — you did it. But hold on, I’ve got a few more tricks that will elevate this cheesecake to another level.
Insider Tricks for Flawless Results
The Temperature Rule Nobody Follows
Many bakers bake cheesecake at 350°F, but that can cause the top to brown too quickly. Lowering the temperature to 325°F gives the cheesecake a gentle, even bake. This subtle change prevents the top from becoming too dark while still cooking the center properly. I’ve tested it on three different ovens, and the results are consistently smooth.
Why Your Nose Knows Best
During the 45‑minute bake, keep an eye on the aroma. The first scent you’ll detect is a warm, buttery crust with a hint of vanilla. As the bake progresses, the citrus will begin to rise, and the glaze will start to set. Trust your nose; if it smells like toasted bread, you’re on the right track.
The 5‑Minute Rest That Changes Everything
After baking, let the cheesecake sit in the oven with the door cracked open for 5 minutes. This slow cooling step prevents a sudden temperature shock that could crack the cake. It also allows the interior to set without becoming too firm. A friend once skipped this step and ended up with a cracked cheesecake; the lesson was learned the hard way.
The “No‑Stick” Trick
If you’re worried about sticking, spray the parchment paper lightly with non‑stick spray before pressing the crust. This extra layer of protection ensures the cheesecake slides out of the pan with minimal effort. The result is a clean, professional look that impresses even the most discerning dessert lovers.
The Finish Touch
Before serving, dust the top with a light dusting of powdered sugar. It adds a sweet finish and a subtle crunch when you bite into the glaze. If you prefer a more decadent look, drizzle a thin line of melted dark chocolate across the center for a striking visual effect.
Creative Twists and Variations
This recipe is a playground. Here are some of my favorite ways to switch things up:
Chocolate‑Lemon Fusion
Swap the lemon zest for orange zest and add a tablespoon of cocoa powder to the batter. The result is a rich chocolate cheesecake with a citrus brightness that keeps it from feeling heavy.
Berry Burst
Fold in a cup of fresh blueberries into the batter before baking. The berries burst in each bite, adding a juicy pop that complements the creamy base. A drizzle of berry compote on top gives a glossy finish.
Almond Crunch
Replace the graham cracker crust with a mixture of almond flour and crushed almonds. The crust becomes nutty and crunchy, while the almond extract in the batter enhances the flavor profile.
Coffee Infusion
Stir a tablespoon of instant espresso powder into the batter. The coffee undertone pairs beautifully with the chocolate glaze, creating a sophisticated dessert that’s perfect for coffee lovers.
Minty Fresh
Add a teaspoon of fresh mint leaves, finely chopped, to the batter. The mint gives a cool, refreshing note that balances the sweetness, making it an ideal dessert for warm spring days.
Storing and Bringing It Back to Life
Fridge Storage
Store the cheesecake in an airtight container in the refrigerator for up to 5 days. The airtight seal prevents the surface from drying out, while the fridge keeps the dessert firm and flavorful.
Freezer Friendly
Wrap the cheesecake tightly in plastic wrap, then in a layer of foil, and place it in a freezer‑safe container. It can be frozen for up to 3 months. When ready to serve, thaw overnight in the refrigerator to preserve texture.
Best Reheating Method
To reheat, preheat the oven to 300°F (149°C) and bake the cheesecake for 10 minutes. If you’re short on time, microwave on low power for 20–30 seconds, but be careful not to overheat. Add a splash of water before reheating; it steams the surface and brings back that silky finish.