It started on a rainy Thursday when I was trying to salvage a batch of pumpkin bread that had gone flat and soggy. I grabbed my trusty jar of semi-sweet chocolate chips, dumped them into the batter, and baked them anyway. The result was a cookie that was soft, gooey, and surprisingly crisp around the edges—like a pumpkin‑filled chocolate cloud that didn’t collapse under its own weight. I was so surprised I almost dropped the pan, but the aroma filled the kitchen like a warm hug. That night, I dreamed of a cookie that could stand up to its own flavor and still taste like a cozy autumn treat.
I woke up the next morning with a single mission: to turn that accidental triumph into a definitive pumpkin chocolate chip cookie recipe that would outshine every other version you’ve tried. I want you to feel the crunch of the chocolate, the subtle spice, and the moist pumpkin base all in one bite. I’ll be honest—I ate half the batch before anyone else got a chance, so you’re in for a serious treat. This isn’t just another pumpkin cookie; it’s the ultimate comfort cookie that will have you daring to taste it and not wanting a second round. If you’ve ever struggled to balance pumpkin sweetness with chocolate richness, you’re not alone—and I’ve got the fix.
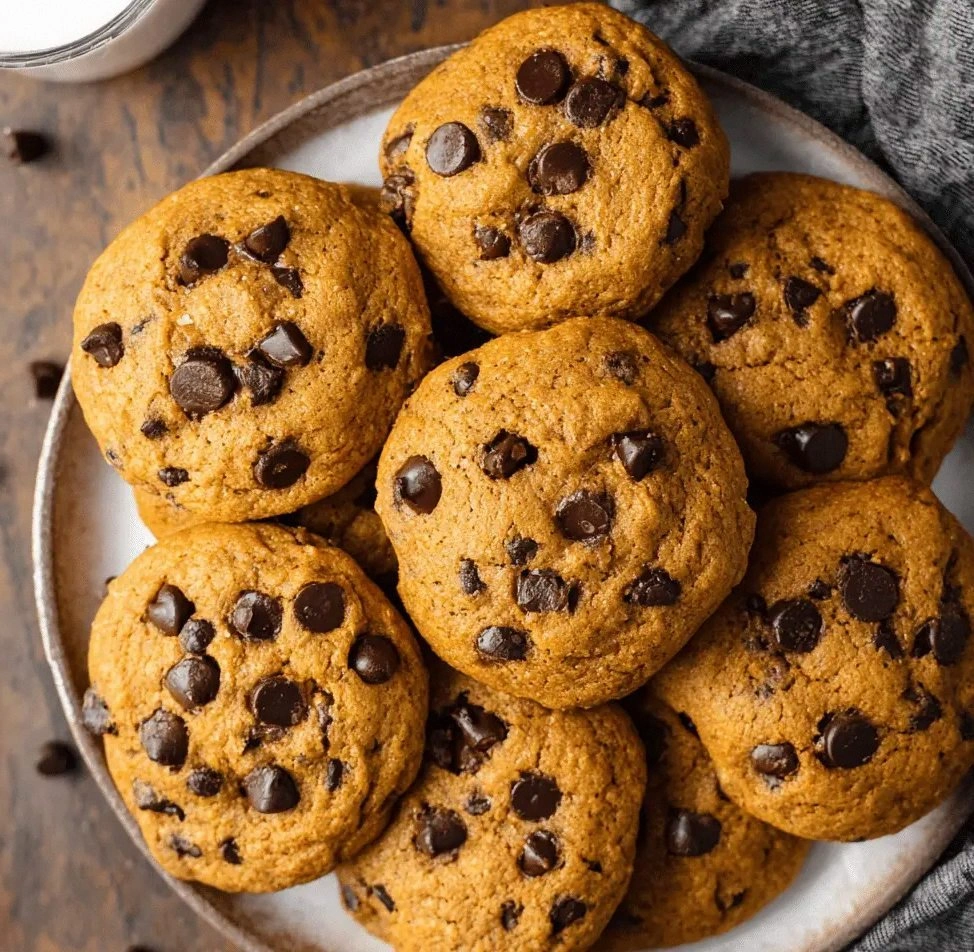
Picture yourself pulling this out of the oven, the whole kitchen smelling incredible, and the first cookie already melting in your mouth. The chocolate chips will be glossy, the pumpkin will give a subtle earthy sweetness, and the spices will whisper warmth. I dare you to taste this and not go back for seconds, because the texture is so perfect it will make your taste buds sing. The secret lies in the precise ratio of dry to wet ingredients, the use of fresh pumpkin puree, and a sprinkle of pumpkin spice that sets this cookie apart from the rest. By the end of this guide, you’ll wonder how you ever made it any other way.
Let me walk you through every single step—by the end, you’ll wonder how you ever made it any other way. I’ll share the exact measurements, the timing, and the small tweaks that make a big difference. I’ll also throw in a few kitchen hacks that will save you time and avoid common pitfalls. This recipe is hands down the best version you’ll ever make at home, and it’s ready to become your new fall staple. So grab your apron, preheat the oven, and let’s get started.
What Makes This Version Stand Out
- Balanced Sweetness: The combination of brown and white sugar creates a caramelized depth that complements the pumpkin without overpowering it. This harmony ensures each bite is sweet but not cloying, giving the cookie a sophisticated flavor profile.
- Rich Chocolate: Using semi‑sweet chips rather than milk or dark gives a buttery, slightly bitter undertone that pairs beautifully with the pumpkin’s earthiness. The chips stay firm enough to provide texture yet melt just enough to coat your palate.
- Spice Layering: Cinnamon, nutmeg, and cloves are measured to deliver a warm, aromatic backdrop. The subtle heat of the spices enhances the pumpkin’s natural sweetness without turning the cookie into a spice bomb.
- Moisture Management: Pumpkin puree adds moisture but also density. Balancing it with butter and eggs keeps the cookie tender while preventing it from becoming soggy.
- Texture Contrast: The dough’s structure yields a slightly chewy center with a crisp edge that shatters like thin ice when you bite. This contrast keeps each bite interesting and satisfying.
- Make‑Ahead Friendly: The dough can be refrigerated or frozen before baking, making it an excellent option for busy days or for prepping ahead for parties. The cookies keep well at room temperature for up to a week.
- All‑Season Appeal: While pumpkin is a fall staple, the flavors translate beautifully year‑round, especially when paired with a hot beverage or a scoop of vanilla ice cream.
Inside the Ingredient List
The Flavor Base
All‑purpose flour is the backbone of the cookie, providing structure and a subtle nutty undertone. Using 2 cups ensures the dough has enough body to hold the pumpkin puree without becoming doughy. If you skip the flour, the cookie turns into a sticky pancake rather than a cookie. For a gluten‑free version, replace the flour with a blend of rice and tapioca starch.
The Texture Crew
Unsalted butter, softened to room temperature, adds richness and helps create a tender crumb. The ¾ cup measurement strikes a balance between flavor and spread; too much butter will cause the cookies to spread too thin. Brown sugar contributes to caramelization, while granulated sugar keeps the texture light. A single large egg and an extra yolk bind everything together and give a slight sheen to the dough. If you’re avoiding eggs, try a flaxseed “egg” (1 tbsp ground flaxseed + 3 tbsp water).
The Unexpected Star
Pumpkin puree is the secret hero that gives this cookie its signature moisture and subtle sweetness. Use a 1‑cup portion of fresh, unsweetened puree for the best flavor. Skipping the pumpkin will make the cookie dry and less aromatic. If you prefer a lighter pumpkin taste, mix in a tablespoon of pure maple syrup to enhance the natural sweetness.
The Final Flourish
Semi‑sweet chocolate chips are the pièce de résistance, adding a glossy, melty center to each bite. The 1‑cup measurement ensures each cookie has a generous amount of chocolate without drowning the dough. If you’re a dark chocolate lover, substitute ½ cup dark chips and ½ cup semi‑sweet for a balanced flavor. The spices—cinnamon, nutmeg, cloves, and a pinch of salt—create a warm, aromatic backdrop that elevates the pumpkin’s earthiness.
Everything’s prepped? Good. Let’s get into the real action…
The Method — Step by Step
- Preheat your oven to 350 °F (175 °C) and line two baking sheets with parchment paper. This prevents sticking and gives you clean, even cookies. Make sure the sheets are spaced apart so the heat can circulate. If you’re in a hurry, you can use a silicone mat instead. The goal is a uniform baking surface.
- In a large mixing bowl, whisk together the flour, baking soda, baking powder, cinnamon, nutmeg, cloves, and salt. This dry blend ensures the spices are evenly distributed and the leavening agents are active. The whisking step also aerates the flour, making the cookies lighter. If you have a stand mixer, use the paddle attachment on low speed.
- In a separate bowl, cream the softened butter, brown sugar, and white sugar with an electric mixer on medium speed until pale and fluffy—about 2 minutes. This introduces air into the dough, giving the cookie a light bite. The butter must be at room temperature; otherwise, the mixture will take longer to incorporate. Be careful not to over‑beat; you want a silky texture.
- Beat in the egg and yolk, one at a time, followed by the vanilla extract. The egg adds structure, while the yolk enriches the dough with a silky mouthfeel. The vanilla enhances the pumpkin’s sweetness. Mix until the ingredients are fully blended, but avoid overmixing.
- Fold in the pumpkin puree until just combined. The dough will look lumpy, but that’s fine; the lumps give the cookie a pleasant, rustic look. This step is the moment of truth—watch the dough transform into a thick, cohesive mixture. If it’s too runny, add a tablespoon of flour to thicken.
- Gently stir in the chocolate chips, ensuring they’re evenly distributed without overworking the dough. This prevents the chocolate from melting into the batter. The chips should remain whole, creating pockets of chocolate in every bite. Let the dough rest for 5 minutes before rolling.
- Using a tablespoon or cookie scoop, drop rounded balls of dough onto the prepared baking sheets, spacing them 2 inches apart. The spacing allows the cookies to spread slightly without merging. If you prefer a more compact cookie, use a smaller scoop.
- Bake for 12–14 minutes, or until the edges are golden brown and the centers look set but still soft. The cookies will look slightly underbaked, but they will firm up as they cool. Keep an eye on them—oven temperatures can vary. The aroma will be intoxicating, hinting at caramelized sugar and warm spices.
- Remove the cookies from the oven and let them cool on the sheet for 5 minutes before transferring to a wire rack. This allows the cookies to set without becoming too soft. If you’re in a hurry, you can let them cool on a plate, but a wire rack ensures even cooling.
- Enjoy the cookies warm or let them cool completely. The texture changes slightly as they cool—soft centers become firmer, while the edges retain their crispness. Serve with a glass of milk or a cup of tea for the ultimate comfort experience. Store any leftovers in an airtight container for up to a week.
That’s it— you did it. But hold on, I’ve got a few more tricks that’ll take this to another level. These insider tips will help you avoid common pitfalls and fine‑tune the flavor and texture to perfection.
Insider Tricks for Flawless Results
The Temperature Rule Nobody Follows
Many bakers bake at 375 °F, but that can cause the cookies to spread too much and lose moisture. Baking at 350 °F keeps the edges crisp while preserving the soft center. The lower temperature also allows the spices to bloom slowly, enhancing their aroma. If your oven runs hot, set it 25 °F lower and use a thermometer to double‑check.
Why Your Nose Knows Best
The first aroma that rises from the oven is a reliable indicator of doneness. When the scent of caramelized sugar and pumpkin fills the kitchen, the cookies are ready to be taken out. Trust your nose over the timer; ovens can vary, and you’ll avoid overcooking. A quick sniff test is a foolproof way to achieve the perfect cookie.
The 5‑Minute Rest That Changes Everything
Letting the cookies rest on the baking sheet for 5 minutes before moving them to a wire rack allows the heat to redistribute. This step ensures the centers set without becoming overly hard. The cookies will still be soft when you bite into them, but they’ll hold their shape better. Skip this step at your own risk of a collapsed cookie.
The Chocolate‑Chip Placement Trick
If you want a chocolate‑chip‑dense cookie, fold the chips into the dough just before scooping. This ensures each bite has a burst of chocolate. For a lighter chocolate presence, fold the chips in after the dough has rested. The timing changes the chocolate distribution and overall flavor profile.
The Pumpkin‑Puree Timing Secret
Adding the pumpkin puree too early can make the dough too wet, causing excessive spreading. Fold the puree into the batter right before you add the chocolate chips. This keeps the dough manageable and ensures the pumpkin flavor is present without compromising texture. I’ve found that a quick mix for 30 seconds is enough to integrate it.
Creative Twists and Variations
This recipe is a playground. Here are some of my favorite ways to switch things up:
Nutty Pumpkin Delight
Add ½ cup chopped pecans or walnuts to the dough for a crunchy, nutty twist. The nuts pair beautifully with the pumpkin’s earthiness and the chocolate chips. Use toasted nuts for an extra layer of flavor. This variation is perfect for a holiday potluck.
White Chocolate & Orange Zest
Replace semi‑sweet chips with 1 cup white chocolate chips and sprinkle 1 tbsp fresh orange zest over the dough. The citrus brightens the pumpkin flavor and gives the cookie a subtle brightness. The white chocolate adds a creamy sweetness that contrasts nicely with the spices. This version is especially refreshing for spring.
Maple‑Glazed Surprise
Drizzle a thin layer of maple glaze over cooled cookies. Mix 1 cup powdered sugar with 2 tbsp maple syrup and a splash of milk to create a glossy finish. The maple glaze adds a caramel‑like depth that pairs well with pumpkin. It also gives the cookies a professional look for gifting.
Cocoa‑Infused Crunch
Add ¼ cup cocoa powder to the dry mix and replace ¼ cup of flour with ¼ cup oats for a chocolate‑y twist. The oats give the cookies a chewy texture, while the cocoa deepens the chocolate flavor. This version is ideal for chocolate lovers who still want the pumpkin kick.
Spiced‑Up Extra Heat
Add a pinch of cayenne pepper or a dash of smoked paprika to the spice blend for a subtle heat. The heat enhances the pumpkin’s natural sweetness and adds complexity. Be careful with the amount; a little goes a long way. This variation is great for those who like a spicy kick.
Storing and Bringing It Back to Life
Fridge Storage
Store cooled cookies in an airtight container at room temperature for up to 5 days. For extra freshness, add a slice of bread to the container; the bread absorbs moisture and keeps the cookies soft. Rotate the cookies daily to maintain even texture. Avoid refrigeration unless you’re in a very humid area.
Freezer Friendly
Place the cooled cookies on a baking sheet and freeze until solid, then transfer to a freezer bag. This method prevents the cookies from sticking together. They’ll stay good for up to 3 months in the freezer. Thaw at room temperature for 20 minutes before serving.
Best Reheating Method
Reheat frozen cookies in a preheated oven at 350 °F for 5 minutes, or microwave on low power for 20 seconds. Add a tiny splash of water before reheating; this steams the cookies back to perfection and restores moisture. The result is a cookie that tastes freshly baked, with a chewy center and crisp edges.