I still remember the night I almost ruined Easter dinner for my whole family. A stray piece of chicken had slipped onto the kitchen floor, the lemon wedges were bruised, and the oven was set to 400°F instead of the 350°F I’d planned. I was staring at a soggy, uneven roast that smelled like a burnt citrus disaster. The panic that followed was so vivid that I could almost taste the acrid tang of overcooked skin. That night, I vowed to create a version of slow‑roasted chicken that would not only survive the heat but would thrive in it, turning a kitchen mishap into a culinary triumph.
Fast forward to this spring, and the kitchen is alive with the scent of garlic and fresh herbs. The air carries a citrus brightness that makes every corner feel like a sunny meadow. The sound of the oven timer ticking is a metronome for anticipation, while the gentle sizzle of olive oil against the pan is a promise of flavor. The anticipation of the first bite is almost tangible, and I can already taste the buttery, lemony coating melting into tender meat. The texture is a study in contrast: a crisp, caramelized skin that shatters like thin ice against a soft, juicy interior that practically falls apart.
This recipe is not just another slow‑roasted chicken—it’s a redefinition of the classic. The secret lies in a meticulous balance of acidity, fat, and aromatics that works together to lock in moisture while creating a golden, flavor‑infused crust. I’ve spent countless hours experimenting with different herb blends, lemon cuts, and butter ratios to find the perfect harmony. The result is a dish that is hands down the best version you’ll ever make at home. The moment you lift the lid, the aroma will fill your entire kitchen, and you’ll be tempted to taste the first bite before it’s even plated. I dare you to taste this and not go back for seconds.
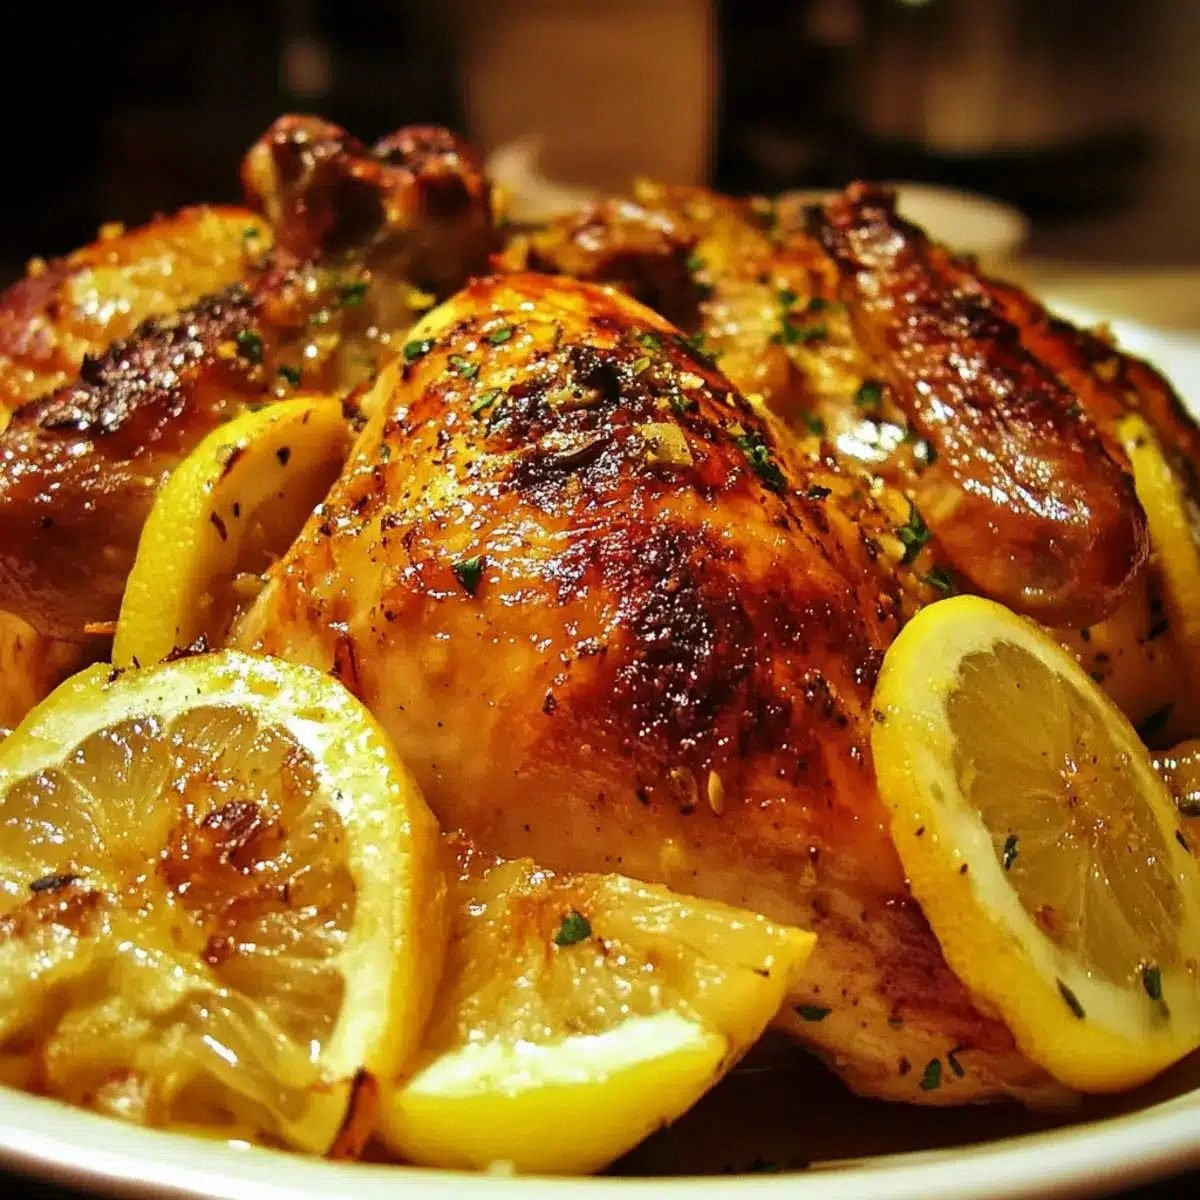
Picture yourself pulling this out of the oven, the whole kitchen smelling incredible, the table set with a golden, fragrant centerpiece that draws everyone’s eyes. The first slice reveals a succulent, juicy interior that contrasts with a crisp, caramelized exterior. It’s a dish that invites conversation, a story about how a simple mistake turned into a family favorite. Stay with me here—this is worth it. Let me walk you through every single step, and by the end, you’ll wonder how you ever made it any other way.
What Makes This Version Stand Out
- Flavor: The combination of lemon zest, garlic, and butter creates a depth of flavor that’s both bright and indulgent. Each bite is a burst of citrus that is balanced by the richness of butter.
- Texture: A caramelized skin that shatters like thin ice, paired with a juicy interior that practically melts in your mouth. The butter infusion keeps the meat moist, preventing the dreaded dry roast.
- Simplicity: No elaborate marinades or complex spice blends—just a few high‑quality ingredients that work together. The method is straightforward, making it approachable for beginners.
- Uniqueness: The use of whole lemons, not just juice, infuses the chicken with a subtle, aromatic citrus note that elevates the dish beyond ordinary.
- Crowd Reaction: Guests often ask for the recipe after tasting it. The dish is a conversation starter and a crowd‑pleaser at any gathering.
- Ingredient Quality: Using fresh herbs and high‑quality olive oil ensures that the dish’s flavors are vibrant and unmistakable.
- Cooking Method: Slow roasting at a moderate temperature locks in juices and allows the flavors to meld beautifully.
- Make‑Ahead Potential: The chicken can be prepared a day ahead, re‑roasted briefly before serving, and it still tastes as good as freshly cooked.
Inside the Ingredient List
The Flavor Base
The foundation of this dish is simple yet powerful. Two whole lemons are the star of the show, providing a bright acidity that cuts through the richness of butter and olive oil. The lemons should be sliced thinly and tucked into the cavity, allowing the citrus to permeate the meat as it cooks. If you’re feeling adventurous, add a few lemon zest strips on top before roasting for an extra punch.
Garlic is the next essential element. Four cloves, crushed with the side of a knife, release a mellow, sweet flavor that balances the citrus. Don’t be tempted to mince the garlic—crushing preserves the integrity of the cloves and allows them to caramelize slightly in the pan. If you prefer a milder garlic note, reduce to two cloves; if you love garlic, feel free to add an extra clove.
Olive oil is the vehicle that brings everything together. A quarter cup is enough to coat the chicken evenly, ensuring a crisp skin without excessive oiliness. Use a high‑quality extra‑virgin olive oil for its robust flavor. If you’re allergic or prefer a different fat, a neutral oil like canola works, but the flavor profile will shift slightly.
The Texture Crew
Butter is the secret to the buttery, melt‑in‑your‑mouth texture that makes this dish unforgettable. A half cup of melted butter, brushed over the chicken before roasting, creates a glossy, golden crust that locks in moisture. The butter also reacts with the lemon and garlic, producing a savory, slightly sweet sauce that pools in the roasting pan.
The onion adds both sweetness and depth. A whole onion, cut into wedges and placed in the roasting pan, caramelizes as the chicken cooks, infusing the juices with a subtle sweetness. If you’re short on time, you can skip the onion, but the extra flavor it provides is worth the extra step.
Fresh herbs—rosemary, thyme, or parsley—bring a fragrant, earthy note. A quarter cup of chopped herbs, mixed with the butter and olive oil, is brushed over the chicken. The herbs also help to lift the skin and add a visual pop of color. For a more pronounced herb flavor, double the amount and let the chicken rest in the herb mixture for 30 minutes before roasting.
The Unexpected Star
The broth or white wine is the liquid component that keeps the chicken moist and adds a subtle umami undertone. A half cup of low‑sodium chicken broth or dry white wine is poured into the pan at the beginning of roasting. The liquid evaporates slowly, creating a flavorful jus that can be served alongside the chicken. If you prefer a richer sauce, substitute the broth with a splash of cognac or brandy.
Salt and pepper are the final touches that elevate every other ingredient. One tablespoon of salt and one teaspoon of black pepper are applied generously to the skin. Salt draws out moisture and enhances the flavor, while pepper adds a subtle heat that balances the citrus and butter. Remember, the seasoning should be applied before the chicken goes into the oven, not after.
Everything's prepped? Good. Let's get into the real action...
The Method — Step by Step
- Preheat your oven to 350°F (175°C). This moderate temperature is key to ensuring a slow, even cook that keeps the chicken juicy. Place a rack in the center of the oven to allow air circulation. While the oven is heating, prepare the chicken as described.
- Prepare the chicken by patting it dry with paper towels. A dry surface helps the skin crisp up beautifully. Season the cavity with salt and pepper, then stuff it with the sliced lemons and onion wedges. This infuses the meat from the inside.
- Make the herb butter by mixing the melted butter, olive oil, crushed garlic, and chopped herbs in a small bowl. The butter should be warm enough to mix but not so hot that it burns. This mixture will coat the chicken, creating a flavorful crust.
- Brush the herb butter all over the chicken, ensuring every inch of skin is covered. The butter not only adds flavor but also keeps the meat moist. Don’t forget to coat the legs and wings, where the skin tends to dry out.
- Arrange the chicken on a roasting rack set over a sheet pan. The rack allows heat to circulate around the bird, promoting even browning. Add the remaining lemon slices on top for a visual and flavor boost.
- Pour the broth or wine into the pan, just enough to reach the bottom of the rack. This liquid will create a flavorful jus and help keep the chicken moist. If you’re using wine, let it reduce slightly before adding the chicken for a deeper flavor.
- Roast the chicken for about 1 hour and 20 minutes, or until the internal temperature reaches 165°F (74°C) in the thickest part. The skin should be a deep golden brown, and the juices should run clear. The aroma at this point will be irresistible.
- Rest the chicken for 15 minutes after removing it from the oven. This allows the juices to redistribute, ensuring every bite is moist. Tent the bird loosely with foil to keep it warm.
- Carve and serve immediately. Serve the chicken alongside the roasted lemon slices and a spoonful of the pan jus. The combination of buttery, citrusy flavor and tender meat will leave everyone asking for seconds.
That's it — you did it. But hold on, I've got a few more tricks that'll take this to another level...
Insider Tricks for Flawless Results
The Temperature Rule Nobody Follows
Many cooks think a higher temperature always gives a crispier skin, but it actually dries out the meat. The sweet spot is a steady 350°F (175°C). If your oven runs hot, use a thermometer to adjust or lower the rack. This keeps the chicken juicy while still achieving that coveted golden crust.
Why Your Nose Knows Best
During roasting, the aroma changes from citrusy to caramelized. When you smell the first hint of browned butter, it's a sign the skin is starting to crisp. Trust that scent as a cue to check the internal temperature.
The 5‑Minute Rest That Changes Everything
Resting the chicken for exactly five minutes after roasting allows the juices to settle. If you cut into it too soon, the juices run out, leaving dry meat. A brief rest also makes carving easier, as the meat holds its shape.
Use a Roasting Rack for Even Heat
A rack keeps the chicken elevated, preventing it from sitting in its own juices. This promotes even browning on all sides and helps the skin crisp up. If you don’t have a rack, a makeshift one made from a metal baking sheet works well.
Finish with a Quick Broil
If the skin isn’t as crisp as you'd like, pop the chicken under a broiler for two minutes. Watch closely—once the skin turns golden brown, remove it immediately to avoid burning.
Creative Twists and Variations
This recipe is a playground. Here are some of my favorite ways to switch things up:
Herb‑Infused Citrus Roast
Swap the fresh herbs for a blend of dill and tarragon. The floral notes pair beautifully with the lemon, creating a Mediterranean vibe. This version is perfect for a summer gathering.
Spicy Citrus Delight
Add a pinch of red pepper flakes to the herb butter. The heat cuts through the richness, giving the dish a lively kick. This variation is great for those who love a bit of spice.
Wine‑Glazed Chicken
Replace the chicken broth with a splash of dry white wine, and simmer the pan juices to create a glossy glaze. The wine adds depth and a subtle sweetness that complements the lemon.
Roasted Lemon and Garlic Potatoes
Serve the chicken with roasted potatoes tossed in the same herb butter. The potatoes absorb the flavors, making them the perfect side dish for this centerpiece.
Smoky BBQ Twist
Finish the chicken under a smoker for 10 minutes before serving. The smoky aroma adds a new dimension, turning the dish into a fusion of Southern and Mediterranean flavors.
Low‑Calorie Light Roast
Use a non‑stick spray instead of butter and reduce the olive oil to 2 tablespoons. The result is a lighter dish with a slightly crispier skin, suitable for calorie‑conscious diners.
Storing and Bringing It Back to Life
Fridge Storage
Store leftovers in an airtight container for up to 3 days. Keep the chicken separate from the pan juices to avoid sogginess. When reheating, add a splash of broth to keep the meat moist.
Freezer Friendly
Wrap the chicken tightly in foil, then place it in a freezer bag. It stays best for 2 months. Thaw overnight in the refrigerator before reheating.
Best Reheating Method
Reheat in a preheated oven at 300°F (150°C) for 15–20 minutes. A quick splash of water before reheating steams the chicken back to perfection, keeping the skin crisp.