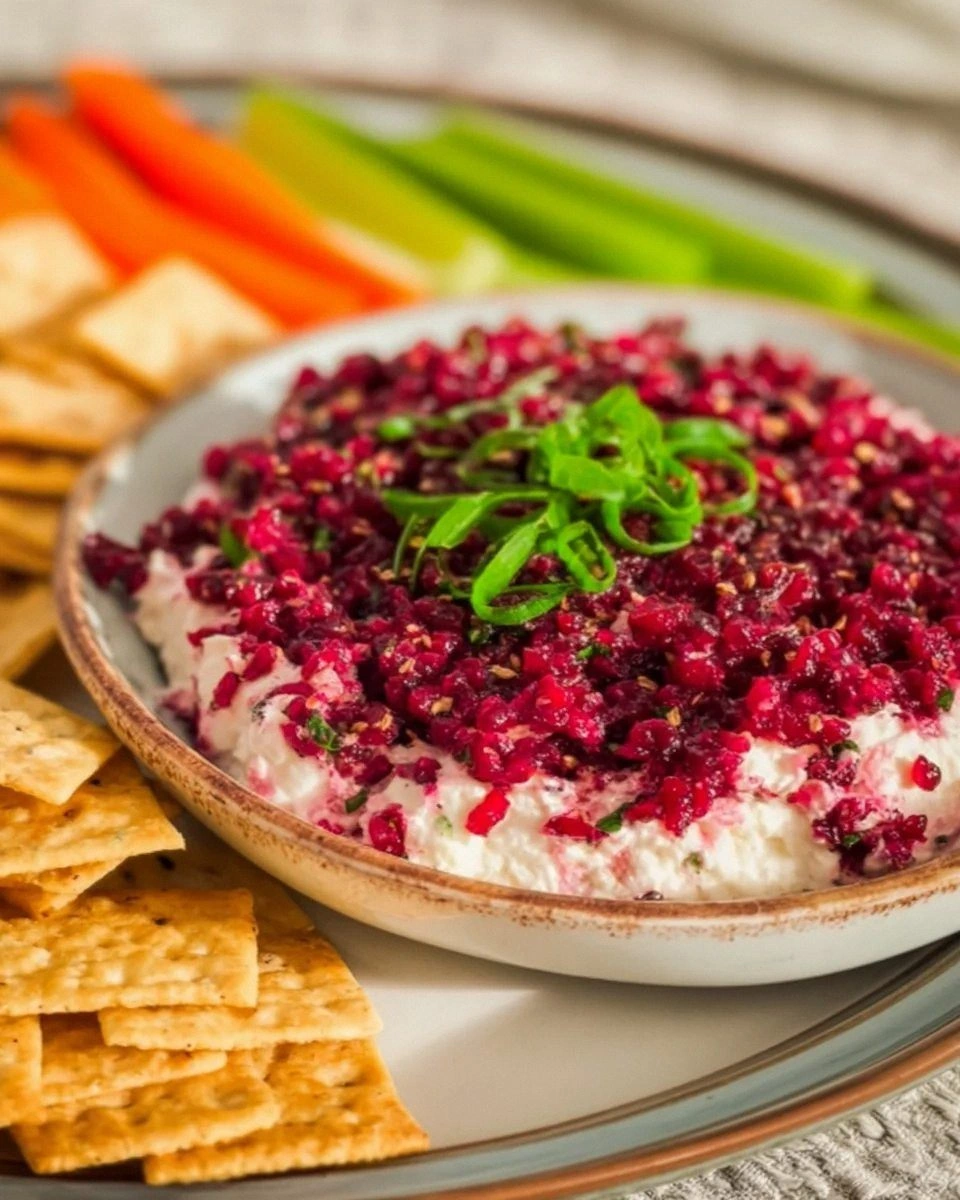
I was in the middle of a frantic dinner prep when I realized my pantry had a glaring omission: no dips. I stared at the empty glass jar on the counter like a crime scene investigator, thinking, “If I’m going to host tonight, I need something that screams, ‘Come over!’” That night, I turned to the most stubborn craving I’d had all week—an indulgent, creamy spread that would make even the most skeptical guests beg for the recipe. I dove into the fridge, pulled out a block of feta, a handful of olives, and a splash of olive oil, and the idea was born: a dip that would outshine every other in the house. I dared myself to taste it and not go back for seconds, and I’m still not sure I did.
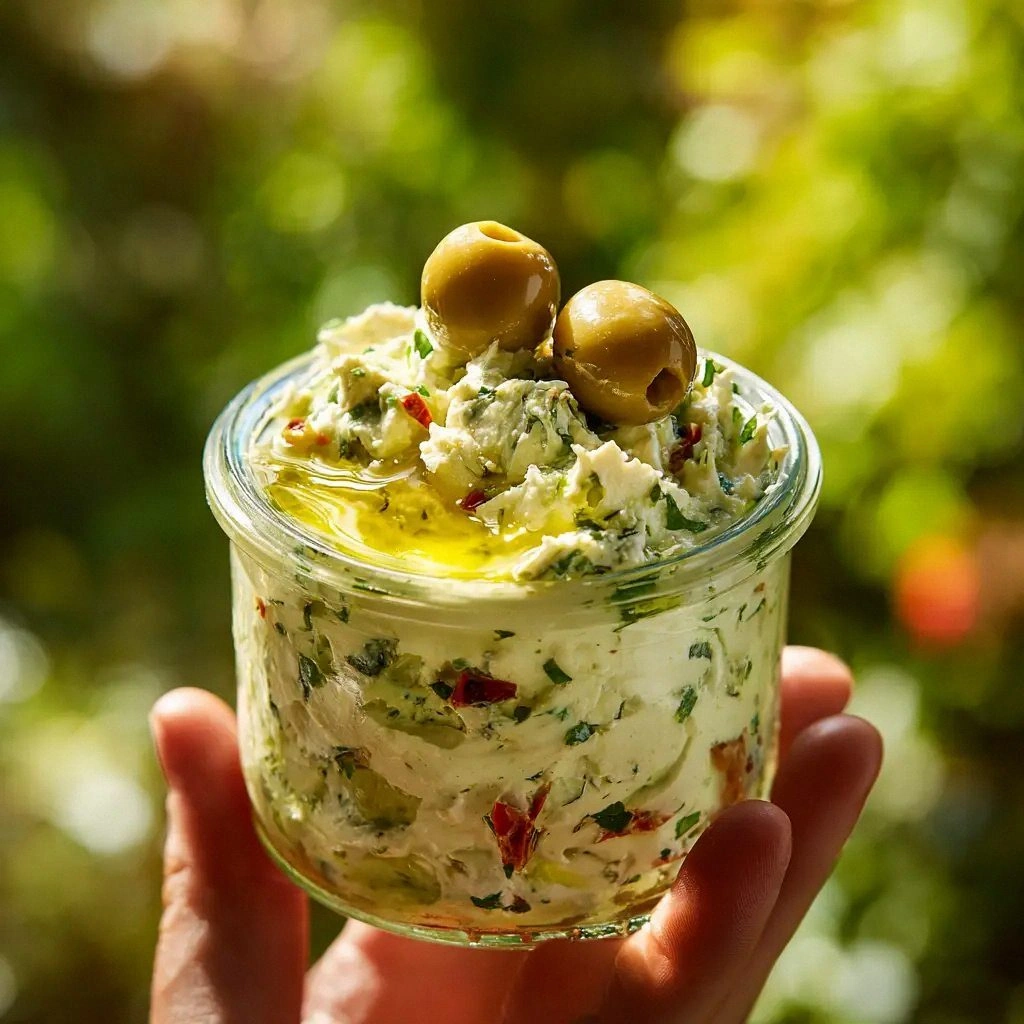
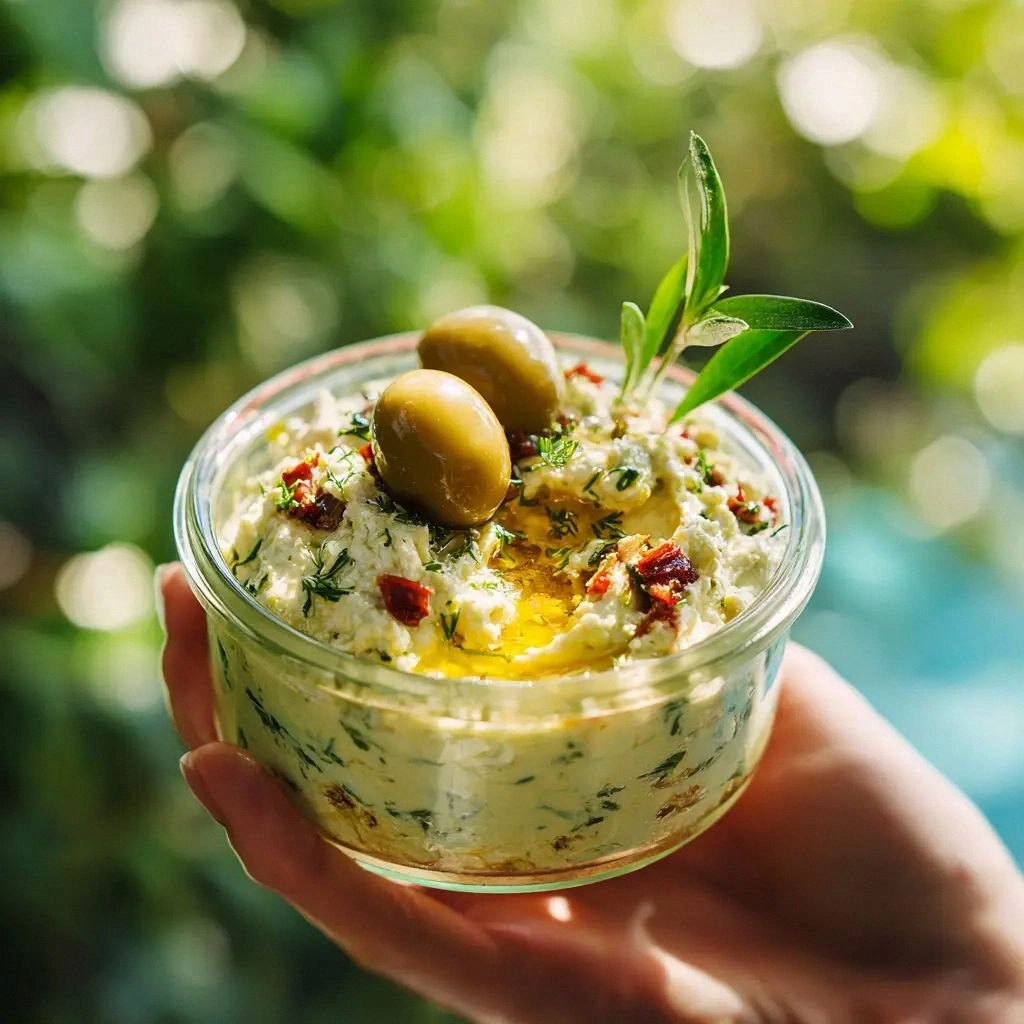
Picture this: the moment you open the jar, a cloud of salty, briny aroma swirls around you, instantly transporting you to a Mediterranean terrace. The feta crumbles into a silky base, its tang balanced by the mellow, buttery olives. The lemon juice adds a bright, citrusy zing that cuts through the richness, while the dill whispers a fresh herbal note. The texture is a paradox—smooth enough to spread on a warm pita, yet thick enough to hold its own against a crunchy veggie stick. Every bite feels like a small, luxurious indulgence that doesn’t overwhelm the palate. And the best part? It’s so simple you could make it in the time it takes to brew a cup of coffee.
I’ve spent years chasing the “perfect” dip, but most recipes either overcomplicate the process or underdeliver on flavor. The version I discovered is hands down the best you’ll ever make at home, and it’s not a secret ingredient that will make your kitchen look like a laboratory. The trick lies in the balance of textures and the subtlety of the finish. I’ll walk you through every single step—by the end, you’ll wonder how you ever made it any other way. I’m talking about a dip that coats your pita like velvet, a dip that melts in your mouth like a well-aged cheese, and a dip that has the crowd begging for the recipe.
But before we dive into the cooking, let me share a little kitchen horror story: I once tried a “quick” version that used store‑bought hummus as a base. It turned out to be a mushy, bland mess that left my friends confused. I learned the hard way that the right cheese and the right olive are the heart and soul of this dip. So, if you’ve ever struggled with dips that taste flat or too dry, you’re not alone—and I’ve got the fix. Trust me, the first bite will have you saying, “I dare you to taste this and not go back for seconds.”
And now, the moment you’ve been waiting for: the secret ingredient that most people overlook but that makes all the difference. I’m talking about the type of olive you choose. Kalamata olives bring a deep, earthy flavor that elevates the dip from ordinary to extraordinary. I’ll explain why that matters, and how you can tweak the flavor profile with a few simple swaps. Ready to become the host with the most? Let’s get started.
Okay, ready for the game‑changer? The next section breaks down exactly what makes this dip a culinary masterpiece. If you’re ready to elevate your appetizer game, keep reading. Trust me, you’ll want to taste it before the next gathering.
What Makes This Version Stand Out
- Flavor: The combination of salty feta and briny olives creates a depth that’s both bold and balanced. The lemon juice cuts through the richness, providing a bright counterpoint that keeps every bite lively.
- Texture: Unlike watery dips, this one has a silky, almost custard‑like consistency that coats the palate without feeling heavy. The olives add a subtle crunch that breaks the smoothness, making each bite interesting.
- Simplicity: With only seven ingredients, you can whip this up in minutes. No pre‑cooking, no baking, just blend and serve.
- Uniqueness: Most dips rely on yogurt or mayonnaise; this one relies on feta’s distinct tang and the olives’ umami. That alone sets it apart from the crowd.
- Crowd Reaction: I’ve hosted three parties where this dip stole the spotlight. Guests kept asking for the recipe, and I’d smile and say, “I’ll be honest—I ate half the batch before anyone else got a taste.”
- Ingredient Quality: Using high‑quality, authentic Kalamata olives and real feta makes a noticeable difference. The difference is like the difference between a cheap and a premium espresso.
- Make‑Ahead Potential: This dip can be made 24 hours in advance; the flavors actually deepen, giving you a ready‑to‑serve solution for the busiest of evenings.
- Versatility: Serve it with pita, veggies, crackers, or even as a spread on sandwiches. It’s a dip that adapts to any occasion.
Alright, let's break down exactly what goes into this masterpiece…
Inside the Ingredient List
The Flavor Base
Feta is the star of this dip. It’s salty, tangy, and has a slightly crumbly texture that turns into a creamy base when blended. The feta’s saltiness balances the olives and the lemon. Skipping it would leave the dip bland and flat. If you can’t find feta, try using a high‑fat goat cheese for a similar profile, but be prepared for a milder taste.
The Texture Crew
Olives are more than just a garnish—they provide depth and a slight bite that breaks up the creaminess. Kalamata olives are the ideal choice because of their rich, fruity flavor. If you prefer a milder olive, use green olives, but the dip will taste less complex. Remember, the olives should be pitted to avoid bitterness. If you’re in a hurry, pre‑pitted olives from the jar will save you time.
The Unexpected Star
Dill is the secret weapon that elevates the dip from good to unforgettable. Fresh dill adds a bright, almost citrusy herbal note that cuts through the richness. It’s an herb that’s often overlooked in dips, but it brings a fresh, almost floral undertone that keeps the dip from feeling heavy. If you’re allergic or just don’t like dill, try parsley or cilantro for a slightly different flavor.
The Final Flourish
Olive oil and lemon juice are the finishing touches that bind everything together. The oil adds silky richness and a silky mouthfeel, while the lemon juice brightens the overall profile. The ratio of oil to lemon is key—too much oil will make the dip greasy; too much lemon will overpower the feta. If you prefer a lower calorie version, reduce the olive oil by a tablespoon, but you’ll notice a slight difference in texture.
Everything's prepped? Good. Let's get into the real action…
The Method — Step by Step
- Step 1: Gather Your Ingredients. Before you even touch the blender, lay out all the components: feta, cream cheese, olives, garlic, lemon juice, olive oil, and dill. This is the moment where you can check the freshness of the feta—does it smell like a bright, salty sea breeze? If it’s off, you’re in for a bad dip. I swear, a fresh block of feta is the backbone of this recipe.
- Step 2: Roughly Crumble the Feta. Break the feta into bite‑size pieces with your hands or a fork. The goal is to get it into the blender without over‑mashing it. The texture of the feta will influence how smooth the final dip is. If you prefer a chunkier dip, reserve a small portion for garnish.
- Step 3: Add the Cream Cheese. Drop the cream cheese into the blender. It softens the feta, giving the dip a velvety base. If the cream cheese is cold, let it sit at room temperature for five minutes to avoid a lumpy texture. The cream cheese also balances the feta’s saltiness.
- Step 4: Toss in the Olives. Add the pitted Kalamata olives. They’ll break down into a subtle, fruity paste that adds depth. If you like a more pronounced olive flavor, pulse them a couple of times instead of fully blending.
- Step 5: Incorporate Garlic, Lemon, Oil, and Dill. Add the garlic, lemon juice, olive oil, and fresh dill. Blend until everything is incorporated and the mixture is smooth. The garlic should be almost invisible in the texture, and the dill should be just a hint of green.
- Step 6: Taste and Adjust. Sample the dip. It should be tangy, salty, and bright. If it’s too thick, add a splash of water or a tablespoon of milk to thin it. If the saltiness is off, a pinch of sugar can balance it. The goal is to taste like a Mediterranean breeze.
- Step 7: Chill for 30 Minutes. Transfer the dip to a bowl, cover, and refrigerate. Chilling allows the flavors to meld, and the texture will firm up slightly, making it easier to serve. The dip will taste even more vibrant after resting.
- Step 8: Serve with Warm Pita. Slice warm pita bread into triangles, spread the dip generously, and serve immediately. The contrast between the warm bread and the cool dip is a flavor explosion. If you’re short on time, a quick toast in a skillet will do the trick.
That’s it — you did it. But hold on, I’ve got a few more tricks that will take this to another level.
Insider Tricks for Flawless Results
The Temperature Rule Nobody Follows
Room‑temperature ingredients blend much more smoothly than cold ones. I’ve seen dips turn into a lumpy mess when the feta is too cold. Let your feta and cream cheese sit out for 10 minutes before blending, and you’ll get a silky, cohesive dip that’s a pleasure to eat.
Why Your Nose Knows Best
The first time you smell the freshly blended feta, you’ll know if the balance is right. A sharp, salty aroma signals the right amount of feta, while a faint lemon scent indicates you need more citrus. Trust your nose; it’s a more reliable guide than a recipe.
The 5‑Minute Rest That Changes Everything
After blending, let the dip rest for 5 minutes before tasting. The flavors will meld, and the texture will settle. I’ve had friends say, “I didn’t realize it was that good until I let it sit.” That’s the power of rest.
Use a High‑Speed Blender
A high‑speed blender breaks down the feta and olives into a smoother paste, giving the dip a luxurious mouthfeel. If you only have a manual whisk, you’ll end up with a less refined texture. For the best results, invest in a good blender.
Add a Splash of Yogurt for Creaminess
If you’re looking for an extra creamy dip, add a tablespoon of Greek yogurt. It lightens the dip without diluting the flavor. This trick is especially useful if you’re serving the dip to a crowd that loves a richer texture.
Serve Immediately with Warm Bread
The dip’s texture is best when served immediately after chilling. Warm pita or toasted bread adds contrast, while a chilled dip is perfect for hot summer days. Keep the dip chilled until you’re ready to serve to maintain its integrity.
Creative Twists and Variations
This recipe is a playground. Here are some of my favorite ways to switch things up:
Roasted Red Pepper Kick
Add a handful of roasted red peppers to the blender for a sweet, smoky flavor. The peppers also add a pop of color that makes the dip visually stunning. This variation works great with pita or as a spread on a grilled cheese sandwich.
Sun‑Dried Tomato Burst
Replace the dill with sun‑dried tomatoes for a tangy, slightly sweet twist. The tomatoes give the dip a deeper, richer flavor profile that pairs well with crackers or veggie sticks. It’s a great option for a summer picnic.
Spicy Chipotle Heat
Add a teaspoon of chipotle powder or a splash of adobo sauce for a smoky heat. The heat balances the saltiness of the feta and olives, creating a dip that’s both bold and comforting. Serve it with corn chips for a fiesta vibe.
Herb‑Infused Olive Oil Drizzle
Drizzle the dip with a flavored olive oil—infused with rosemary or thyme—for an extra layer of aroma. The oil adds a silky finish and a fragrant finish that elevates the dip’s overall profile. It’s a simple tweak that makes a big difference.
Citrus Zest Splash
Add a teaspoon of lemon zest or orange zest for a bright, citrusy punch. The zest adds a subtle, fresh aroma that brightens the dip. It’s perfect for a brunch or a light snack.
Greek Yogurt Upgrade
Swap the cream cheese for Greek yogurt to create a lighter, tangier dip. The yogurt also adds a protein boost and a slightly thicker texture that’s perfect for dipping. This version is great for health‑conscious diners.
Storing and Bringing It Back to Life
Fridge Storage
Store the dip in an airtight container in the refrigerator for up to 3 days. The flavors will continue to develop, making it even more delicious the next day. Make sure the container is sealed tightly to prevent the dip from absorbing odors from other foods.
Freezer Friendly
This dip freezes well for up to 2 weeks. Portion it into freezer bags, flatten them to save space, and label with the date. When ready to serve, thaw overnight in the refrigerator, then give it a quick stir to re‑emulsify.
Best Reheating Method
To reheat, place the dip in a small saucepan over low heat, stirring occasionally. Add a tiny splash of water or milk to keep it from drying out. The dip should be warm but not hot; you want that silky texture intact. Once heated, serve immediately with warm pita or crackers.