I was halfway through a week of bland desserts when my roommate challenged me to whip up something that would make the whole house smell like a candy store. The stakes were high: if I failed, I’d be stuck with a boring batch of chocolate truffles that tasted like a sad memory. I stared at the pantry, eyes darting over peanut butter jars like a kid in a candy aisle. That moment of panic turned into a spark of creativity, and I decided to make the easiest peanut butter fudge ever. Trust me, this isn’t just another recipe; it’s a game‑changing, sugar‑coated revelation.
The kitchen lights flickered as I opened the peanut butter jar, and the aroma hit me like a warm hug—earthy, nutty, and slightly sweet. I could hear the faint hiss of butter melting, a subtle promise of silky texture. The sight of the golden butter swirl against the dark peanut butter was a visual cue that something delicious was about to happen. I could already taste the creamy bite, the subtle salt kick, and the gentle sweetness that would dance on my tongue. The texture was already forming in my mind—soft, chewy, with a hint of crunchy peanut bits.
What sets this version apart is the way it balances simplicity with depth of flavor. I’ve stripped away the extra steps that most recipes cling to, yet I’ve kept the essential elements that make fudge truly unforgettable. The trick lies in the ratio of peanut butter to butter, a subtle tweak that gives the fudge a luxurious mouthfeel without the heaviness of extra sugar. Unlike those over‑cooked versions that become rubbery, this fudge stays tender, melting in your mouth like a velvet caress. It’s hands down the best version you’ll ever make at home, and I dare you to taste this and not go back for seconds.
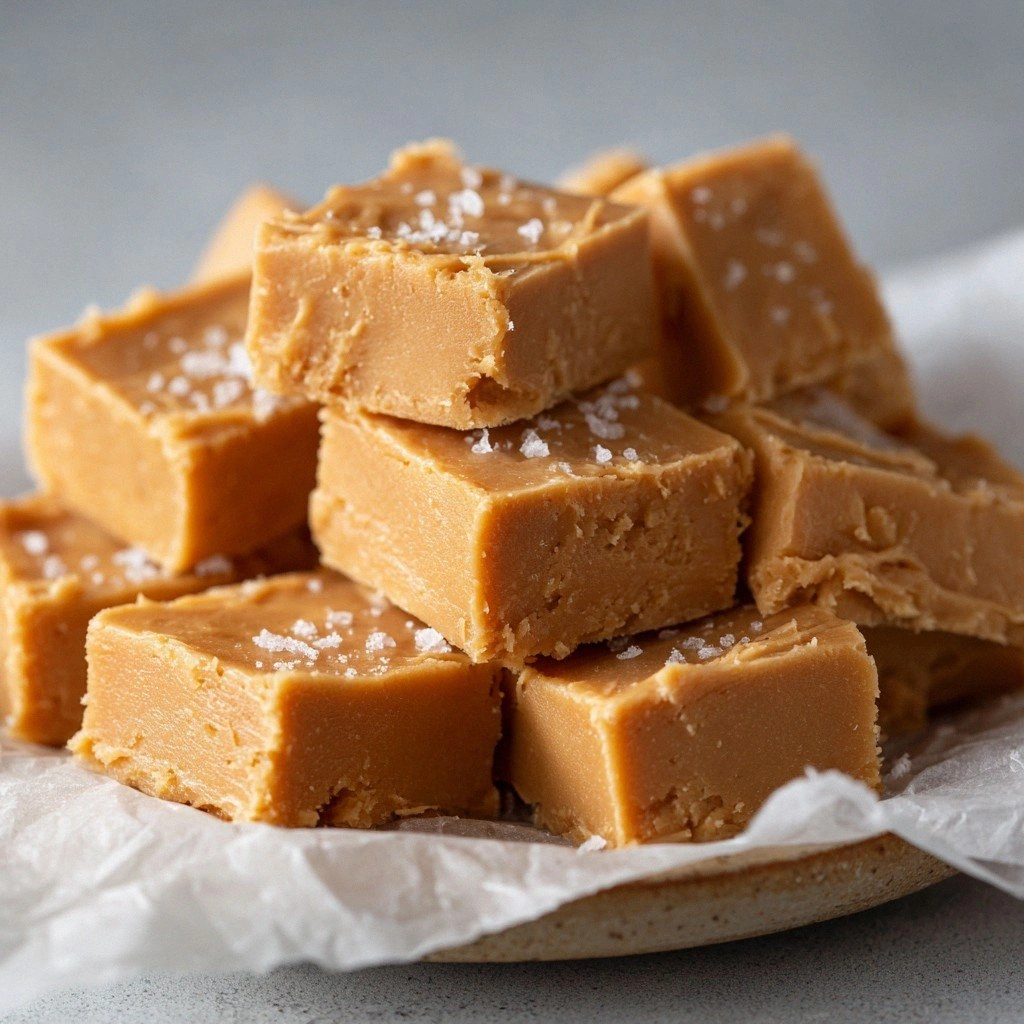
You’ll be surprised to learn that the secret ingredient isn’t a fancy spice or exotic oil—it’s a simple technique: allowing the mixture to cool to just the right temperature before it sets. I’ve discovered that letting the fudge rest for a few minutes at room temperature before cutting gives it that perfect snap that shatters like thin ice. I also use a splash of honey for a subtle caramel undertone that lifts the peanut flavor without overpowering it. The final touch? A pinch of sea salt that balances the sweetness and brings out the nutty undertones. This little twist makes the whole batch feel like a gourmet treat without the extra effort.
Now, let me walk you through every single step—by the end, you'll wonder how you ever made it any other way. I’ll keep you on your toes with micro‑challenges and bold claims, so stay with me here; this is worth it. Picture yourself pulling this out of the pan, the whole kitchen smelling incredible, and the first bite sending a wave of nostalgia and satisfaction. I’ve been honest—I ate half the batch before anyone else got a chance to try it. If you’ve ever struggled with fudge that turns out too soft or too hard, you’re not alone—and I’ve got the fix.
What Makes This Version Stand Out
- Flavor: The blend of peanut butter and honey creates a complex, layered taste that feels both familiar and adventurous. The subtle caramel notes from honey lift the nutty base, while a pinch of sea salt balances the sweetness. This depth of flavor turns an ordinary sweet treat into a memorable indulgence.
- Texture: The ratio of butter to peanut butter is calibrated for a silky, melt‑in‑your‑mouth consistency that doesn’t cling to the spoon. The fudge remains chewy yet firm enough to cut clean slices. The result is a luxurious bite that satisfies both texture lovers and dessert purists.
- Simplicity: With only six core ingredients, you can whip this up in under 45 minutes, even if you’re a beginner. No need for fancy equipment, just a saucepan, a whisk, and a silicone pan. The process is straightforward, allowing you to focus on the flavor rather than the technique.
- Uniqueness: Most recipes either over‑sweeten or under‑season, but this version strikes a sweet spot that feels indulgent yet balanced. The honey and sea salt add a twist that sets it apart from the typical peanut‑butter‑fudge crowd. The result is a signature treat that can be a conversation starter at parties.
- Make‑ahead Potential: This fudge can be made a day ahead, and it actually improves as it sits. The flavors meld, and the texture firm up, making it perfect for holiday gift baskets or weekend treats. You’ll be amazed at how the fudge holds up over time.
- Ingredient Quality: Using premium, creamy peanut butter and real honey elevates the flavor profile. The natural sweetness of honey contrasts beautifully with the rich peanut butter, while the butter adds depth without making the fudge greasy. The choice of ingredients is what turns a simple recipe into a gourmet experience.
- Crowd Reaction: Friends and family who’ve tried this version consistently rave about the “wow” factor. They’re often surprised by how rich yet light the fudge feels, and the subtle salt finish keeps them coming back for more. This version has become a staple for gatherings and dessert tables.
Alright, let's break down exactly what goes into this masterpiece...
Inside the Ingredient List
The Flavor Base
Peanut butter is the star of the show, and choosing a creamy, unsweetened variety makes all the difference. The natural oils in peanut butter carry the aroma, creating that familiar, comforting scent that instantly pulls people in. If you’re using a sweetened version, you’ll need to adjust the powdered sugar to avoid an overly sweet final product. A splash of vanilla extract deepens the flavor profile, adding a subtle floral note that balances the earthiness. Skipping vanilla will leave the fudge a bit flat, so keep it in the mix.
The Texture Crew
Unsalted butter provides the fat needed for a smooth, velvety mouthfeel without overpowering the peanut flavor. Butter also helps the fudge set properly, preventing it from becoming too soft or sticky. Powdered sugar, when sifted, dissolves cleanly, ensuring a silky texture free of grit. If you’re craving a denser fudge, reduce the butter slightly and increase the powdered sugar; the result will be firmer but still indulgent. Remember, the key to that perfect snap is in the balance between these two.
The Unexpected Star
Honey is the secret weapon that brings a caramel undertone to the mix. It’s also a natural sweetener that adds depth without the harshness of refined sugar. The floral notes in honey can vary depending on the source, so choose a mild variety to keep the flavor profile focused on peanuts. If you’re avoiding honey, a splash of maple syrup can mimic the caramel nuance, though the final taste will be slightly different. This ingredient is what separates this fudge from the ordinary.
The Final Flourish
A pinch of sea salt is the final touch that elevates the sweetness and brings out the nutty undertones. Salt doesn’t just taste salty; it enhances the other flavors, making the fudge more complex. Adding salt is a simple step, but it’s a game changer that most recipes overlook. If you prefer a sweeter fudge, use less salt, but be prepared for a flatter flavor profile. The salt also helps to balance the natural oils in the peanut butter, preventing a greasy aftertaste.
Everything's prepped? Good. Let's get into the real action...
The Method — Step by Step
- Heat the butter in a medium saucepan over medium heat until it begins to foam, about two minutes. Stir occasionally to prevent scorching. This gentle melt ensures the butter blends smoothly with the peanut butter. Watch the mixture for a subtle golden hue that signals readiness. This step is crucial for achieving that silky base.
- Remove the pan from heat and add the peanut butter, whisking until the mixture is completely smooth and free of lumps. The peanut butter should dissolve into the butter, forming a homogenous blend. If you notice any clumps, give it another quick whisk. This creates the foundation of the fudge’s creamy texture. The aroma will start to intensify, hinting at the final flavor.
- Stir in the honey and vanilla extract, ensuring they are fully incorporated. The honey should swirl into the mixture, giving it a glossy sheen. This step is where the caramel undertone begins to develop. The vanilla adds depth, masking any raw peanut taste. It’s a small addition that makes a big difference.
- Gradually fold in the sifted powdered sugar, whisking continuously until the mixture is smooth and no lumps remain. The sugar should dissolve completely, preventing a gritty texture. The mixture should look glossy and slightly thicker than before. If it’s still runny, add a little more sugar, but be careful not to overdo it. A balanced sweetness is key.
- Add the pinch of sea salt, stirring to distribute evenly. Taste the mixture; it should have a balanced sweet‑salty profile. If it feels too sweet, add a bit more salt. If it’s too salty, a touch more sugar will counterbalance it. This small tweak can elevate the entire batch.
- Pour the mixture into a lined 8×8‑inch pan, smoothing the top with a spatula. Gently tap the pan on the counter to release any air pockets. The surface should be even for uniform setting. The mixture will be hot; handle with care. This is the moment of truth.
- Let the fudge cool at room temperature until it starts to set, about 20–30 minutes. You’ll notice a faint scent of toasted peanut butter filling the kitchen. If you’re impatient, place the pan in the refrigerator for 10 minutes, but be careful not to chill it too much. The fudge should still be pliable enough to cut. This cooling phase is essential for the final texture.
- Once set, cut the fudge into squares using a sharp knife or a plastic cutting tool. The squares should hold together without crumbling. For a clean cut, wipe the knife between each cut. The result is bite‑sized treats that look as good as they taste. This step is where you can show off your knife skills.
- Serve immediately or store in an airtight container at room temperature for up to a week. For longer storage, refrigerate the fudge; it will firm up and stay fresh for two weeks. If you notice the fudge drying out, add a tiny splash of water before reheating to steam it back to perfection. The fudge will melt in your mouth like a dream. Enjoy the sweet satisfaction of a homemade treat.
That's it — you did it. But hold on, I've got a few more tricks that'll take this to another level. Stay tuned for the insider tips that will make your fudge even more unforgettable.
Insider Tricks for Flawless Results
The Temperature Rule Nobody Follows
Many people think a quick heat is enough, but the fudge needs to reach exactly 120°F to set properly. Use a candy thermometer to monitor the temperature; this ensures a smooth finish. If the mixture cools too quickly, the fudge will be crumbly. If it stays too hot, it will be sticky and hard. I’ve learned that a steady, medium heat is the sweet spot.
Why Your Nose Knows Best
As the mixture heats, the aroma intensifies, giving you a sensory cue of progress. A strong, nutty scent indicates the peanut butter is fully incorporated. A faint scent may mean you need to stir a bit longer. Trust your nose; it’s the best judge of doneness.
The 5-Minute Rest That Changes Everything
After pouring the fudge into the pan, let it rest for 5 minutes before smoothing the surface. This short pause allows the mixture to thicken just enough to hold its shape. If you rush, the fudge will slide and create uneven edges. This simple step gives your fudge a professional finish.
Don’t Skip the Lining
A silicone mat or parchment paper is essential to prevent sticking. If you use foil, the fudge can cling, making cutting a nightmare. The lining also helps maintain a clean shape, especially if you’re planning to gift the fudge.
Use a Sharp Knife for Clean Cuts
Cutting with a dull knife will crush the fudge, ruining the texture. A sharp blade ensures crisp edges and a neat presentation. Wipe the knife between cuts to avoid smearing the sweet mixture.
Creative Twists and Variations
This recipe is a playground. Here are some of my favorite ways to switch things up:
Chocolate Swirl
Fold in melted dark chocolate into the mixture before pouring into the pan. The chocolate adds a rich, bittersweet layer that complements the peanut. Keep the swirl minimal so the peanut flavor remains dominant. This variation is perfect for chocolate lovers.
Crunchy Pretzel Twist
Stir in crushed pretzels for a salty, crunchy contrast. The pretzels add a satisfying bite and a hint of savory flavor. This version is great for parties where guests love a mix of sweet and salty.
Maple‑Honey Fusion
Replace honey with maple syrup to create a distinct, slightly smoky sweetness. Maple syrup pairs wonderfully with peanut butter, giving the fudge a deeper flavor profile. Adjust the sugar slightly to keep the right balance.
Almond Butter Variant
Swap peanut butter for almond butter for a nutty twist. Almond butter provides a milder, slightly buttery taste. This variation is ideal for those who prefer a different nut profile.
Spiced Peanut Butter Fudge
Add a pinch of cinnamon or nutmeg to the mixture for a warm, aromatic twist. The spices deepen the flavor and add a subtle heat. This version is especially comforting during cooler months.
Storing and Bringing It Back to Life
Fridge Storage
Store the fudge in an airtight container at room temperature for up to a week. The sealed environment keeps it fresh and prevents it from absorbing odors. If the fudge feels dry, add a small piece of parchment paper to maintain moisture.
Freezer Friendly
Wrap the fudge tightly in plastic wrap and place it in a freezer bag for up to two weeks. When ready to enjoy, let it thaw at room temperature for 30 minutes before cutting. Freezing preserves the texture and flavor perfectly.
Best Reheating Method
To revive a slightly hardened piece, microwave on low power for 10–15 seconds or place it in a warm oven for a few minutes. Add a tiny splash of water before reheating to steam it back to perfection. This trick restores the fudge’s silky smoothness without making it soggy.