I was standing in my kitchen at midnight, the kind of desperate hour when the fridge light is the only beacon of hope, and I realized I was missing that one perfect sweet‑and‑salty treat to end a binge‑watch session of every 90‑minute movie ever made. My friends had dared me to create something that could survive a road‑trip, a party, and a sudden craving attack all at once, and I was like, “Challenge accepted.” I rummaged through the pantry, grabbed the last Butterfinger bar, a tub of peanut butter, and a bag of powdered sugar, and the first whiff of that caramel‑toffee aroma hit me like a warm hug from a long‑lost aunt. The sound of the butter hitting the pan was a soft sizzle that whispered, “We’re about to make magic,” and I could already taste the buttery, crunchy, chocolate‑coated bliss in my mind.
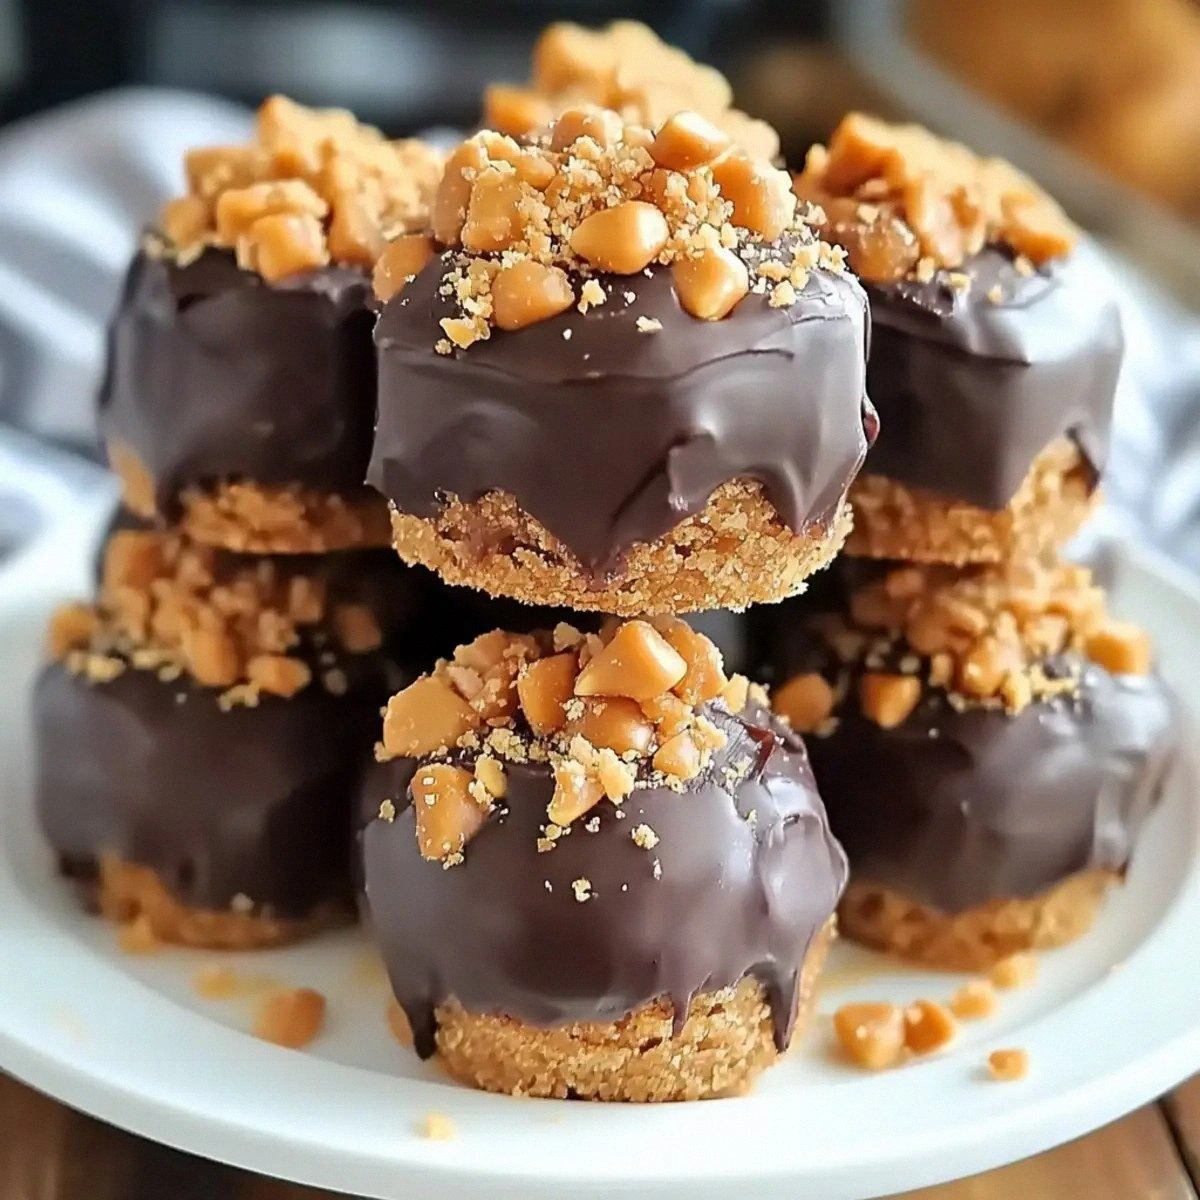
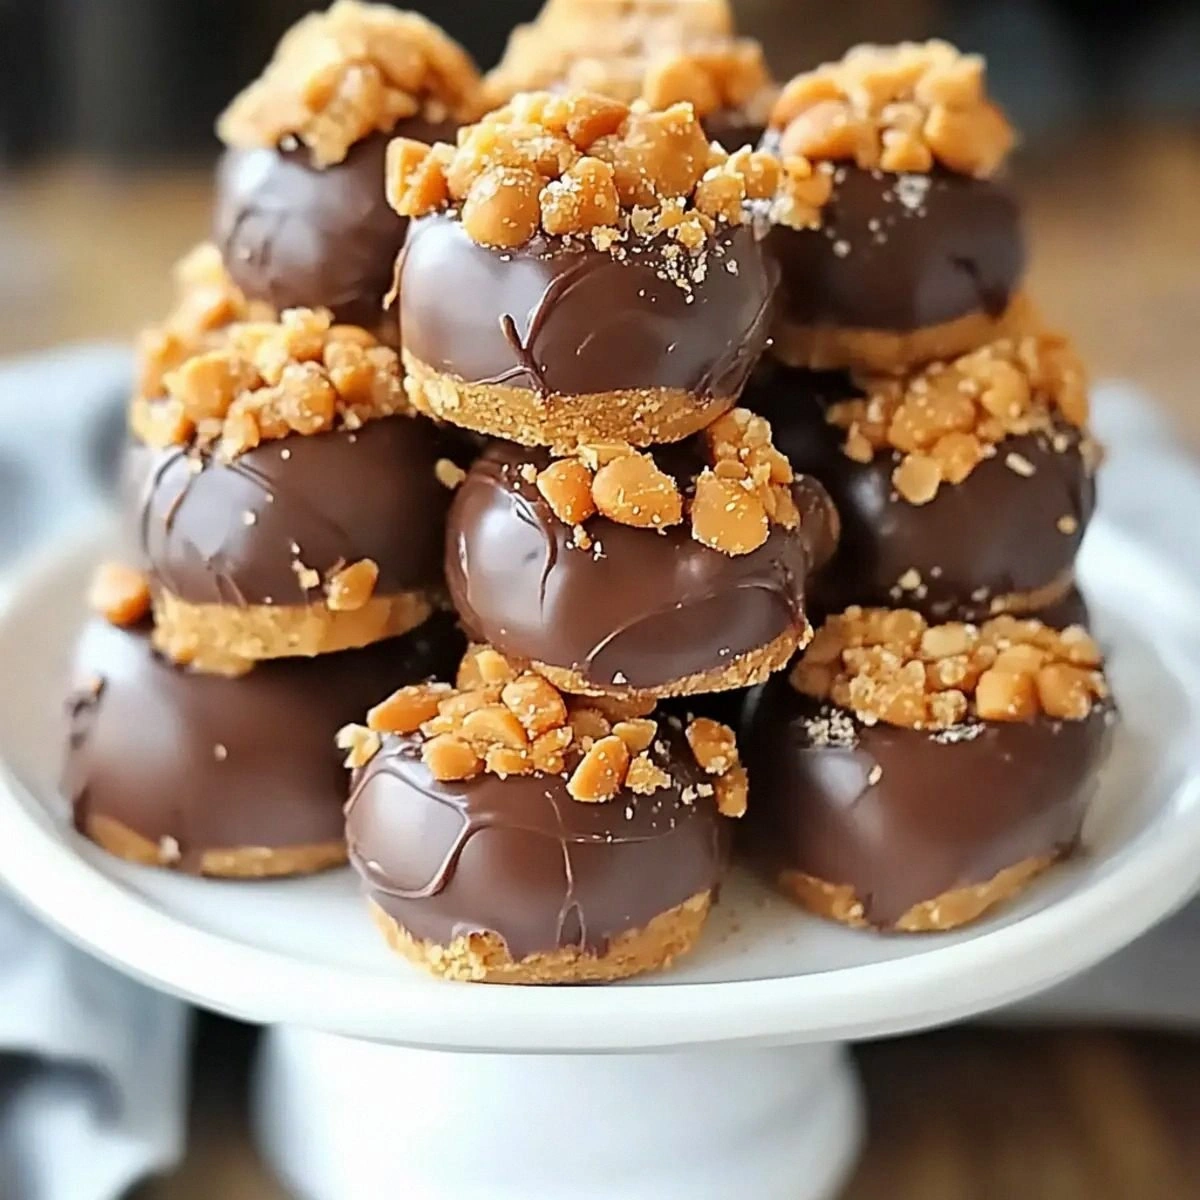
Picture this: a glossy, dark chocolate shell that cracks with a gentle snap, revealing a soft, peanut‑buttery center studded with shards of buttery, caramel‑laden Butterfinger that melt in your mouth like fireworks on the Fourth of July. The texture is a symphony of creamy, crunchy, and smooth, each bite delivering a wave of nostalgia that transports you back to school cafeteria snack lines, but upgraded to gourmet status. The scent alone—rich chocolate mingling with roasted peanuts and a faint hint of vanilla—fills the kitchen like a bakery on a Sunday morning, making anyone who walks by wonder what on earth you’re cooking.
Most no‑bake desserts either end up too sweet, too dry, or just plain bland. I’ve tried countless versions that either turned into a sticky mess or a hard, rock‑like candy that you could barely bite into without a dental appointment. This version, however, is the result of a meticulous balance of ingredients, a dash of science, and a whole lot of love. I dared you to taste this and not go back for seconds—trust me, you’ll be the one handing out the extra balls at the party, not the one asking for the recipe.
What sets this recipe apart is a secret technique: I lightly toast the butter and peanut butter together before mixing, which creates a deep, nutty flavor that you’ll swear was achieved with a fancy kitchen gadget. It’s a tiny step that makes a colossal difference, and I’m about to spill the beans on why it works. Let me walk you through every single step — by the end, you’ll wonder how you ever made it any other way.
What Makes This Version Stand Out
- Taste: The caramel‑toffee notes of Butterfinger marry perfectly with the salty‑sweet peanut butter, creating a flavor profile that’s both nostalgic and sophisticated.
- Texture: A creamy interior meets a crisp chocolate coating, delivering a satisfying snap followed by a melt‑in‑your‑mouth finish.
- Simplicity: No oven, no fancy equipment—just a bowl, a spatula, and a microwave, making it accessible for any skill level.
- Uniqueness: Toasted butter‑peanut base adds a depth that most recipes skip, turning a simple candy into a gourmet treat.
- Crowd Reaction: People often claim they’ve never tasted anything like it, and the “wow” factor is immediate.
- Ingredient Quality: Using real Butterfinger bars (not the generic imitation) guarantees that signature crunch and caramel flavor.
- Method: The no‑bake approach preserves the delicate texture of the candy while ensuring a glossy chocolate shell.
- Make‑Ahead Potential: These balls keep for weeks in the fridge, making them perfect for meal‑prep or party planning.
Inside the Ingredient List
The Flavor Base
The heart of these Butterfinger Balls starts with creamy peanut butter. This isn’t just any peanut butter; it’s the kind that spreads like silk and carries a natural roasted aroma that elevates the entire dessert. If you swap it for a chunky variety, you’ll get unwanted texture spikes that ruin the smoothness. For a nut‑free version, try a smooth almond butter, but expect a slightly different flavor profile that leans more toward sweet almond.
The Texture Crew
Unsalted butter, softened, is the silent hero that binds everything together. The butter’s fat content creates a glossy sheen and a melt‑in‑your‑mouth feel once the balls are chilled. Skipping the butter or using a low‑fat spread will lead to crumbly, dry balls that fall apart when you try to roll them. I always recommend using European‑style butter for its higher butterfat, which adds richness without excess water.
Powdered sugar brings the necessary sweetness while keeping the mixture light. Because it’s finely milled, it dissolves instantly, preventing any gritty texture. If you’re watching sugar intake, you can substitute half with a sugar‑free powdered blend, but the final texture will be a tad less airy.
The Unexpected Star
Butterfinger candy bars, finely crushed, are the secret weapon that gives these balls their signature crunch and caramel‑toffee punch. The bar’s layers of crunchy peanut butter coating and buttery toffee create an irresistible contrast to the smooth interior. If you can’t find Butterfinger, substitute with a combination of crunchy peanut butter clusters and toffee bits, but the authentic flavor will be slightly off.
The Final Flourish
Semisweet or milk chocolate, chopped for dipping, forms the decadent outer shell. The choice between semisweet and milk chocolate dictates the overall sweetness level; I prefer semisweet for a balanced bite, but milk chocolate adds a richer, creamier coating that kids adore. Make sure the chocolate is high‑quality with at least 60% cocoa for a glossy finish that doesn’t bloom.
A pinch of salt might seem trivial, but it amplifies the sweet and savory dance, preventing the dessert from becoming cloyingly sweet. If you love a salt‑crystal crunch, sprinkle a tiny pinch of flaky sea salt on the dipped balls just before the chocolate sets.
Everything's prepped? Good. Let's get into the real action...
The Method — Step by Step
-
Gather all your ingredients and equipment: a large mixing bowl, a rubber spatula, a microwave‑safe bowl, a baking sheet lined with parchment, and a sturdy spoon for scooping. This is the moment of truth—everything must be within arm’s reach, or you’ll be chasing ingredients like a frantic chef on a cooking show.
Kitchen Hack: Set out a small bowl of water near your work area; if the mixture gets too sticky, a quick splash keeps it manageable. -
In a microwave‑safe bowl, combine the ½ cup of unsalted butter and the 1 cup of creamy peanut butter. Microwave on medium power for 30‑45 seconds, stirring halfway through until the mixture is fully melted and glossy. The aroma that rises is a nutty, buttery perfume that tells you you’re on the right track.
Once melted, let the mixture sit for a minute to cool slightly—this prevents the powdered sugar from turning into a clumpy mess.
-
Add the 1¾ cups of powdered sugar to the butter‑peanut mixture, whisking vigorously with the spatula. The mixture will thicken dramatically, turning from a smooth sauce into a pliable dough that clings to the spoon. Keep whisking until no sugar granules are visible; you’re looking for a silky texture that holds its shape when lifted.
Watch Out: Over‑mixing can cause the dough to become too stiff, making it difficult to roll. Stop as soon as the sugar is fully incorporated. -
Stir in the 1 teaspoon of vanilla extract and a pinch of salt. The vanilla adds a fragrant backdrop, while the salt cuts through the sweetness, balancing the flavor like a conductor directing an orchestra.
Now fold in the 1½ cups of finely crushed Butterfinger bars. Use a gentle folding motion to keep the crunchy pieces intact; you want those shards to stay whole for that satisfying crunch.
-
Cover the bowl with plastic wrap and refrigerate the mixture for 20‑30 minutes. This chilling step firms up the dough, making it easier to scoop and roll. While you wait, you can pre‑heat your microwave for the chocolate dip—this is the perfect time to clean up any stray crumbs.
-
While the mixture chills, melt the 1 cup of chopped semisweet or milk chocolate in a microwave‑safe bowl. Heat in 20‑second bursts, stirring between each burst, until the chocolate is smooth and glossy. The chocolate should be just melted, not bubbling—over‑heating will cause it to seize.
Kitchen Hack: Add a teaspoon of vegetable oil to the chocolate for an even shinier finish that sets faster. -
Remove the chilled dough from the fridge. Using a tablespoon or a small ice‑cream scoop, portion out the mixture and roll each portion between your palms to form smooth, uniform balls about the size of a walnut. This part is therapeutic—feel the dough yielding under your fingertips, and imagine each ball as a tiny, edible promise.
Place the rolled balls onto the prepared parchment sheet, leaving a little space between them. If the dough sticks, dip your fingers in a tiny bit of melted butter; the balls will glide like marbles.
-
One by one, dip each ball into the melted chocolate, allowing excess chocolate to drip back into the bowl. Use a fork or a chocolate dipper for a clean lift. Transfer the coated balls back onto the parchment, letting the chocolate set for about 5‑10 minutes. The chocolate should harden to a firm snap—if it’s still soft, give it a few more minutes in the fridge.
Optional: Sprinkle a pinch of flaky sea salt on each ball while the chocolate is still wet for an extra flavor pop.
-
Once the chocolate has set, transfer the Butterfinger Balls to an airtight container. Store them in the refrigerator for up to a week, or freeze for longer storage. When you’re ready to serve, let them sit at room temperature for 10 minutes to soften just enough for that perfect bite.
That’s it — you did it. But hold on, I've got a few more tricks that'll take this to another level...
Insider Tricks for Flawless Results
The Temperature Rule Nobody Follows
Never underestimate the power of temperature control. Keep your butter‑peanut mixture just warm enough to stay fluid, but not hot—aim for around 115°F (46°C). This ensures the powdered sugar dissolves completely without forming a grainy texture. I once tried to speed things up by microwaving the mixture longer, and the result was a gritty, un‑pleasant mouthfeel that ruined the entire batch. A quick kitchen thermometer can save you from this disaster.
Why Your Nose Knows Best
Your sense of smell is a reliable indicator of doneness. When the butter and peanut butter melt together, you’ll notice a nutty, roasted scent that signals the perfect moment to stop heating. If you hear a faint crackling sound, that means the butter is beginning to brown—this adds a subtle caramel note that elevates the flavor. Trust your nose more than the timer; it’s the secret weapon of seasoned chefs.
The 5‑Minute Rest That Changes Everything
After mixing all the dry ingredients, let the dough rest uncovered for exactly five minutes before chilling. This brief pause allows the powdered sugar to fully hydrate, resulting in a smoother, more pliable dough that’s easier to roll. Skipping this step often leads to a crumbly texture that falls apart during shaping. I’ve seen beginners miss this, and the difference is night and day.
Chocolate Tempering Shortcut
If you want a glossy, snap‑ready coating without a tempering machine, simply add a teaspoon of neutral oil (like grapeseed) to the melted chocolate. This lowers the viscosity, giving the chocolate a smooth sheen and a quicker set. The result looks like it came from a professional patisserie, and the flavor remains pure.
The One‑Handed Roll
When forming the balls, try using just one hand to roll while the other steadies the bowl. This technique gives you better control over size and prevents the dough from flattening. It’s a subtle change, but it ensures uniformity, which looks impressive when you serve a platter of perfectly sized spheres.
Creative Twists and Variations
This recipe is a playground. Here are some of my favorite ways to switch things up:
Double‑Chocolate Delight
Swap the semisweet chocolate for dark chocolate (70% cacao) and add a tablespoon of cocoa powder to the dough. The result is a richer, more intense chocolate experience that pairs beautifully with the salty peanut butter.
Nut‑Free Coconut Crunch
Replace the peanut butter with smooth coconut butter and use toasted coconut flakes instead of Butterfinger. This creates a tropical twist that’s perfect for coconut lovers, and it’s completely nut‑free.
Spicy Mexican Mocha
Add a pinch of cayenne pepper and a teaspoon of espresso powder to the dough. The subtle heat and coffee notes add depth, turning the dessert into a sophisticated after‑dinner treat.
White Chocolate Raspberry
Use white chocolate for the coating and fold in freeze‑dried raspberry pieces into the dough. The tartness of raspberry cuts through the sweetness, creating a bright, fruity contrast.
Salted Caramel Swirl
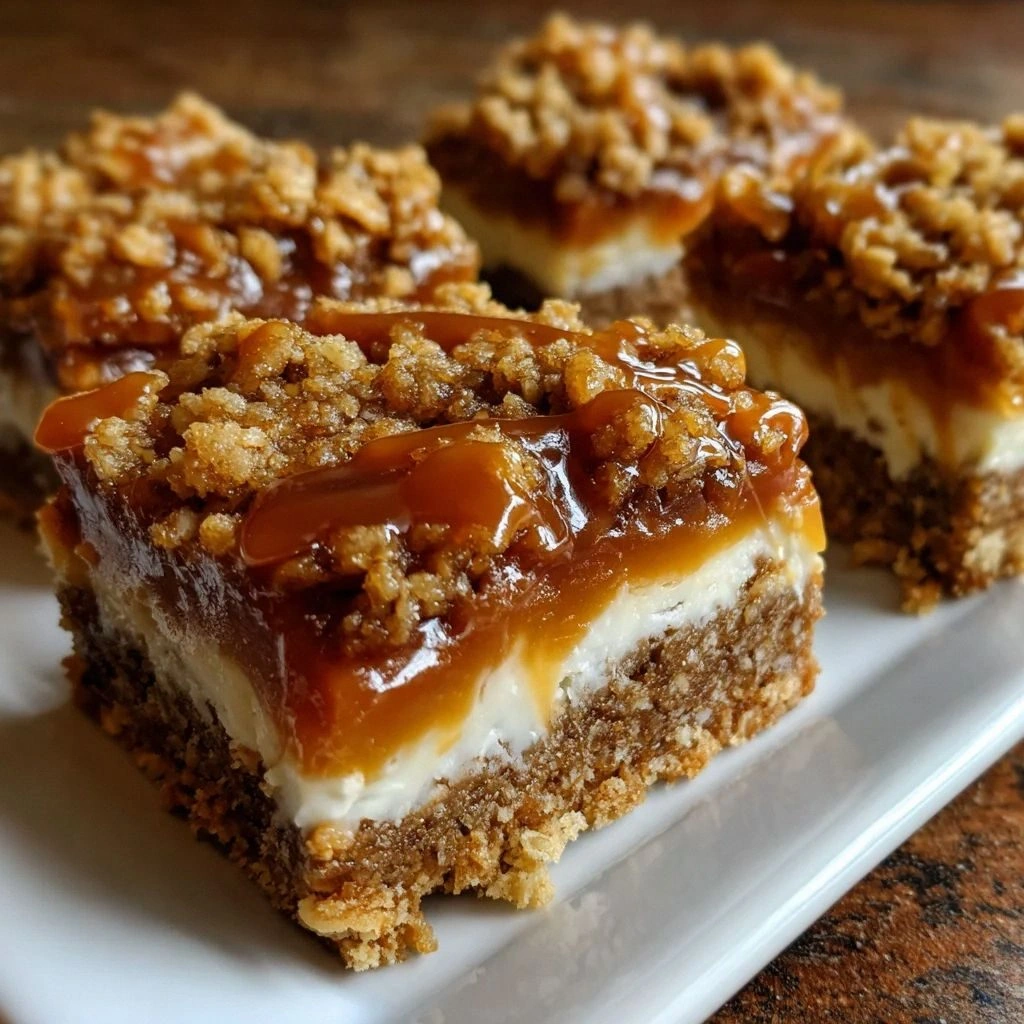
Drizzle a homemade salted caramel sauce over the chocolate‑coated balls just before the chocolate sets. The caramel adds a gooey ribbon that makes each bite extra indulgent.
Storing and Bringing It Back to Life
Fridge Storage
Place the balls in an airtight container lined with parchment paper. They’ll stay fresh for up to 7 days. The chocolate coating stays firm, while the interior remains soft and chewy.
Freezer Friendly
For longer storage, arrange the balls on a baking sheet and freeze them individually for 2 hours. Then transfer to a zip‑top freezer bag. They’ll keep for up to 3 months. When you’re ready to serve, let them thaw in the fridge for 30 minutes, then bring to room temperature for 10 minutes.
Best Reheating Method
If the chocolate coating feels too hard after refrigeration, place the balls on a microwave‑safe plate, add a tiny splash (about 1 tsp) of water to the plate, and microwave for 5‑10 seconds. The steam revives the chocolate’s sheen and softens the interior without melting the coating.