Picture this: it’s a rainy Saturday, the kind of day that makes you want to stay in your pajamas, curl up with a cup of tea, and binge‑watch your favorite sitcom. I’m sitting on the couch, scrolling through a thousand recipes, when the phone buzzes with a frantic text from my sister: “I’m about to host a dinner party and I have no idea what to make!” Her voice trembles with the fear of a culinary disaster. I answered with the only thing that ever saves the day: a baked apple crisp that turns any gathering into a sweet, comforting celebration. The moment I read the headline, I knew I had to share the exact version that made me win the “Best Dessert” award at my last family reunion.
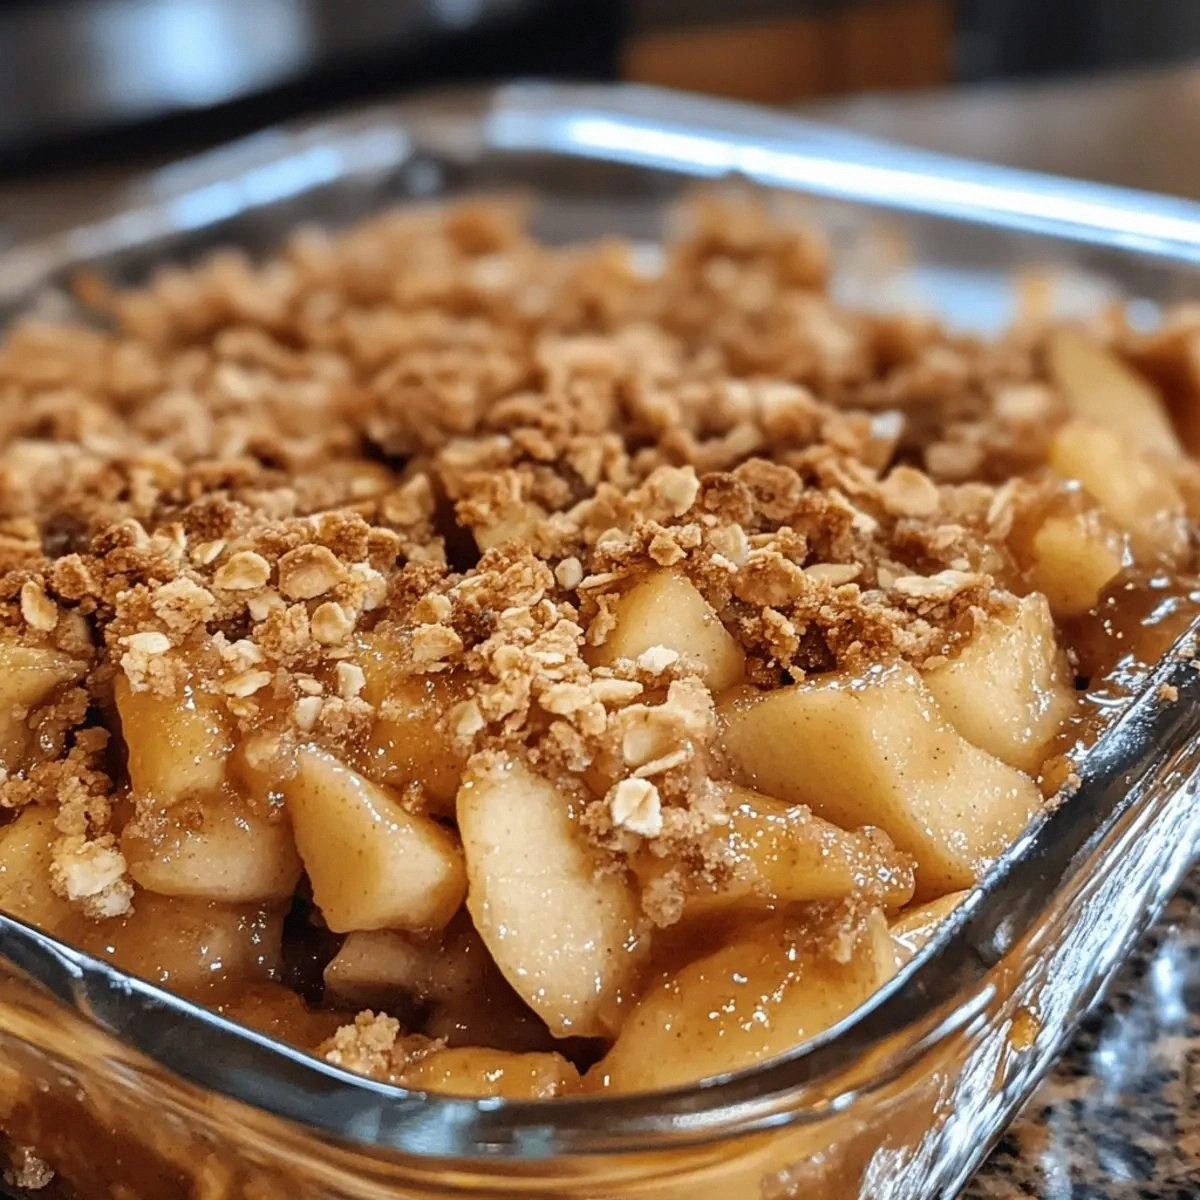
The first thing that struck me about this recipe was the aroma. Imagine a basket of Granny Smith apples, sliced thin, glistening with lemon juice, and coated in a sprinkle of brown sugar that caramelizes to a golden, caramel‑like sheen as it bakes. The cinnamon drips into the mixture like a fragrant river, and the buttery crumble rises, turning into a golden crown that cracks like thin ice when you bite into it. The sound of that crack is a subtle reminder that the crisp has achieved the perfect balance of crunchy and gooey, a harmony that makes every bite a moment of pure joy. That scent alone can turn a mundane afternoon into an invitation to taste something extraordinary.
I’ve tried dozens of apple crisp recipes, from the overly sweet to the under‑seasoned, and every single one left me craving more. The secret to this version lies in a meticulous layering of flavors that starts with a simple apple filling and ends with a buttery, oat‑laden topping that melts in your mouth. The apples are the heart of the dish, but they’re not just any apples; the tartness of the Granny Smiths provides a sharp contrast to the sweet topping, creating a dynamic dance of flavors that keeps you coming back for seconds. This isn’t just a dessert; it’s an experience that brings the whole family together over the comforting scent of warm apples and cinnamon.
What makes this recipe stand out is its simplicity, yet it never compromises on texture or taste. I’ve discovered that the key to a perfect crisp is the balance between the filling and the topping—too much sugar in the topping can drown out the apples, while too little can leave the crisp dry. The technique of using cornstarch as a thickener is a game‑changer; it ensures that the apple filling stays juicy without becoming a soggy mess. The result is a crisp that is light, airy, and yet dense enough to hold its shape, delivering a satisfying bite that feels like a hug in every mouthful.
I dare you to taste this and not go back for seconds. The first bite is a burst of sweet, tart, and buttery flavors that dance across your palate, and then the second bite feels like a warm, comforting hug. The crisp edges, crisped to a golden brown, shatter like thin ice when you bite, releasing a burst of cinnamon and butter that lingers on your tongue. The filling is moist and fragrant, with a hint of lemon that cuts through the richness of the topping. The result is a dessert that feels indulgent without being heavy, a perfect balance that satisfies every craving.
I’ll be honest—once I tasted the first batch, I ate half the dish before anyone else even had a chance. The flavor was so compelling that my friends started asking for the recipe before I even finished the last bite. It’s not just about the taste; it’s about the experience of bringing people together around a dish that feels both nostalgic and new. The crisp’s texture—crispy on top, tender on the inside—creates a sensory experience that is hard to replicate. That is why I claim, without hesitation, that this is hands down the best version you’ll ever make at home.
Most recipes get this completely wrong by over‑baking the topping or under‑seasoning the apples. The result is either a dry, burnt crust or a soggy, bland filling. I’ve learned that the secret is in the timing: the apples need enough time to soften and release their juices, while the topping needs just enough time to brown without burning. The key is to keep an eye on the color, not the clock, and to trust your senses. This is what sets this recipe apart from the rest, and it’s what I’ll share with you in every step of the process.
Picture yourself pulling this out of the oven, the whole kitchen smelling incredible, as steam rises and the aroma of cinnamon and apples fills the air. You can almost hear the gentle sizzle as the crisp starts to brown, a sound that signals everything is going right. The anticipation builds, and the moment you cut into the center, the filling oozes out, golden and fragrant. That moment of triumph is worth every second of prep and every ounce of love you pour into the dish. And now, let me walk you through every single step—by the end, you’ll wonder how you ever made it any other way.
What Makes This Version Stand Out
- Flavor: The combination of tart Granny Smith apples, bright lemon, and sweet brown sugar creates a complex, layered taste that feels both nostalgic and fresh.
- Texture: The buttery crumble is light and airy, yet firm enough to hold its shape, while the filling remains moist and juicy.
- Ease: Every ingredient is pantry‑friendly, and the method requires no special equipment or techniques.
- Versatility: This crisp can be served warm with ice cream or cold as a dessert bar, making it perfect for any occasion.
- Make‑ahead: The assembled dish can be refrigerated for up to 48 hours, allowing you to focus on the main event.
- Crowd‑pleaser: The combination of sweet, tart, and buttery flavors appeals to both kids and adults, making it a hit at family gatherings.
- Ingredient Quality: Using high‑quality butter and fresh apples ensures the best flavor profile and texture.
- Heat Control: The precise baking temperature keeps the topping crisp while keeping the filling tender.
Alright, let's break down exactly what goes into this masterpiece. And before we dive in, here’s a quick kitchen hack that will save you time and keep your hands butter‑free.
Inside the Ingredient List
The Flavor Base
The heart of the crisp is the apple filling, where the tartness of the Granny Smiths meets the sweetness of brown sugar. The lemon juice is a subtle but essential component—it brightens the flavor and prevents the apples from oxidizing. The cornstarch is the secret to a thick, syrupy filling that clings to the apple slices without becoming runny. If you skip the lemon, the apples will lose their bright, zesty punch, and the filling will taste flat. If you omit the cornstarch, you’ll end up with a watery, unappetizing mess that will ruin the crisp’s texture.
The Texture Crew
The crumble topping is where the buttery, flaky texture comes to life. The rolled oats provide a hearty, chewy bite that contrasts nicely with the tender apple filling. The all‑purpose flour acts as a binder, helping the topping hold together and achieve that golden, crisp finish. The cold unsalted butter is essential for a flaky texture; if you use room‑temperature butter, the topping will become greasy and lose its crispness. The pecans or walnuts add a nutty crunch that elevates the dish from simple to unforgettable.
The Unexpected Star
The second cup of brown sugar is the sweetener that balances the tartness of the apples. The second teaspoon of cinnamon is the aromatic backbone that ties the dish together. If you skip either, the flavor profile will feel incomplete. Swapping brown sugar for honey or maple syrup will give a different sweetness and a subtle caramel note, but the crisp will lose its classic texture.
The Final Flourish
The cold butter, pecans, and oats create the final flourish of the crisp. The butter melts into the oats, creating a golden, crisp crust that cracks when you bite. The nuts add a nutty flavor that complements the apples and the sweet filling. If you prefer a nutless version, you can omit the nuts, but the crisp will feel less complex and slightly lighter.
Everything's prepped? Good. Let's get into the real action and start creating the layers that will make this dish unforgettable.
The Method — Step by Step
- Preheat your oven to 350°F (175°C). Line a 9-inch square baking dish with parchment paper or a silicone mat. This step ensures a non‑stick surface and easy cleanup.
- Peel, core, and thinly slice 6 cups of Granny Smith apples. The thin slices cook evenly and release their juices, creating a luscious filling.
- In a large bowl, combine the sliced apples with 1 cup of brown sugar, 1 teaspoon of ground cinnamon, 2 tablespoons of fresh lemon juice, and 2 tablespoons of cornstarch. Mix until the apples are evenly coated. The cornstarch will thicken the filling as it bakes.
- Spread the apple mixture evenly in the prepared baking dish. This creates a uniform base for the topping.
- In a separate bowl, whisk together 1 cup of rolled oats, 1 cup of all‑purpose flour, 1/2 cup of light brown sugar, and 1 teaspoon of ground cinnamon. These dry ingredients form the crumbly topping.
- Cut 1/2 cup of cold unsalted butter into small cubes and add to the dry mixture. Use a pastry cutter or your fingers to blend until the mixture resembles coarse crumbs. This technique creates a flaky, buttery texture.
- Fold in 1/2 cup of chopped pecans or walnuts. The nuts add crunch and depth to the crisp.
- Sprinkle the crumb mixture evenly over the apple layer. Gently press it down to ensure good contact between the topping and the apples.
- Bake for 30 minutes, or until the topping is golden brown and the apple filling is bubbling. The edges should pull away slightly from the sides of the dish.
- Remove from the oven and let it cool for 10 minutes before serving. This resting period allows the filling to set and the flavors to meld.
That's it — you did it. But hold on, I've got a few more tricks that'll take this to another level. First, here’s a kitchen hack for the perfect crumb.
And here’s a watch‑out for the trickiest step: the final bake. If you leave the crisp in the oven too long, the topping will burn and the filling will dry out. Keep an eye on the color and pull it out when the edges are just golden.
And now the fun part. If you’re feeling adventurous, try adding a splash of vanilla extract to the apple mixture for an extra layer of warmth. This small addition can elevate the dish from good to unforgettable.
Okay, ready for the game‑changer? Keep your oven temperature steady, and let the crisp bake at a gentle 350°F. The slow, even heat allows the apples to soften without losing their shape, and the topping to brown to perfection. This is the moment of truth, and it’s worth every minute of anticipation.
Insider Tricks for Flawless Results
The Temperature Rule Nobody Follows
Many people set their ovens too high, thinking a hotter oven will give a crisper top. In reality, a steady 350°F ensures even cooking and prevents the topping from burning while the apples remain tender. I once tried 400°F and the crisp came out with a burnt top and a soggy filling. Stick with 350°F for the best results.
Why Your Nose Knows Best
Your nose is a reliable indicator of doneness. As the crisp bakes, you’ll notice a sweet, caramelized scent that signals the topping is golden. When that aroma hits your nose, it’s time to pull it out of the oven. Trust your senses; they’re often more accurate than a timer.
The 5‑Minute Rest That Changes Everything
Letting the crisp rest for 5 minutes after baking allows the filling to set and the flavors to meld. During this time, the butter in the topping will slightly melt, creating a silky, buttery finish that enhances the overall texture. Skipping this rest can leave the crisp feeling underdeveloped.
Stirring the Filling Early
Stirring the apple mixture once during the first 10 minutes of baking helps distribute the sugar and cinnamon evenly. This ensures every bite has a consistent flavor profile. Skipping this step can lead to pockets of sweetness or tartness.
Choosing the Right Apples
While Granny Smiths are the classic choice, you can experiment with Honeycrisp or Braeburn for a different flavor profile. These varieties hold their shape better and provide a slightly sweeter base. However, they may need a slightly shorter baking time to avoid over‑softening.
Serving Temperature Matters
Serve the crisp warm for the best experience. The warm filling oozes out, and the topping remains crisp. If you serve it cold, the crisp loses its texture and feels flat. Warm it in the oven for a few minutes before serving if it’s been chilled.
Creative Twists and Variations
This recipe is a playground. Here are some of my favorite ways to switch things up:
Apple Pie Crumble
Swap the rolled oats for a crumbly pie crust mix and top with a sprinkle of cinnamon. Bake for an extra 5 minutes for a deeper crunch. This variation gives the crisp a flaky, pie‑like texture.
Chocolate Chip Apple Crisp
Add 1 cup of semi‑sweet chocolate chips to the topping before baking. The chocolate melts into pockets of gooey sweetness, creating a dessert that feels indulgent and comforting.
Spiced Apple Crisp
Replace the ground cinnamon with a blend of nutmeg, allspice, and cloves for a warm, aromatic twist. This version is perfect for holiday gatherings.
Nut-Free Version
Omit the pecans or walnuts and add a handful of dried cranberries or raisins to the topping. The dried fruit adds a chewy texture and a burst of sweetness.
Vegan Adaptation
Use a plant‑based butter substitute and oat milk to replace the dairy butter. The result is a vegan crisp that still delivers on flavor and texture.
Apple & Pear Crisp
Combine equal parts sliced apples and pears for a subtle, fruity variation. The pears add a mild sweetness that balances the tartness of the apples.
Storing and Bringing It Back to Life
Fridge Storage
Store the crisp in an airtight container for up to 3 days in the refrigerator. The crisp will stay fresh, and the filling will remain moist. Let it sit at room temperature for 30 minutes before serving to bring back the warm, comforting texture.
Freezer Friendly
Wrap the crisp tightly in plastic wrap and then place it in a freezer bag. Freeze for up to 2 months. When ready to eat, thaw overnight in the refrigerator, then warm in a 350°F oven for 10 minutes.
Best Reheating Method
To reheat, add a splash of water to the bottom of the pan to create steam, then cover with foil. Bake at 350°F for 10–12 minutes until heated through. The steam keeps the filling from drying out and restores the crisp’s original texture.